

Mobile grooming businesses require flexible and precise management of their operations in service areas. MoeGo's Service Area setting is specifically for the mobile grooming industry, which allows you to seamlessly establish distinct service areas and utilize them for various operational aspects such as setting Certain areas for Certain days, Online Booking, and client management.
Adding a Service Area
Before leveraging your service area for shift management or online booking, you need to add it to your service area list.
From Desktop 🖥️
Navigate to Settings > Business > Service Area.
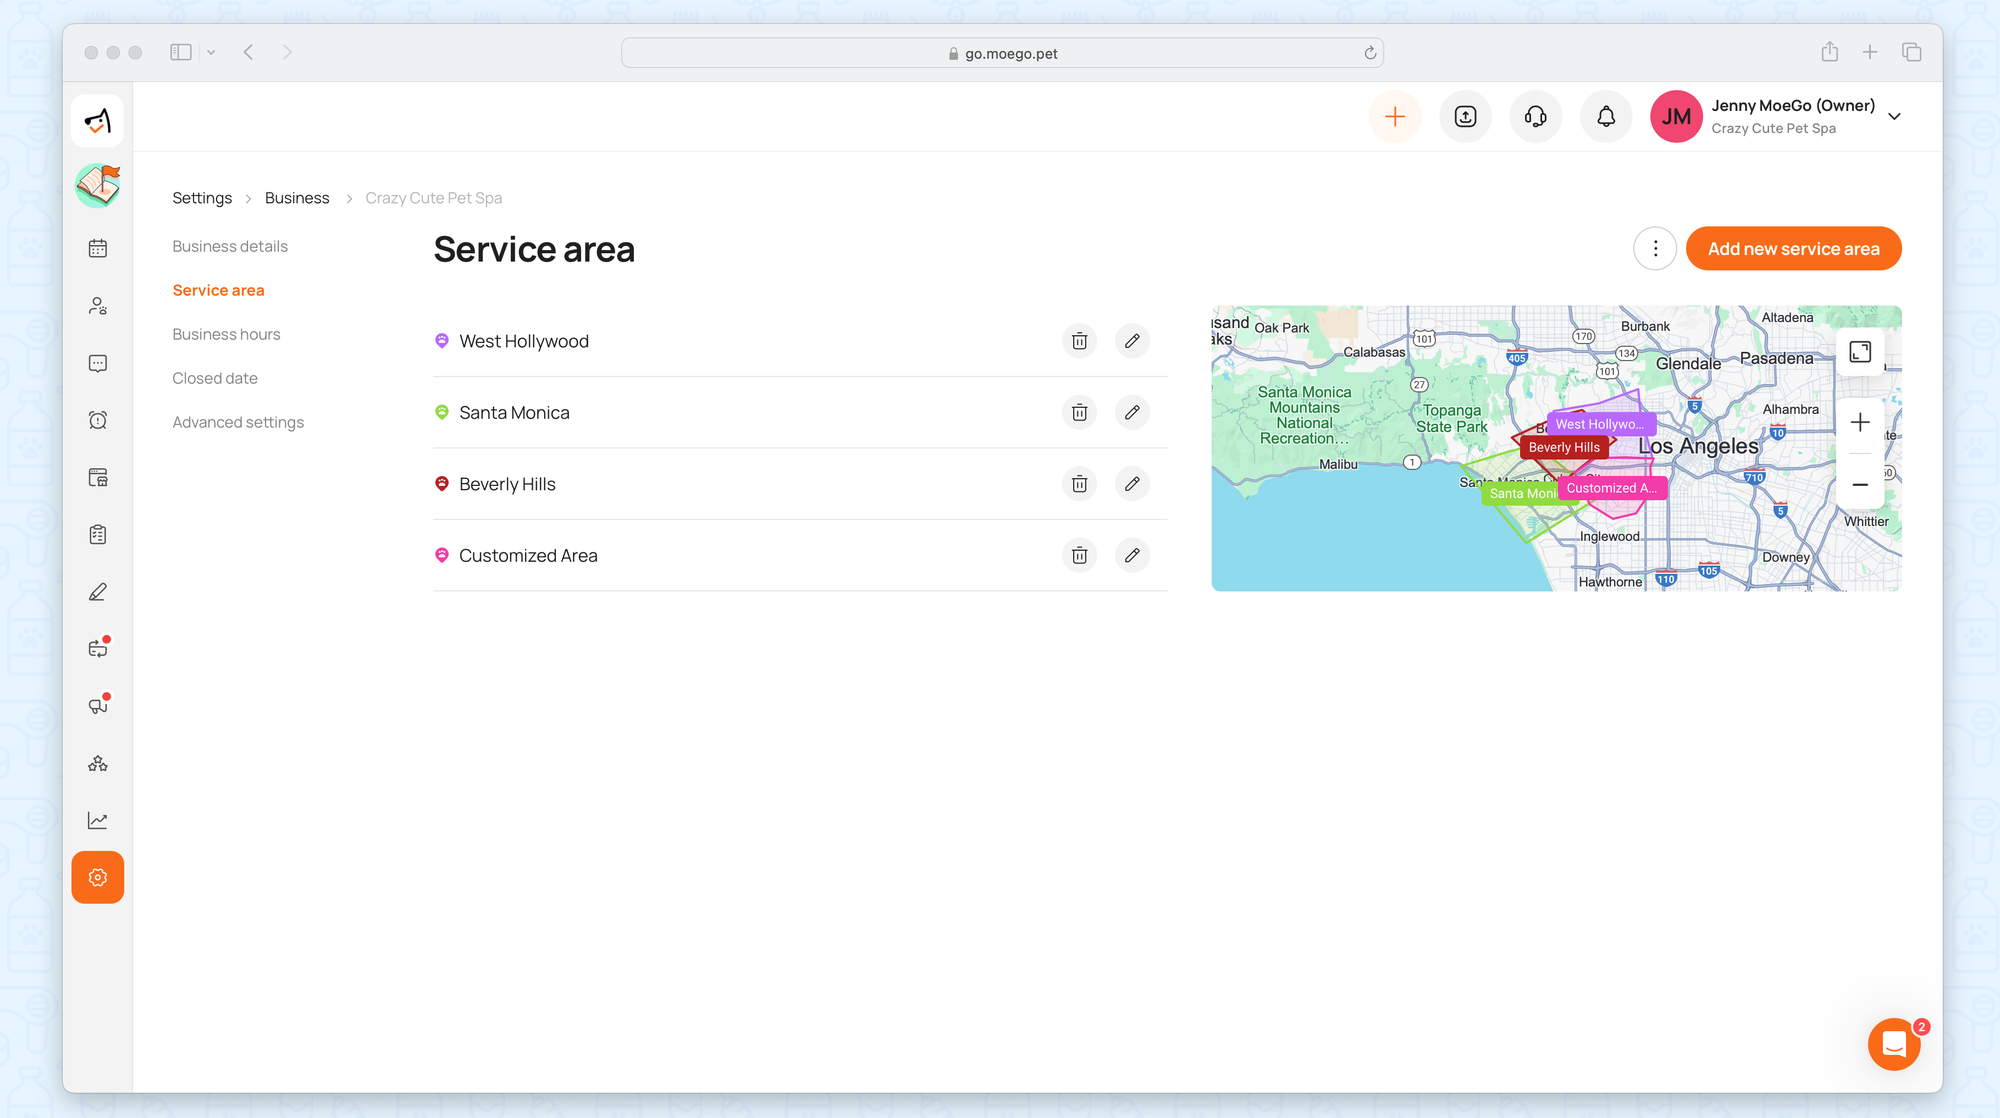
Select < Add new service area > to include a new area in your business.
💡Tip for Desktop: Use < Show existing area > to view all your added service areas and < Show client > to see your clients' locations on the map.
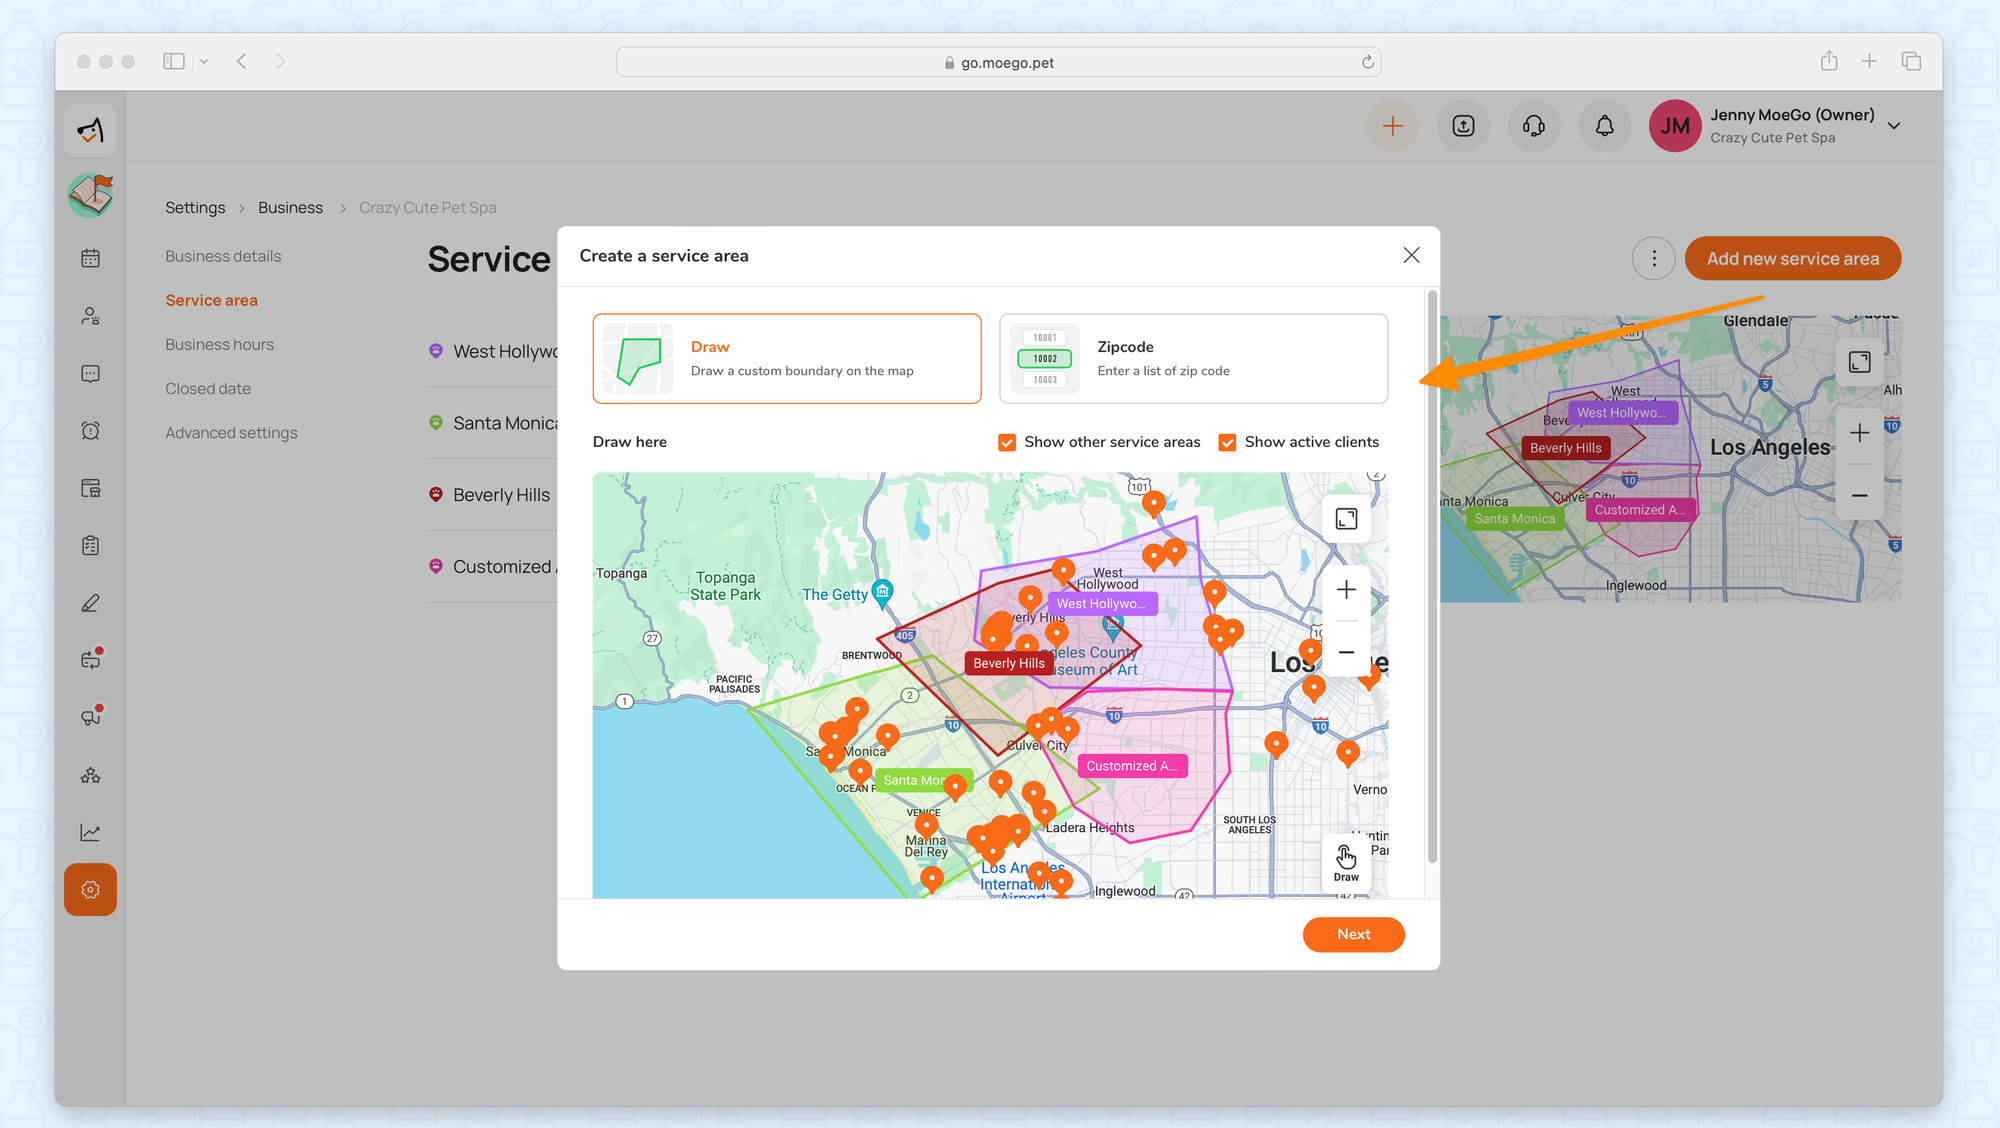
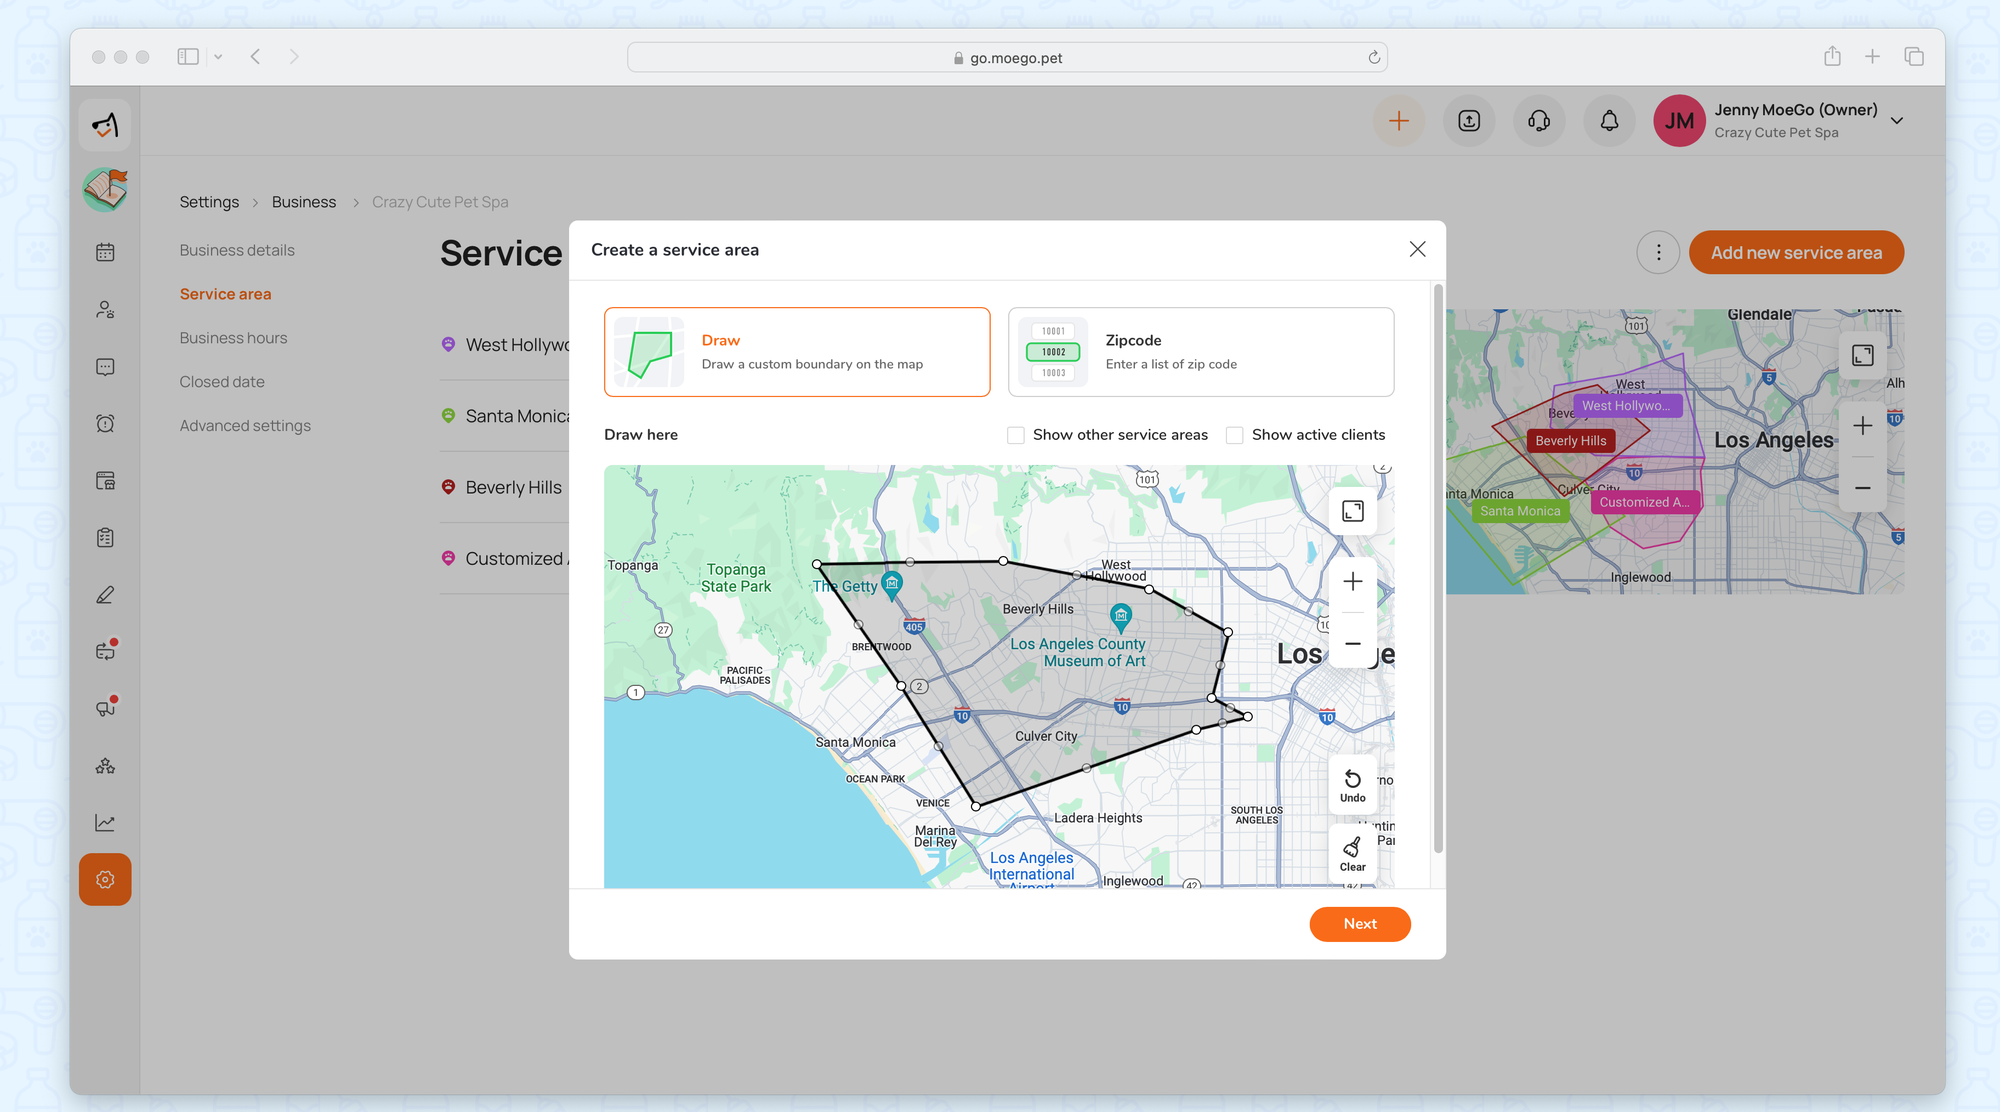
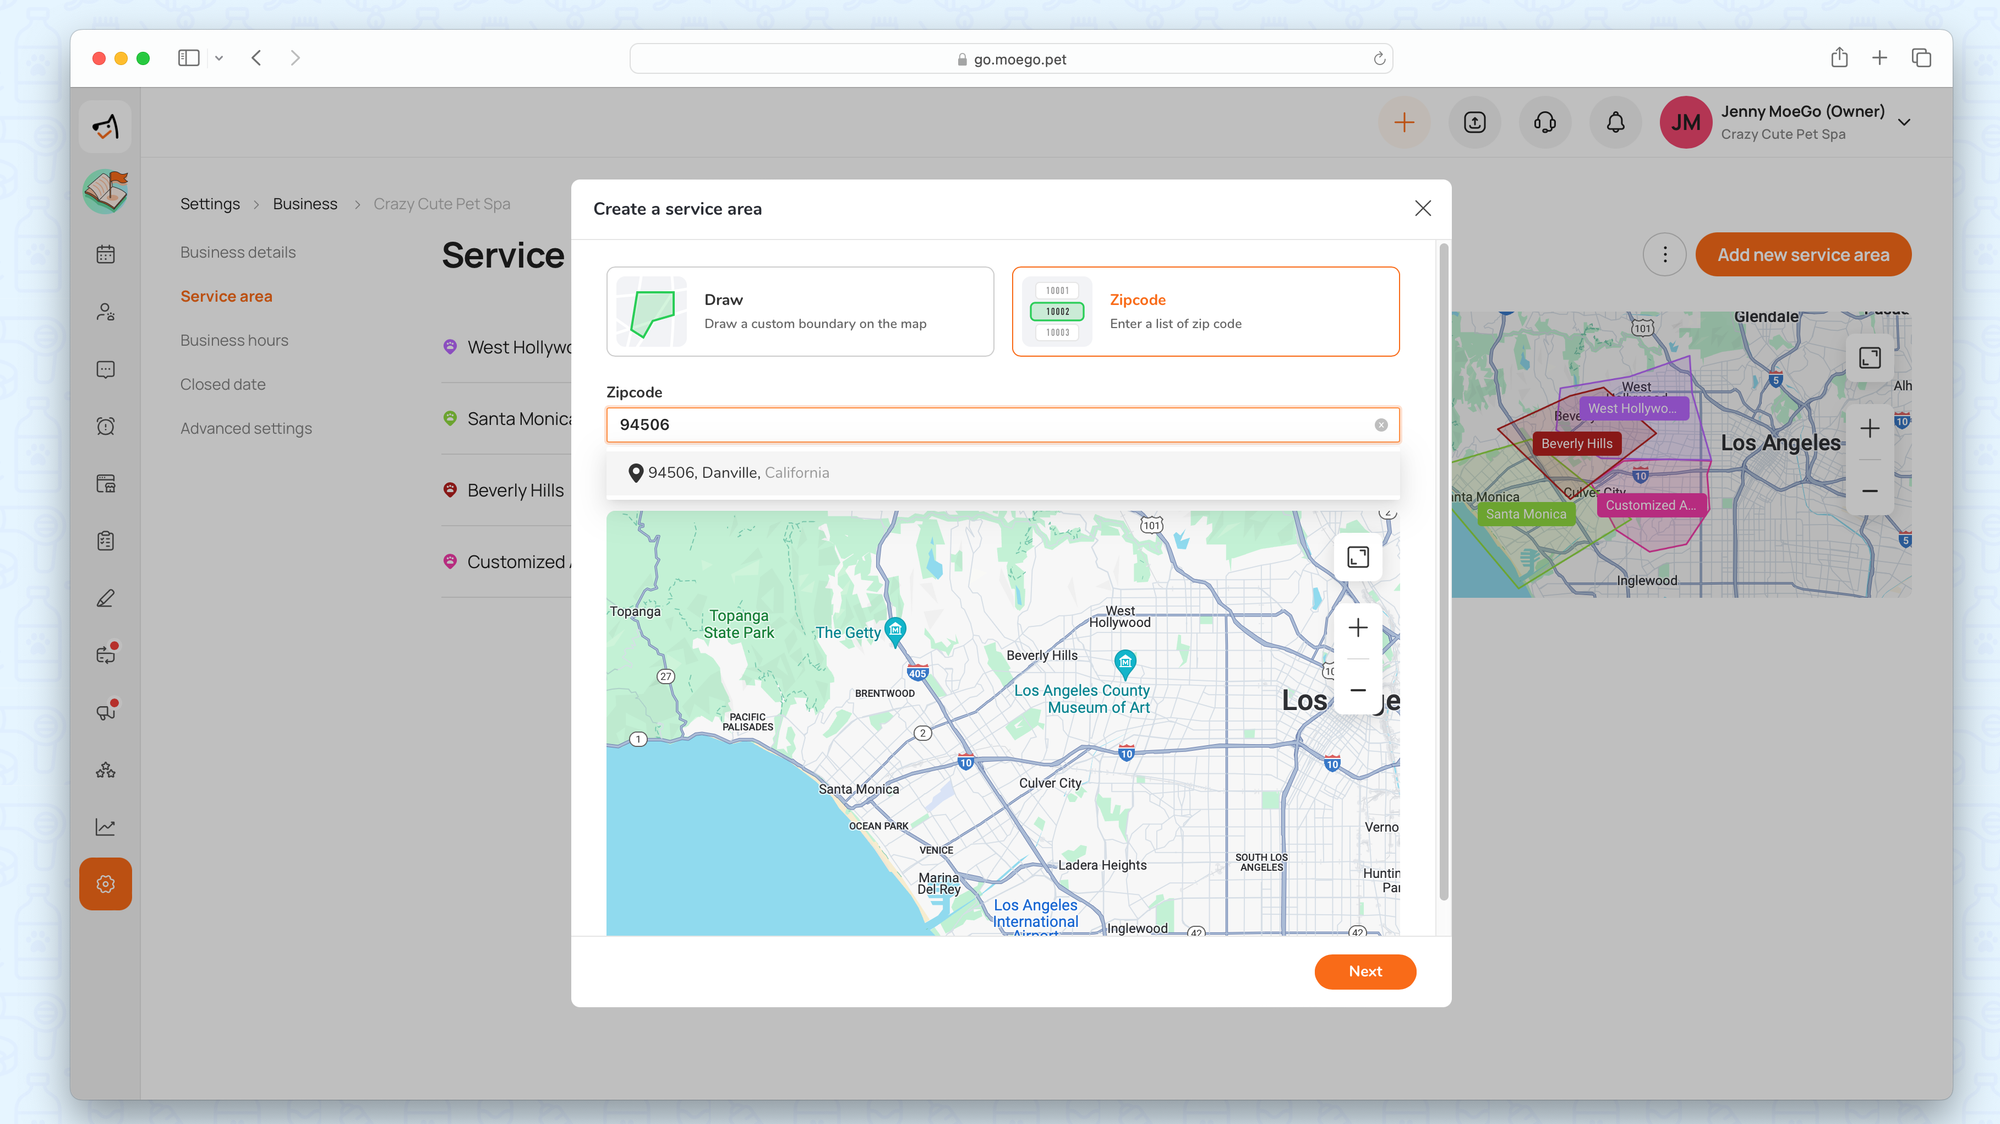
You can define the service area by either:
- Drawing on the Map: Click < Draw >, then create a custom boundary by clicking on the edge points of the desired area.
- By Zipcodes: Enter the zip codes of the locations to be included in your service area.
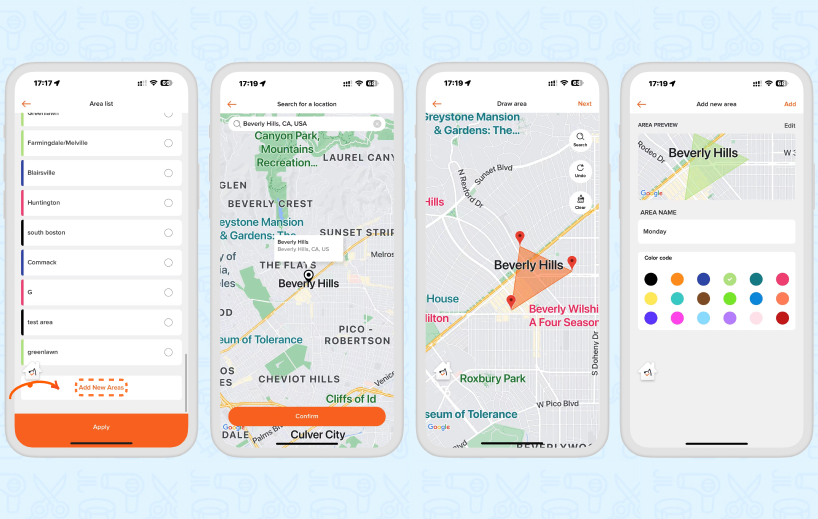
From App 📱
Here's how to add a new service area for your business using the app:
- Go to settings > mobile grooming settings > Set certain area for certain days
- Go to < Area list >, and scroll down to select < Add new areas >.
- Search for the location using the search button and click < Confirm >.
- Draw the area from the location by clicking on the map and adding pinpoints to the area edges.
- Click < Next > and you can add a name or choose a color code for the new service area.
- Click < Add > to add the service area to the area list.
Certain Areas for Certain Days (CACD)
CACD (Certain Area for Certain Days) setting can help you to control available regions for different dates so you can adopt Smart Scheduling without considering the service area change. You can also set up CACD for Online Booking so that customers from a certain area can only request certain dates from Online Bookings.
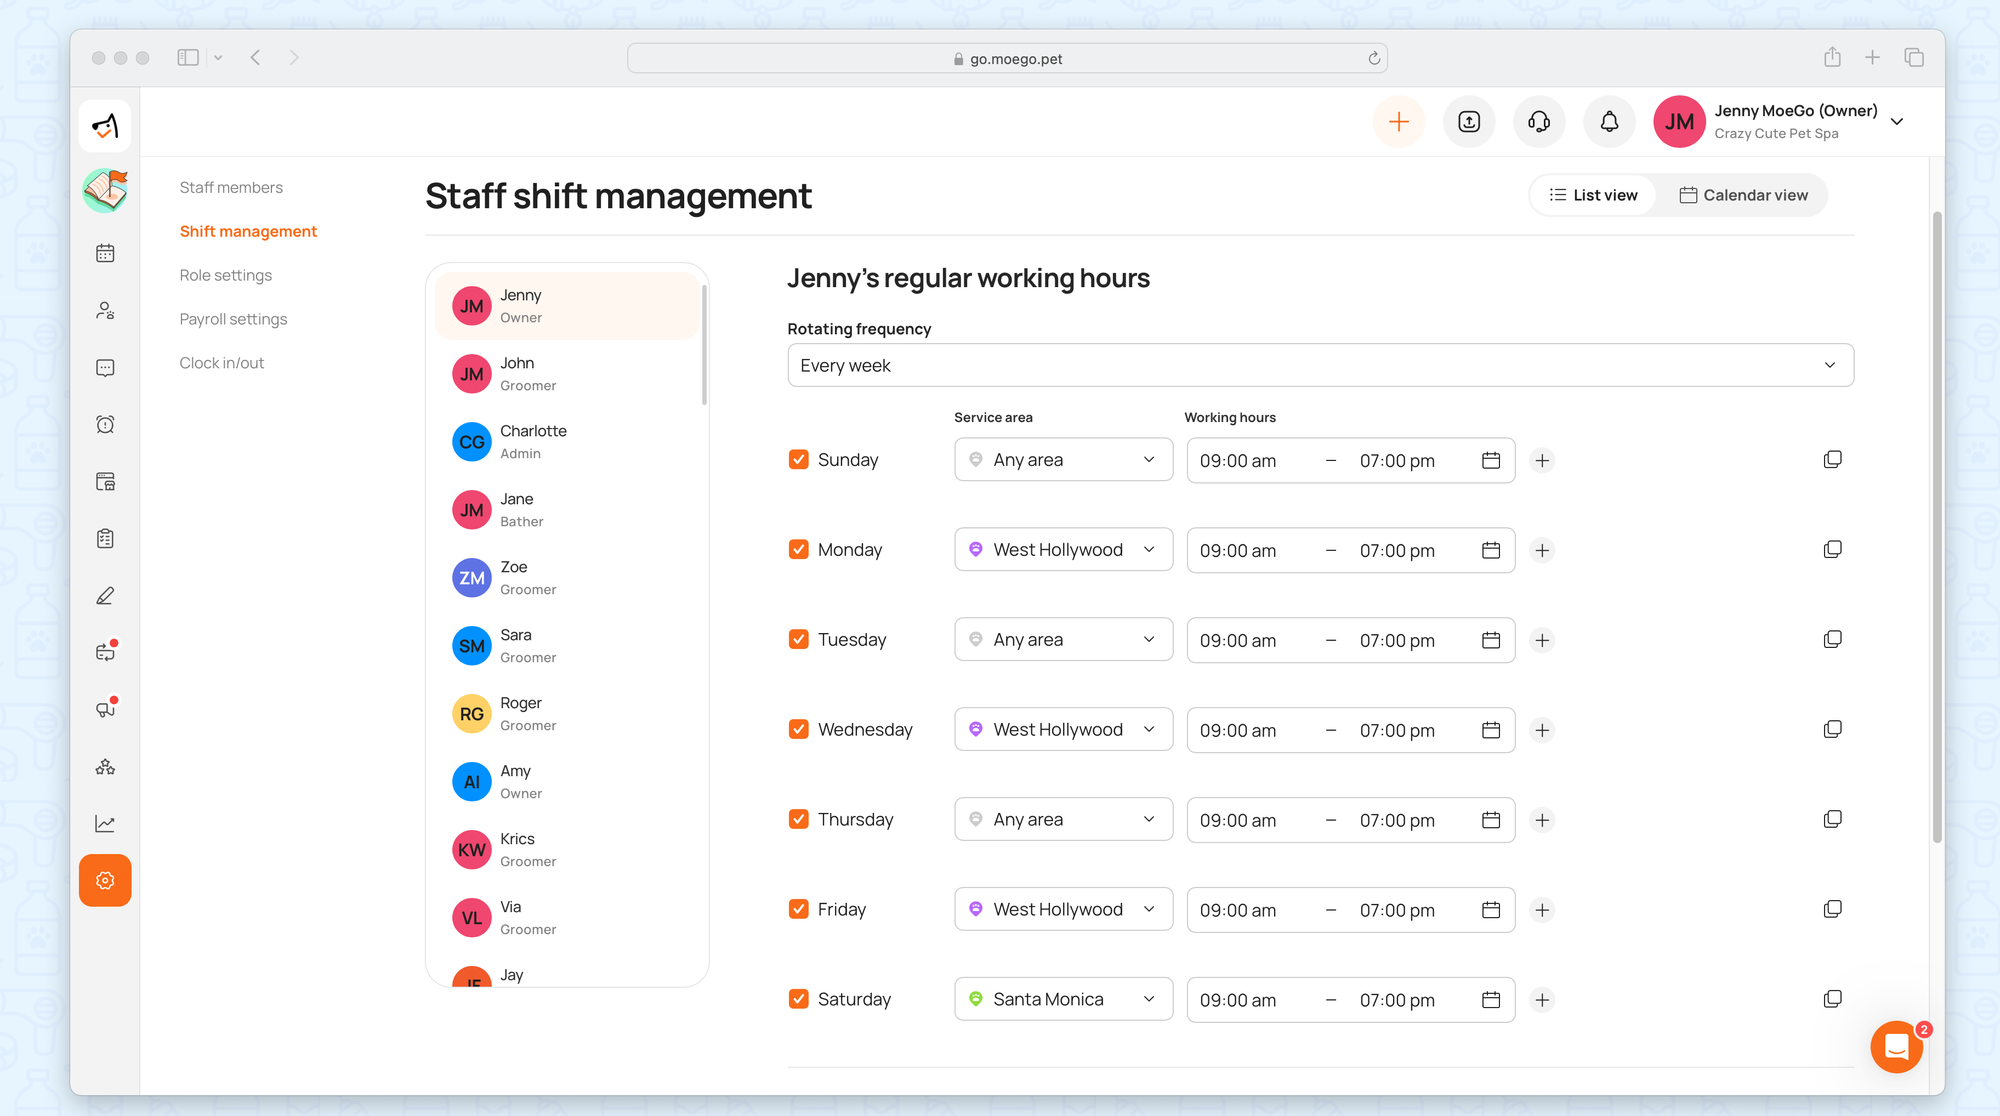
From Desktop 🖥️
If your staff members have a regular CACD pattern for their shifts, you can set up the service areas based on their shift patterns using the desktop version. Follow these steps:
- Navigate to Settings > Staff > Shift Management.
- Switch to list view.
- Click on the target staff member to add service areas to their shift.
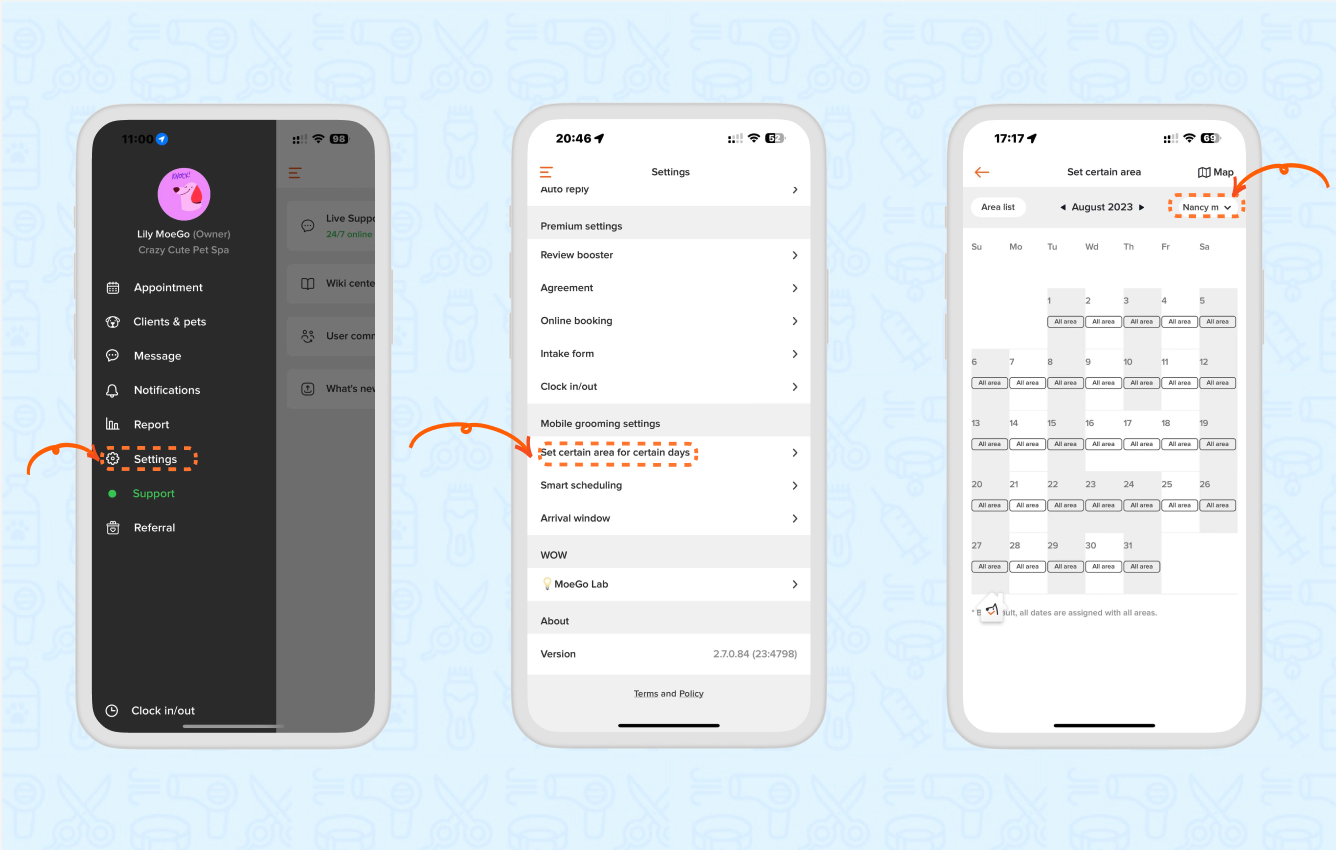
From App 📱
💡Please note: The mobile app only allows you to set up CACD for your staff daily.
To set up CACD for your staff members in the mobile app:
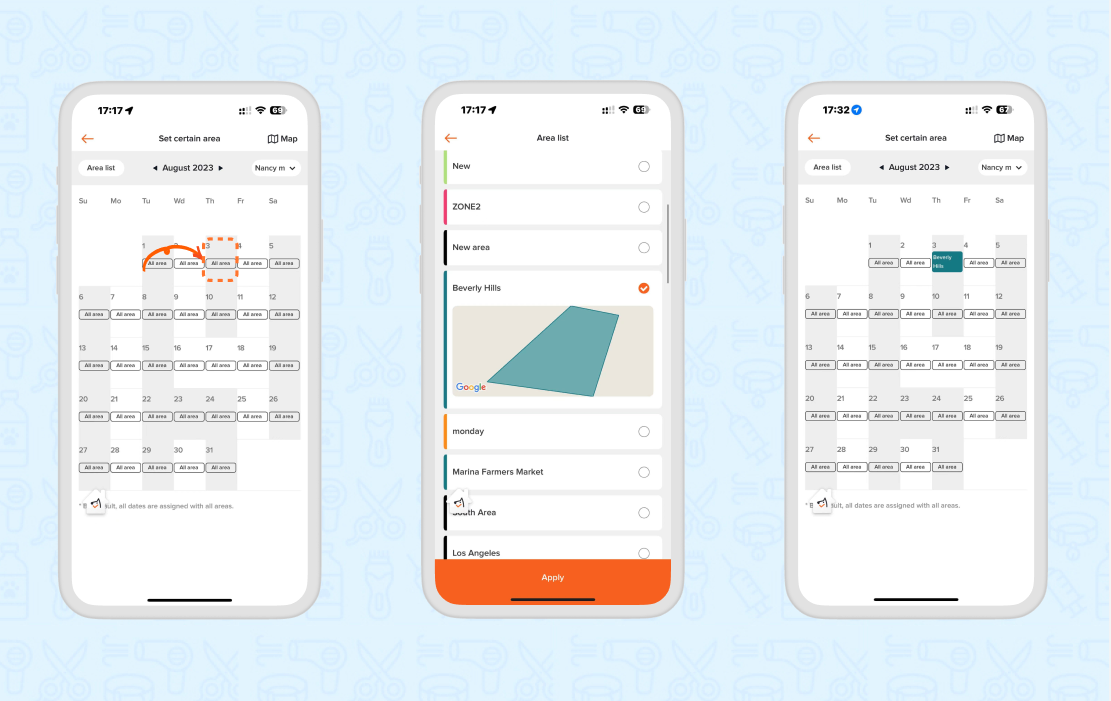
- Go to Settings > Set certain area for certain days.
- Choose the groomer from the top right corner of the calendar.
- Click on the date, select the area, and click < Apply >
Here is a video guide on how to set a certain area for certain days using the mobile app:
Mobile version
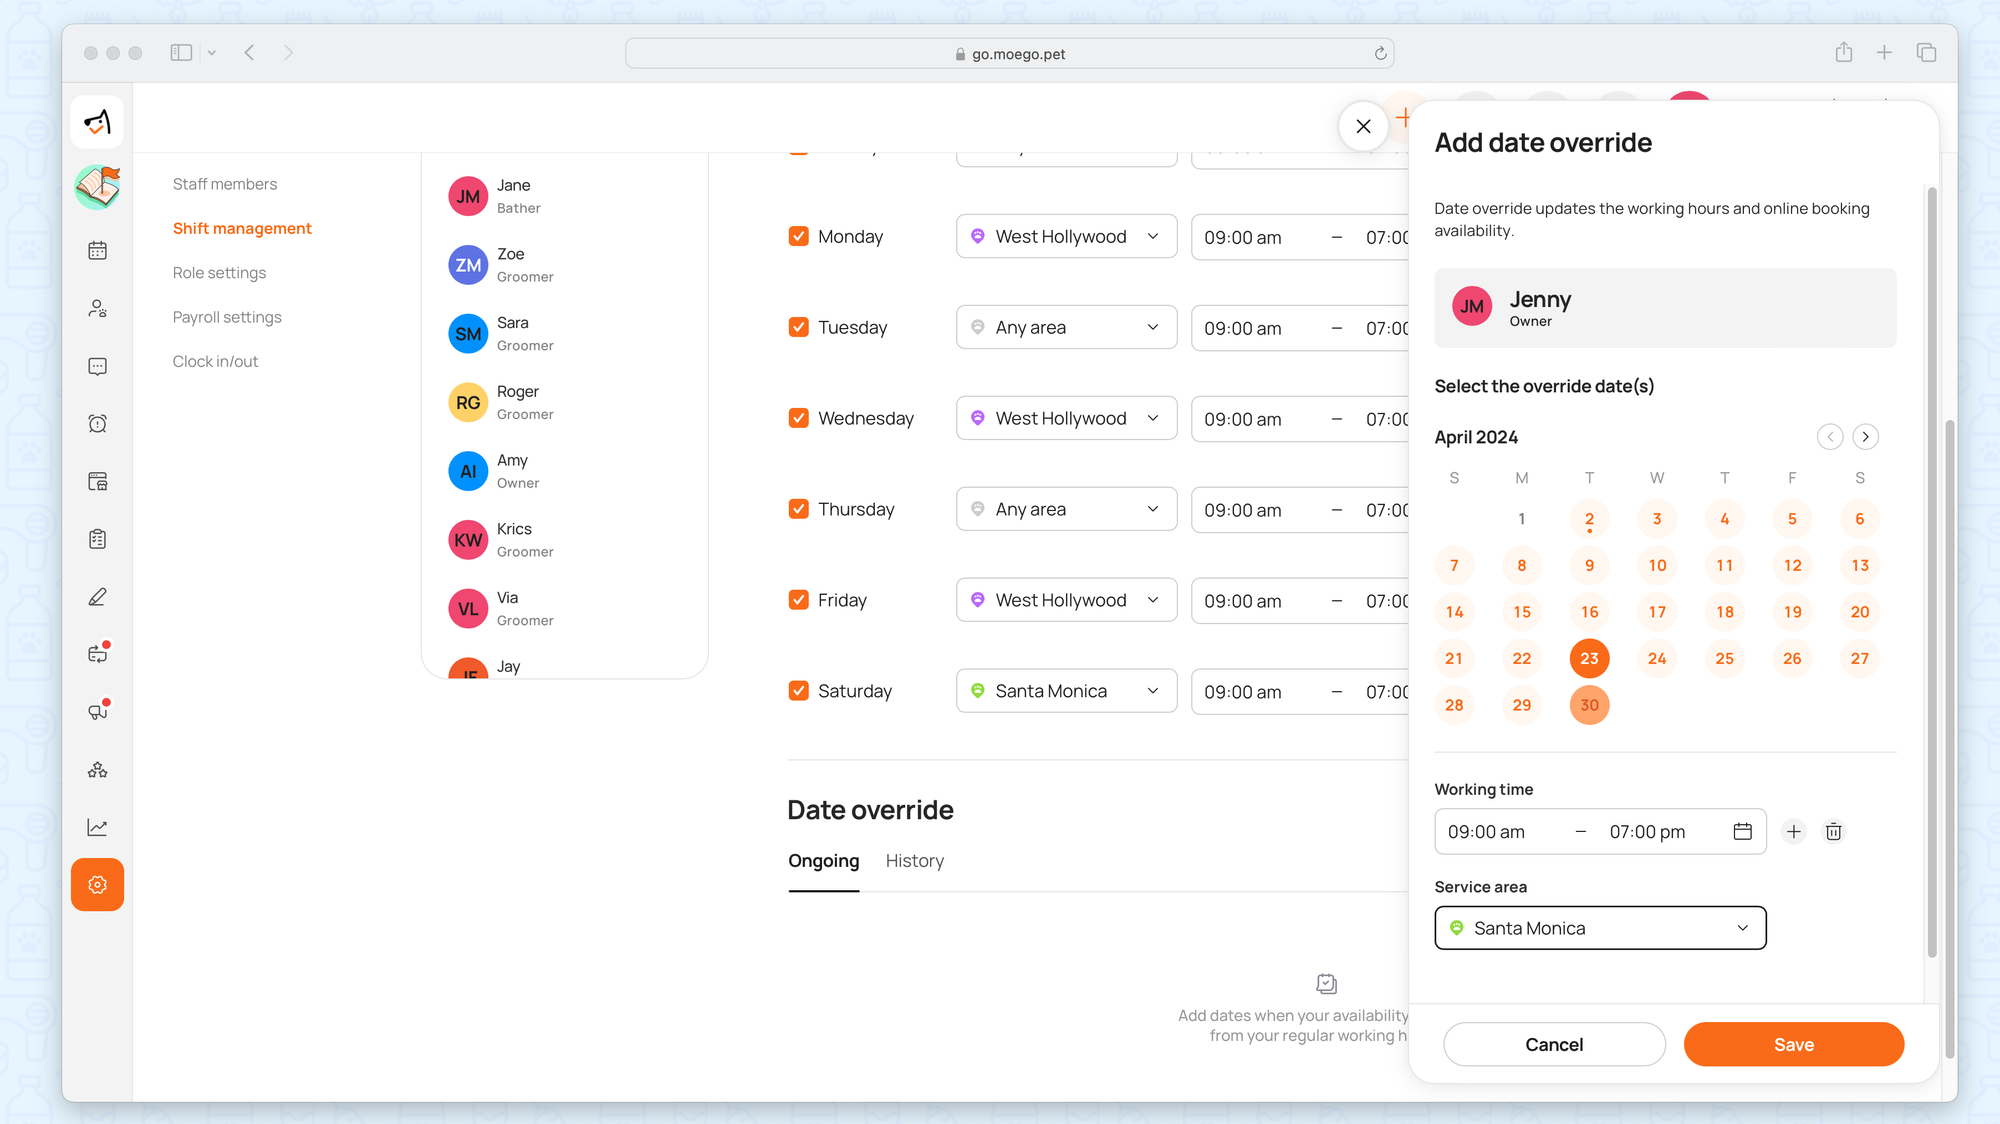
Date Override
Sometimes, you may need to change the service area or time for a specific day. To do this, you can utilize our Date Override feature!
💡Please note: date overrides concerning areas are only available in the desktop version of MoeGo currently.
To set up date overrides on the desktop:
- Go to Settings > Staff > Shift Management
- Switch to < List view >.
- Navigate to the < Date override > section to make the necessary changes to the service area for that particular date.
- Select < Apply >.
Applying Service Area for Online Booking
After setting up the service areas, consult the Online Booking mobile grooming guide to configure service areas for Online Booking.
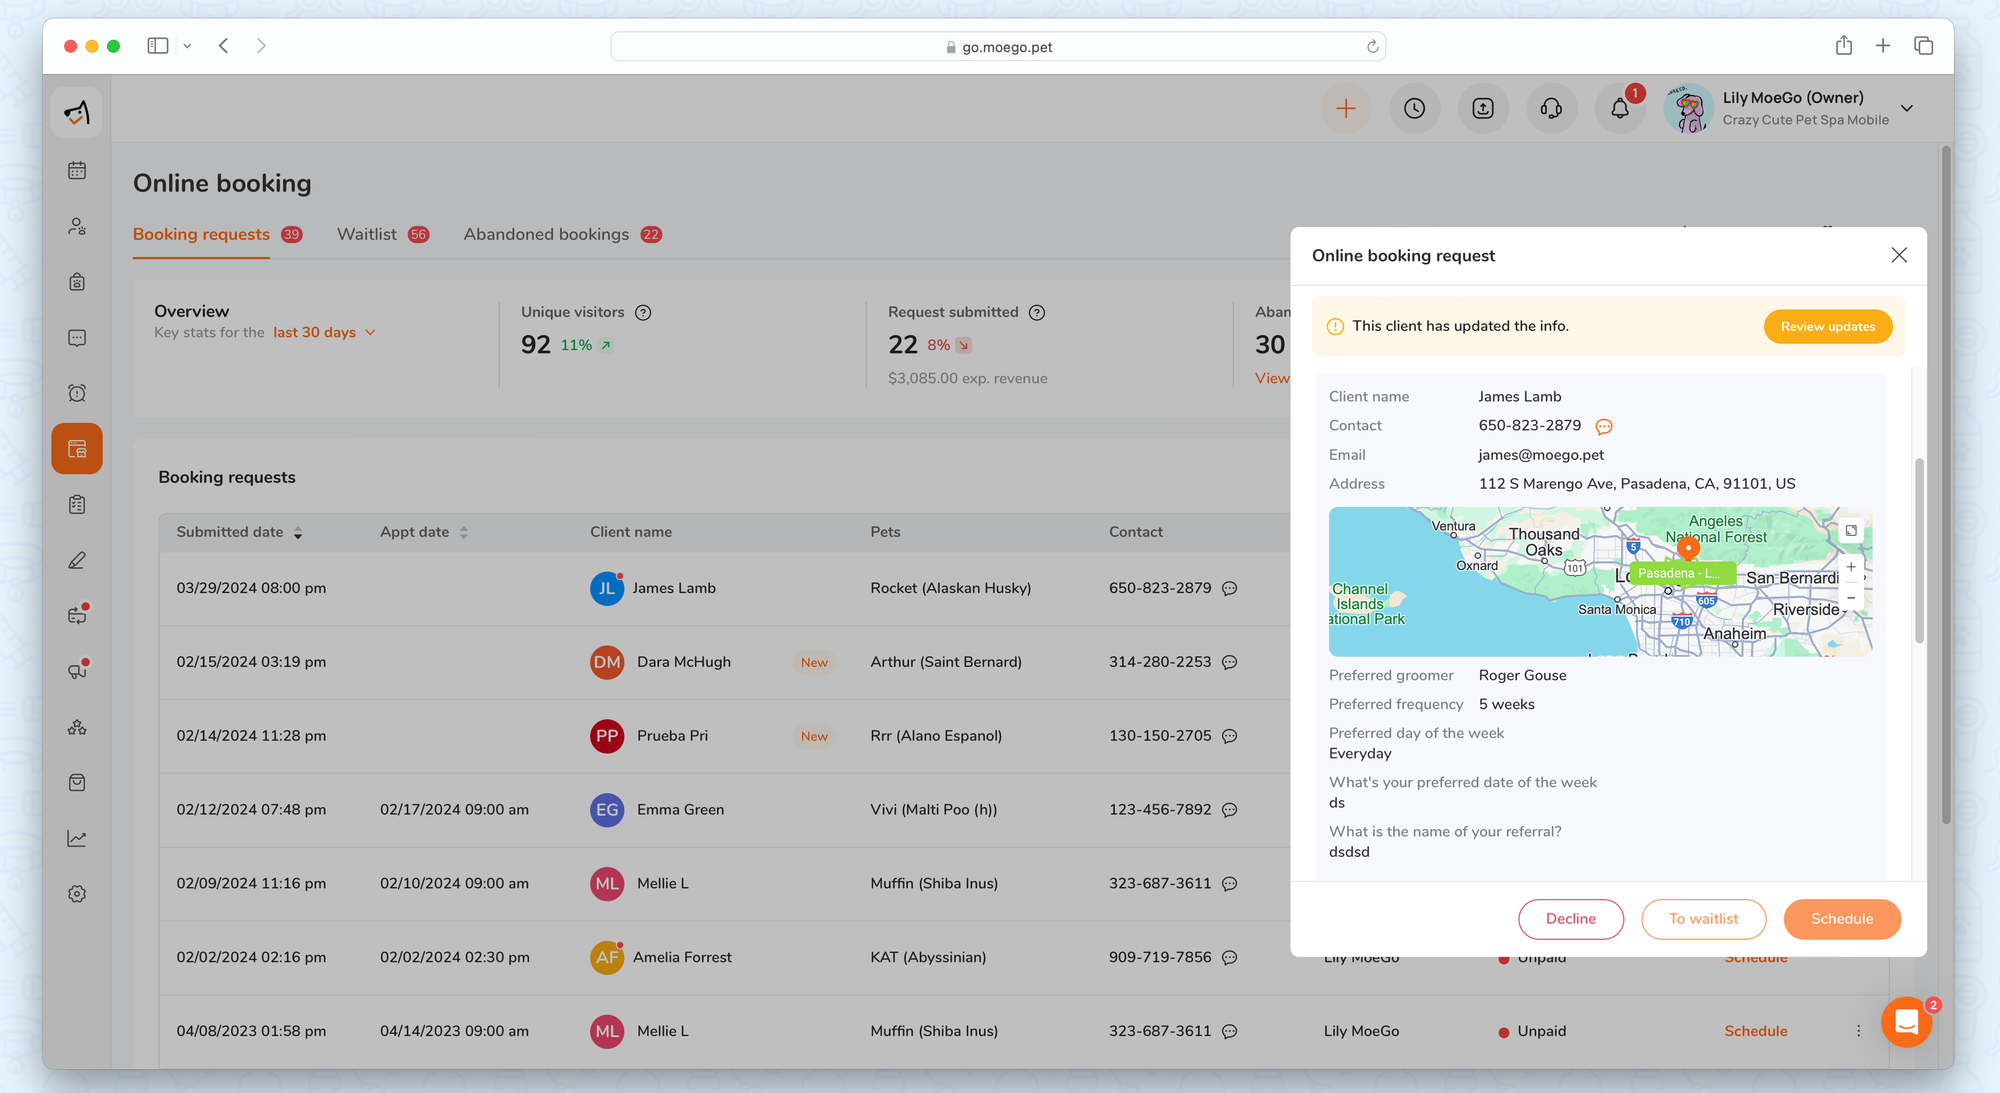
Viewing Location Info of Online Booking Requests
💡Please note: only the address will be displayed in the mobile app, not the service area.
Upon receiving an Online Booking request, click on it from the dashboard on the desktop to view the client's location on the map view and see if they fall within your service area.
Applications of Service Area
1.Viewing Location Info of Intake Forms
💡Please note: only the address will be displayed in the mobile app, not the service area.
Upon receiving an Online Intake form, click on the form from your desktop to view the client's location on the map. Check if they fall within your service area.

2.Filter Client by Service Area
To filter clients by area, go to Client & pets > Filters > Service area. For a comprehensive guide, refer to the Smart Filter for Client List wiki.
💡 Please note: advanced filtering is only available on the desktop version.

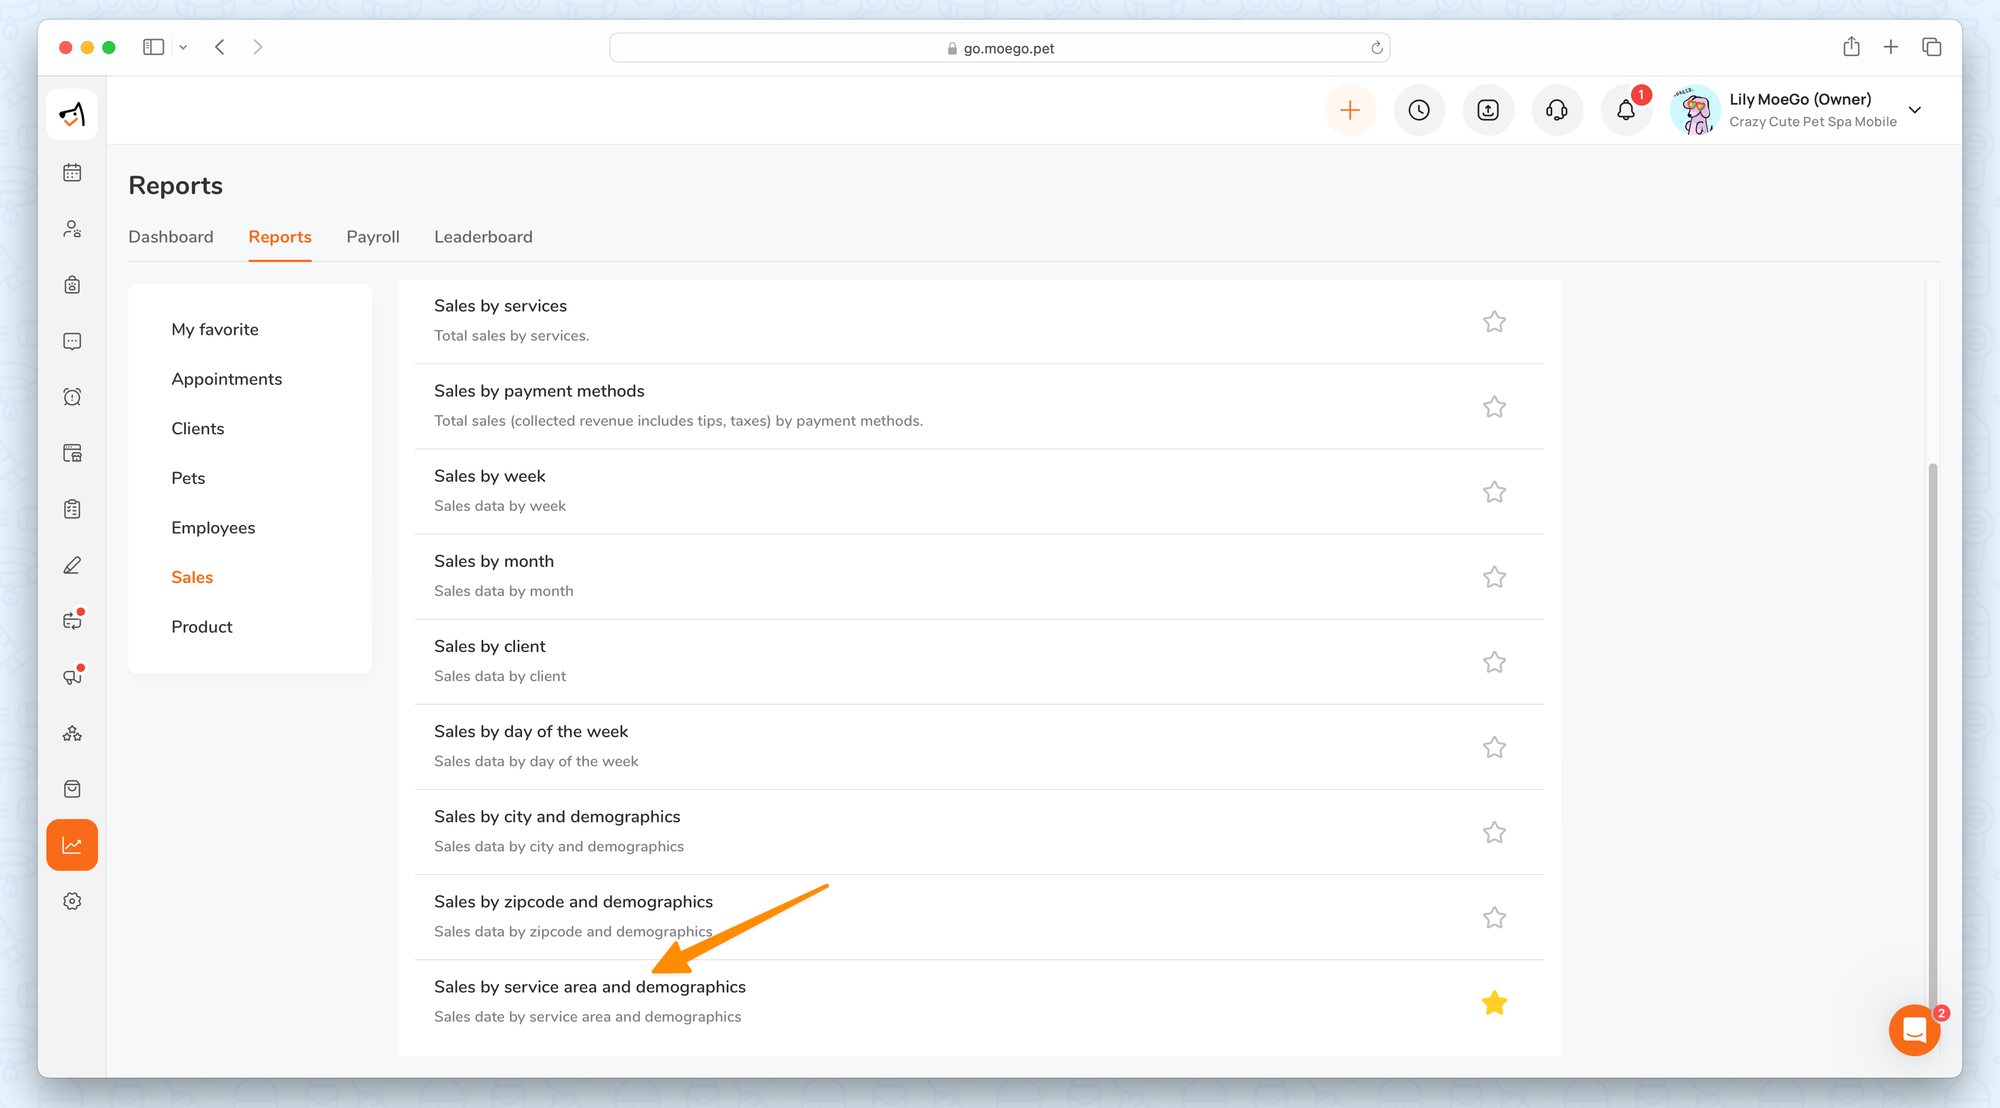
3.Sales Report by Service Area
Access reports on both the desktop and app by going to Reports > Reports > Sales > Sales by service area to view different service area sales reports.
FAQ
Q1. Who is eligible to use the Service Area setting?
Answer: The new service area setting is exclusively available to Mobile Grooming Businesses on the Growth and Ultimate plans.
Q2. How do I transition CACD data from the original to the new format?
Answer: We will automatically convert the data format upon your first visit to the shift management page.
Q3. How do I convert Online Booking service area data from the old to the new format?
Answer: We will automatically transition your original Online Booking service area data to a single service area profile.
