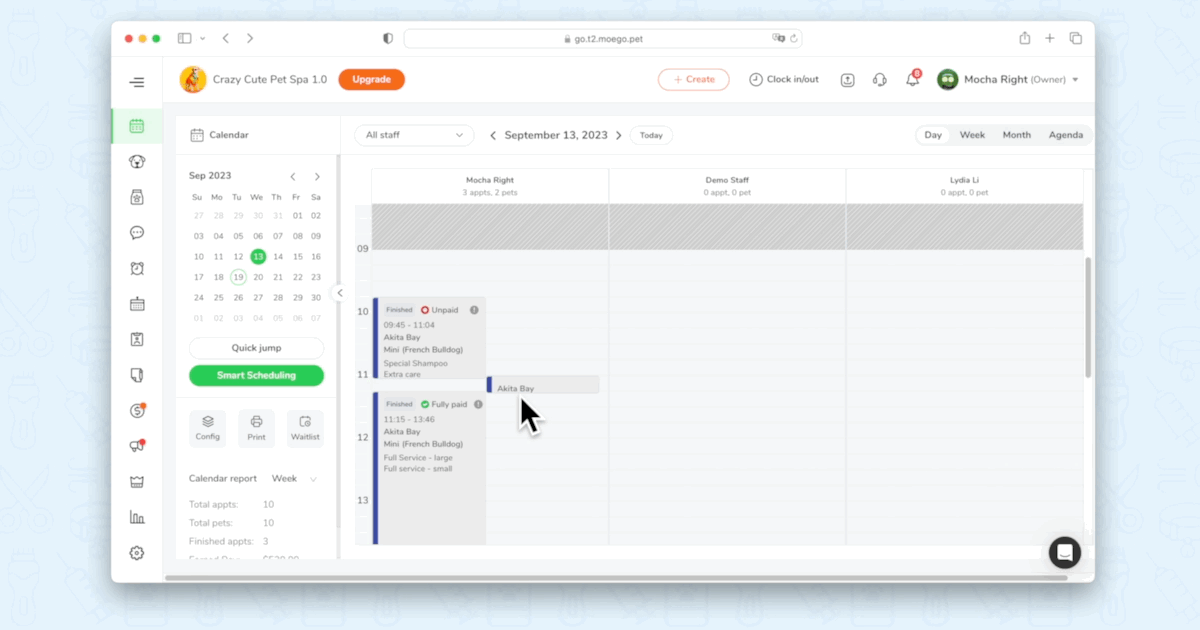
We are launching our brand new MoeGo Calendar view. Designed with your most requested features in mind, this upgraded interface streamlines appointment creation, lifecycle tracking, and much more. Here's a quick guide to get you started:
1. Creating Appointments
To easily create appointments, follow these steps:
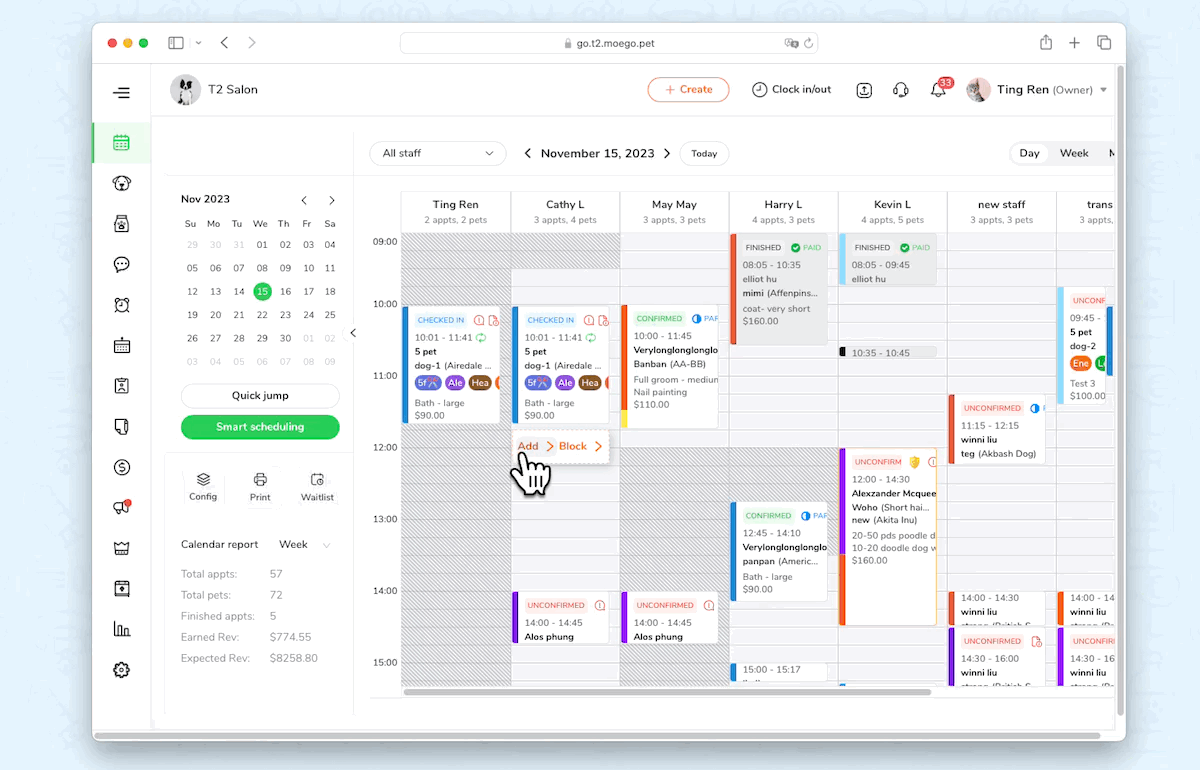
- Refer to the calendar view.
- Hover over the time slot where you want to add a new appointment.
- Click on < Add >.
- During the booking process, you can adjust the time by choosing a new time slot on the calendar.
- When booking for an existing client, you can directly choose from the existing client list and use the last appointment details by hovering on <Adding Pets and services >and clicking on < Book Again >, or clicking on <Adding Pets and services > to choose other pet and service.
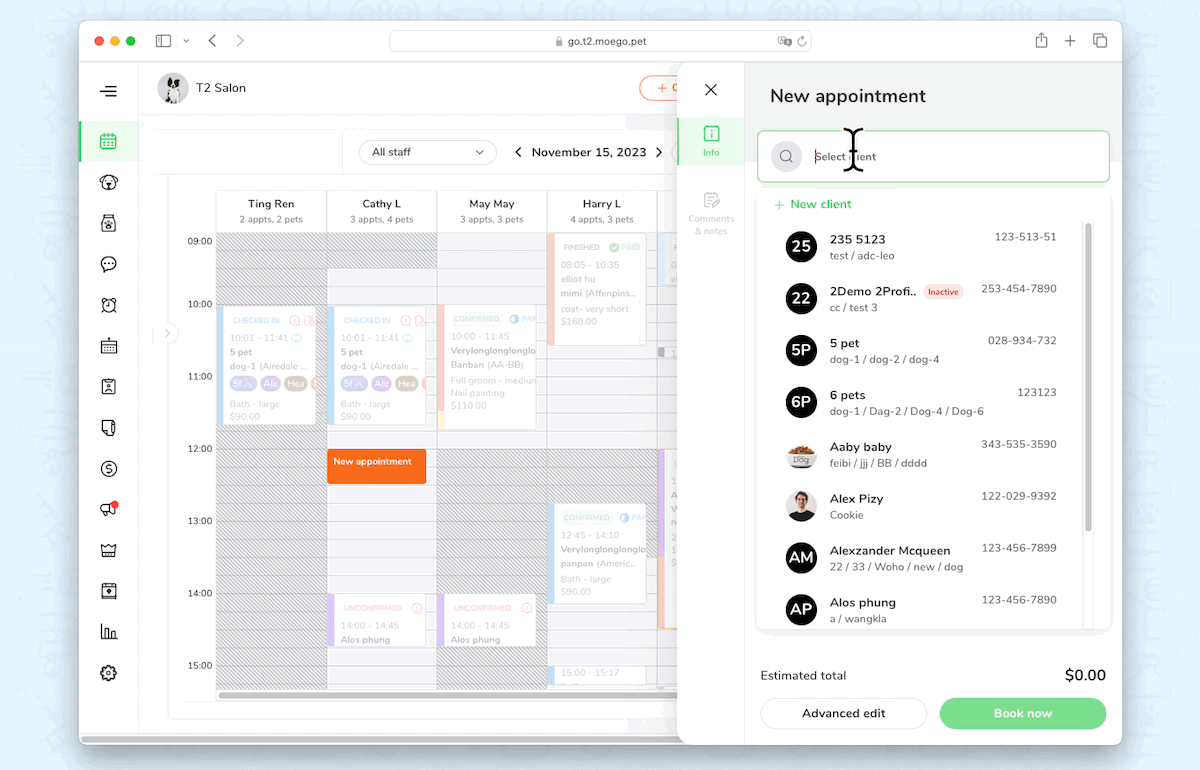
- When booking for a new customer, click on < New client > to create a new client profile.
- Click <Book now> to secure the booking.
2. Editing Appointment
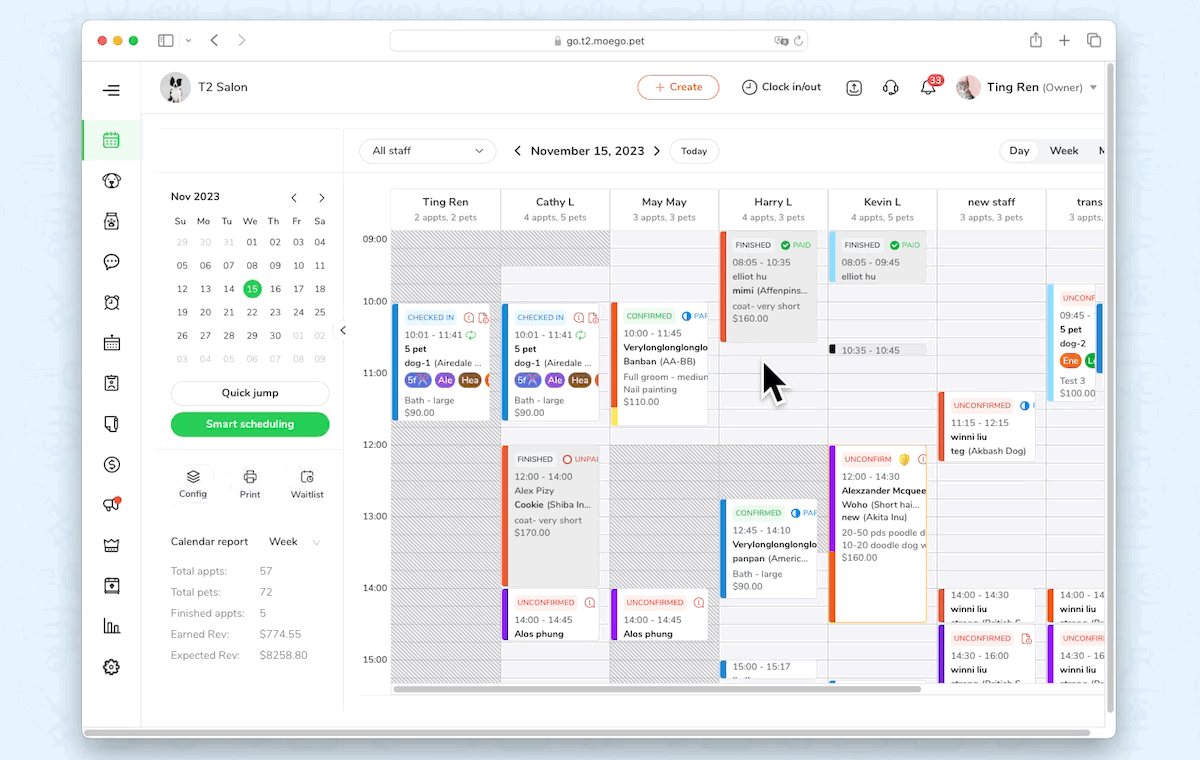
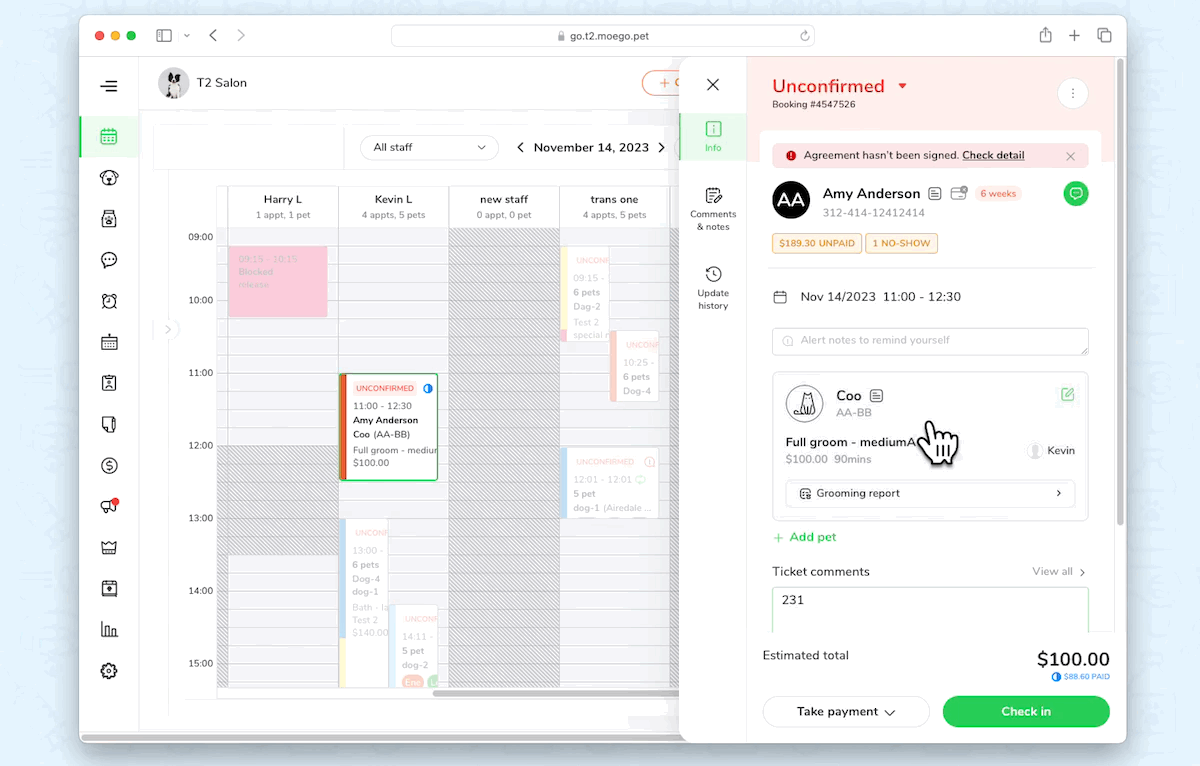
Once the appointment is created, you can directly edit the service details on the appointment detail page.
Editing Date and Time
To edit the starting time of the appointment, click on the date and time.
Editing Service Details for Individual Pet
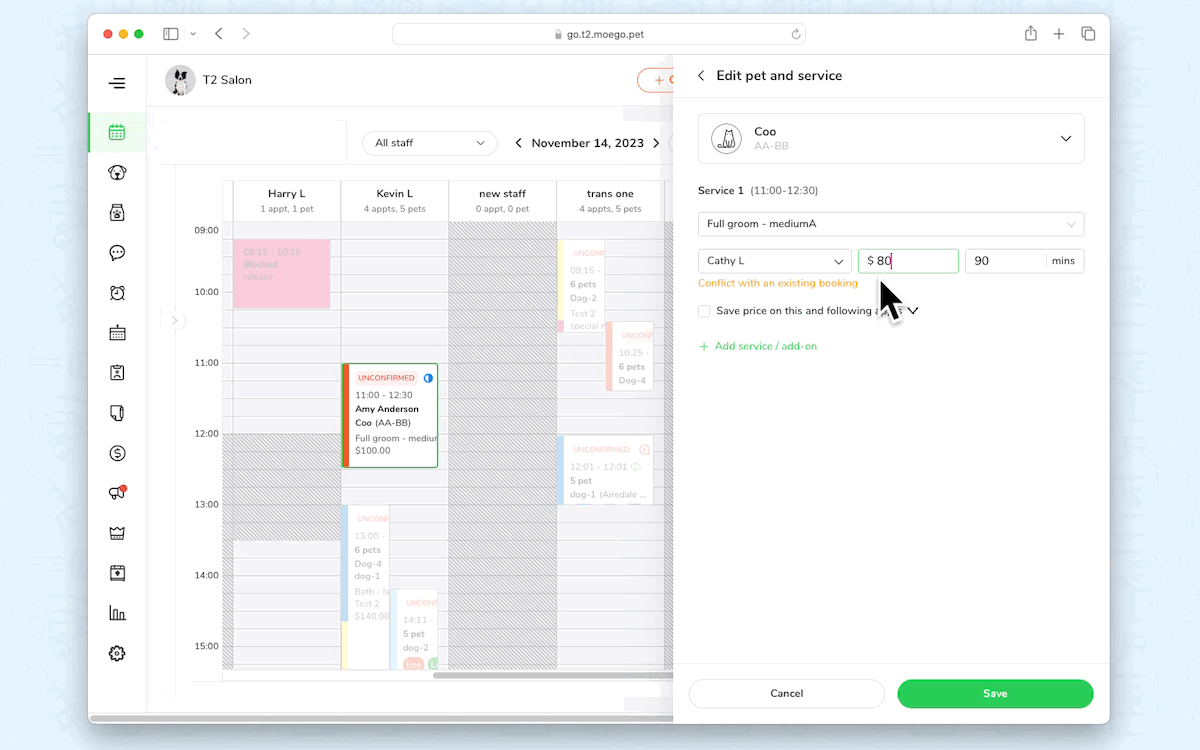
To edit the service details for individual pets, click on the pet service info.
You can update the type, staff, price, and length of the service and add add-ons to the appointments.
When editing the price for the service, you can tick <Save price on this and following appts>or <Save price on all upcoming appts>to save the price for the individual pet or all.
Additionally, you have the option to assign and edit multiple staff members and change the working mode, commission, service type, and time.
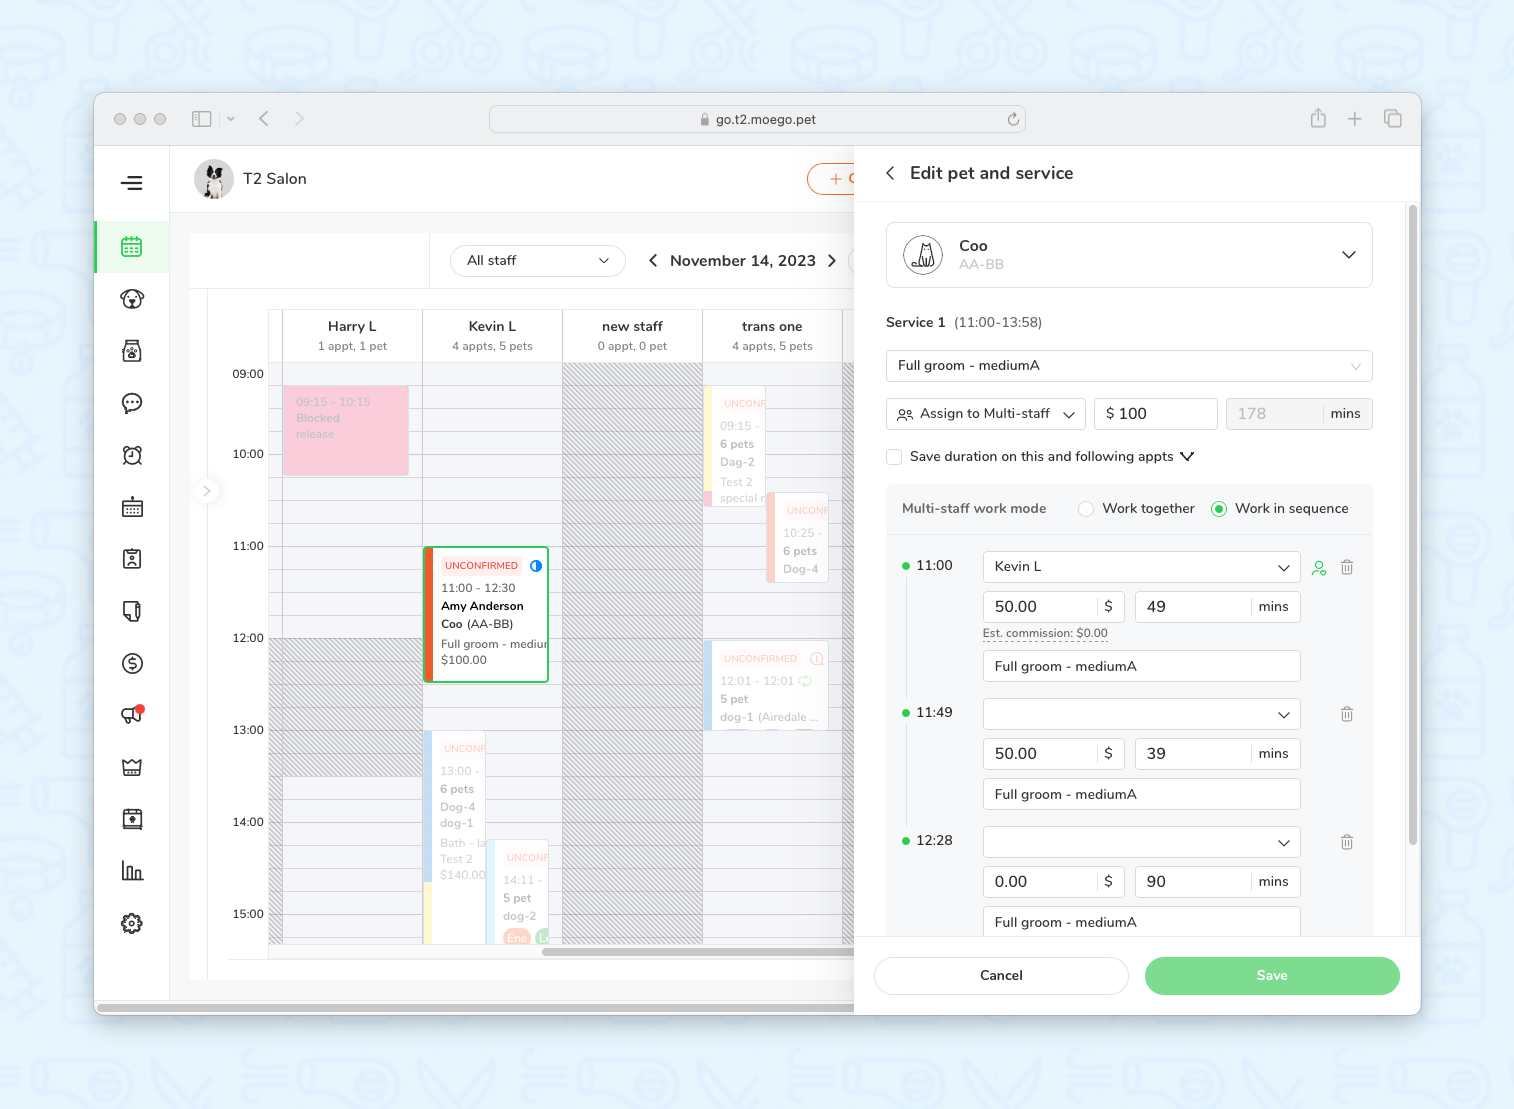
For more information on splitting services across multiple staff members, please see Multi-staff per Service - Split service decently across multiple staff.
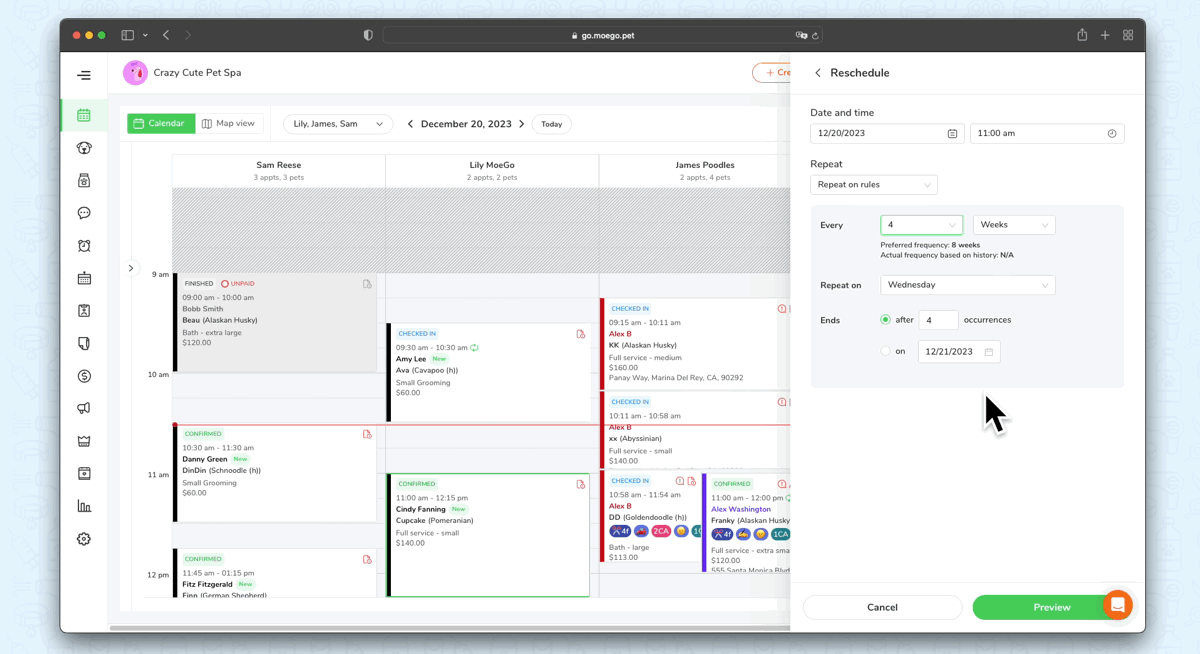
3. Setting Repeated Appointment
From the Calendar View, you can easily create repeated appointments:
- Click < Create > or click on any appointment
- Click the < Edit > icon next to the time, or click into the menu on the top right corner to find < Book Again >
1) Set Up Repeat Rules
- On the appointment detail page, you can select the frequency of repeat: < Doesn't Repeat >, < Repeat on Rules >, or < Repeat on Selected Days>.
- If you select < Repeat on Rules >, you will be recommended with rules based on the client's preferred grooming frequency and the actual grooming frequency based on history.
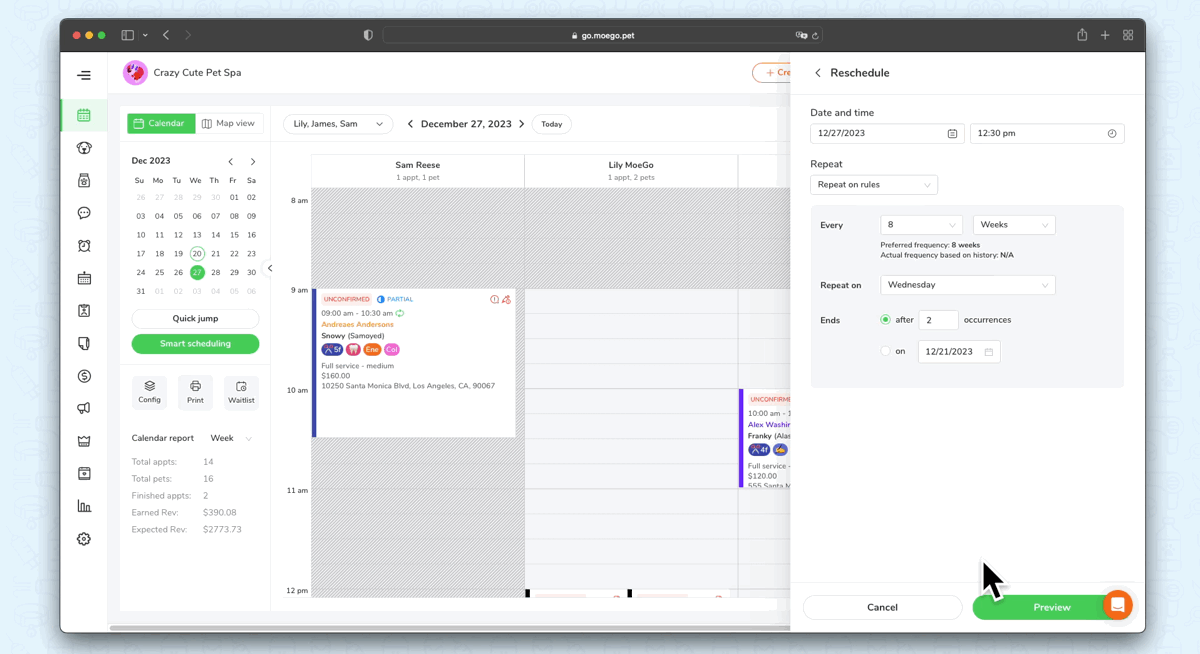
2) Preview & Resolve Time Conflicts
- After confirming the Repeat Rules, you can click < Preview > to resolve potential time conflicts.
- If there are time conflicts, you can resolve them by these two methods:
- Clicking on < Optimize with Smart Scheduling >. Powered by Smart Scheduling, this will attempt to resolve time conflicts based on driving rules and client preferences for optimal efficiency.
- Manually editing the date, time, or staff. This allows you to directly and flexibly make adjustments to the repeated appointment while having the calendar view opened for quick reference on staff's working availability.
Besides the Calendar View, you can also create a Repeated Appointment by clicking the < Advanced Edit > button at the bottom of the appointment detail.
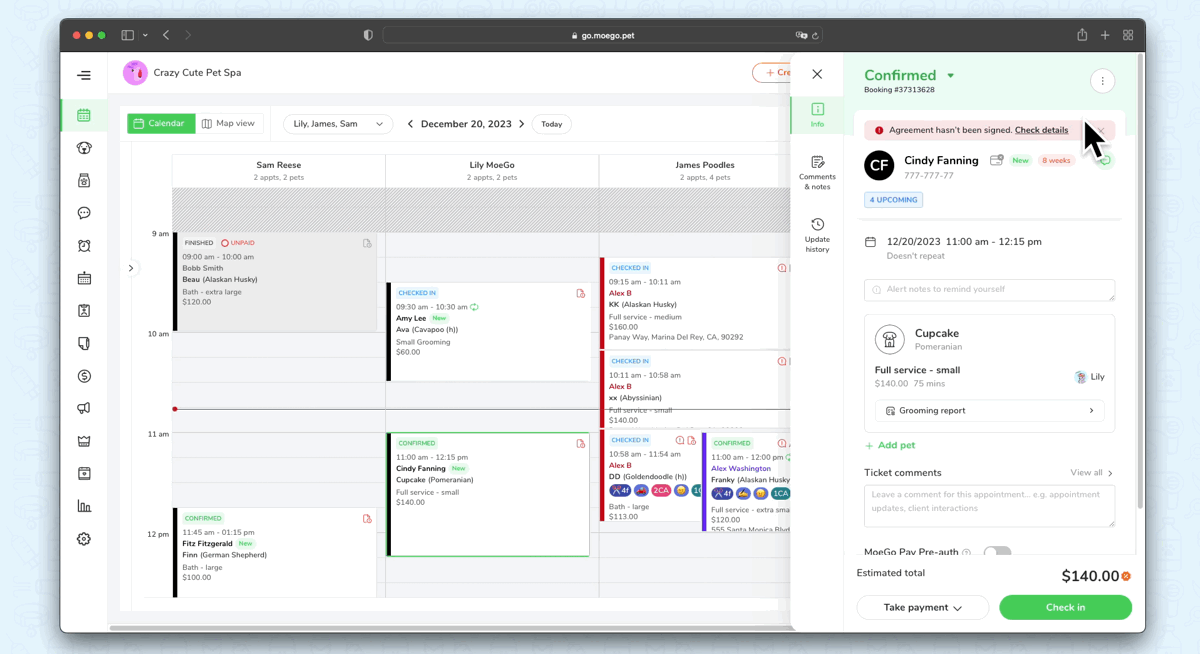
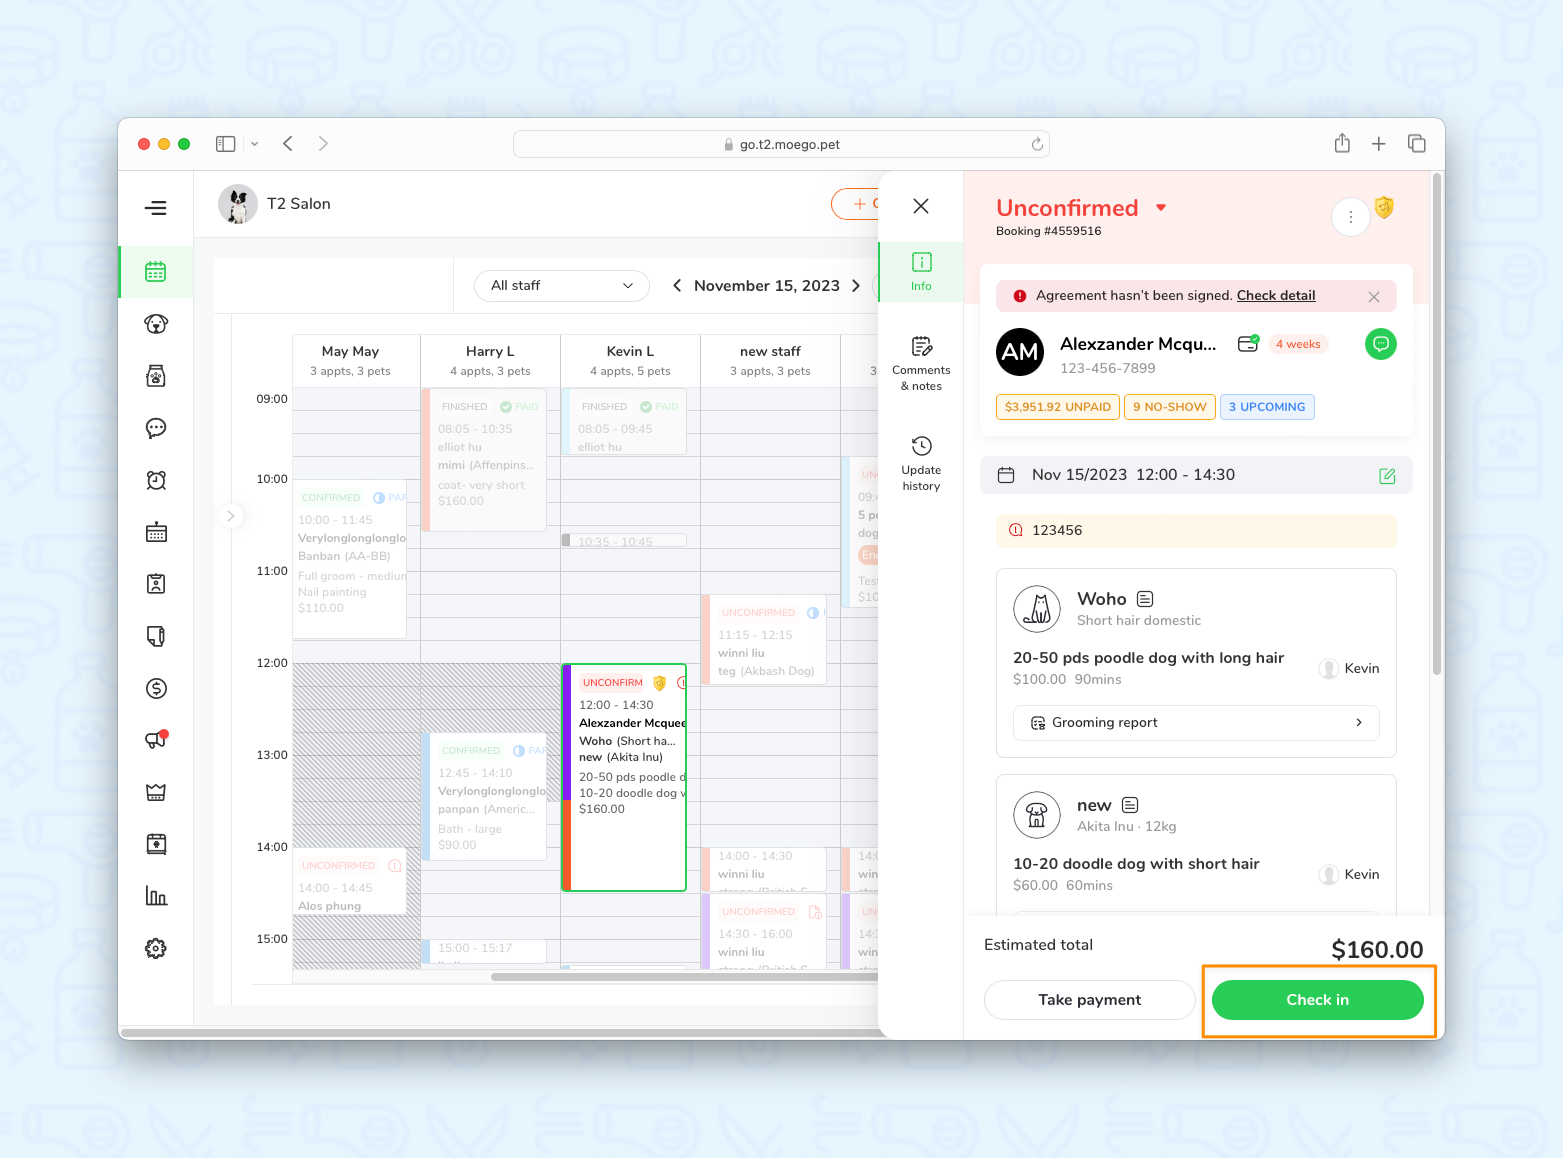
4. Changing the Appointment Status
To change the status, click on the status header in the appointment details.
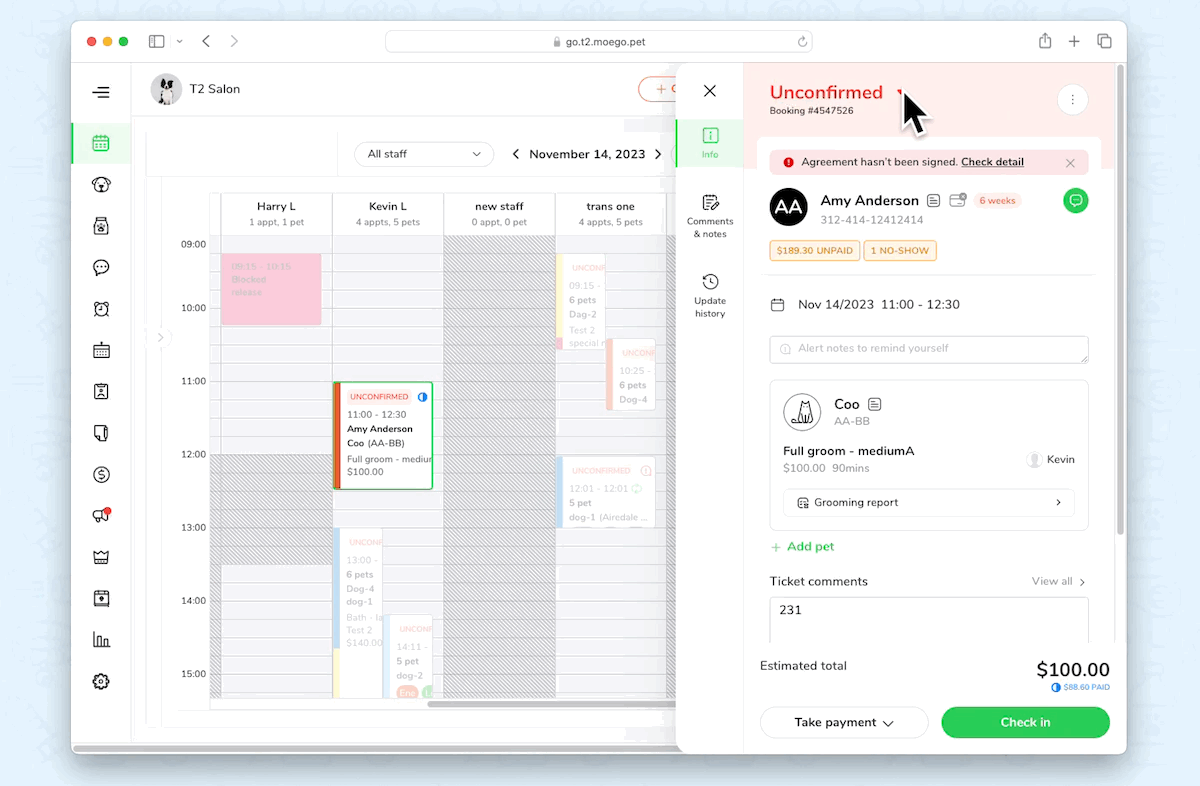
You can also use the < Check in > button to progress the appointment status.
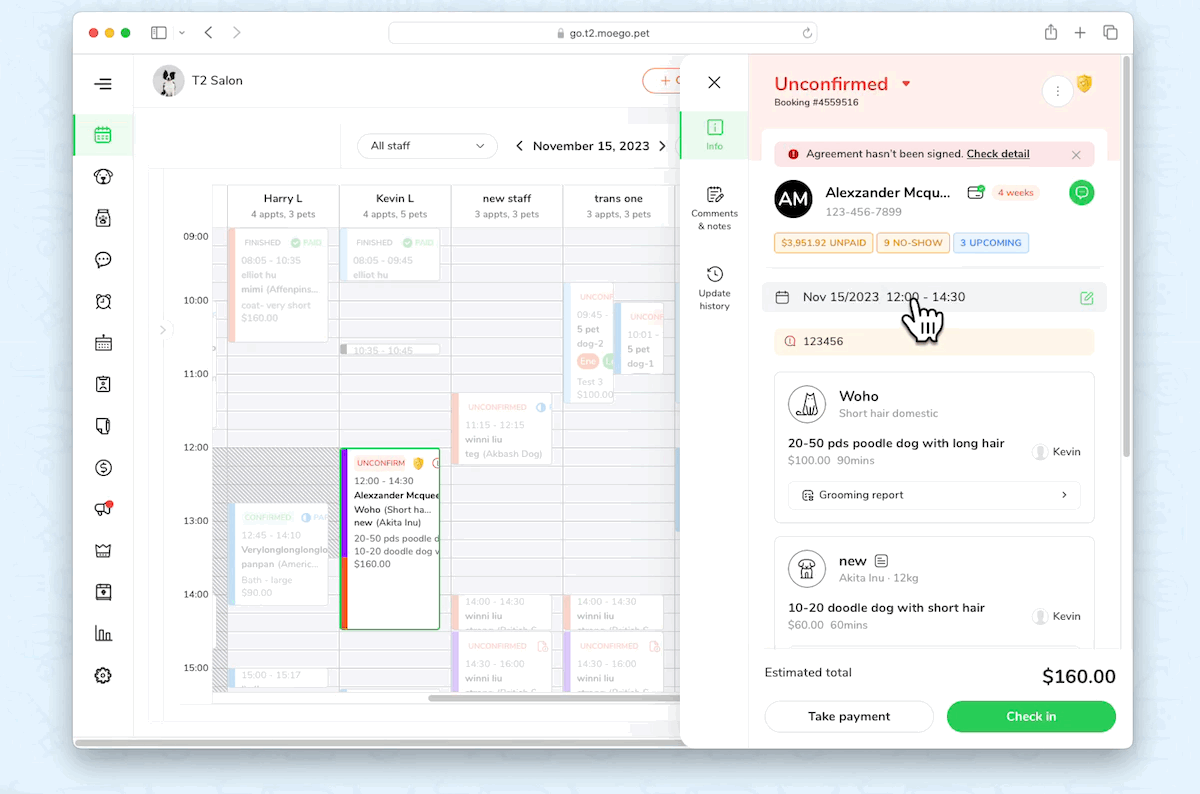
5. Viewing the Appointment Lifecycle
You can have complete transparency into the changing ticket status and track your appointments from booking to service completion.
- To view the appointment details, click on the appointment in your calendar.
- Then, click on < Update history> to see the complete status update and change history of the appointment.
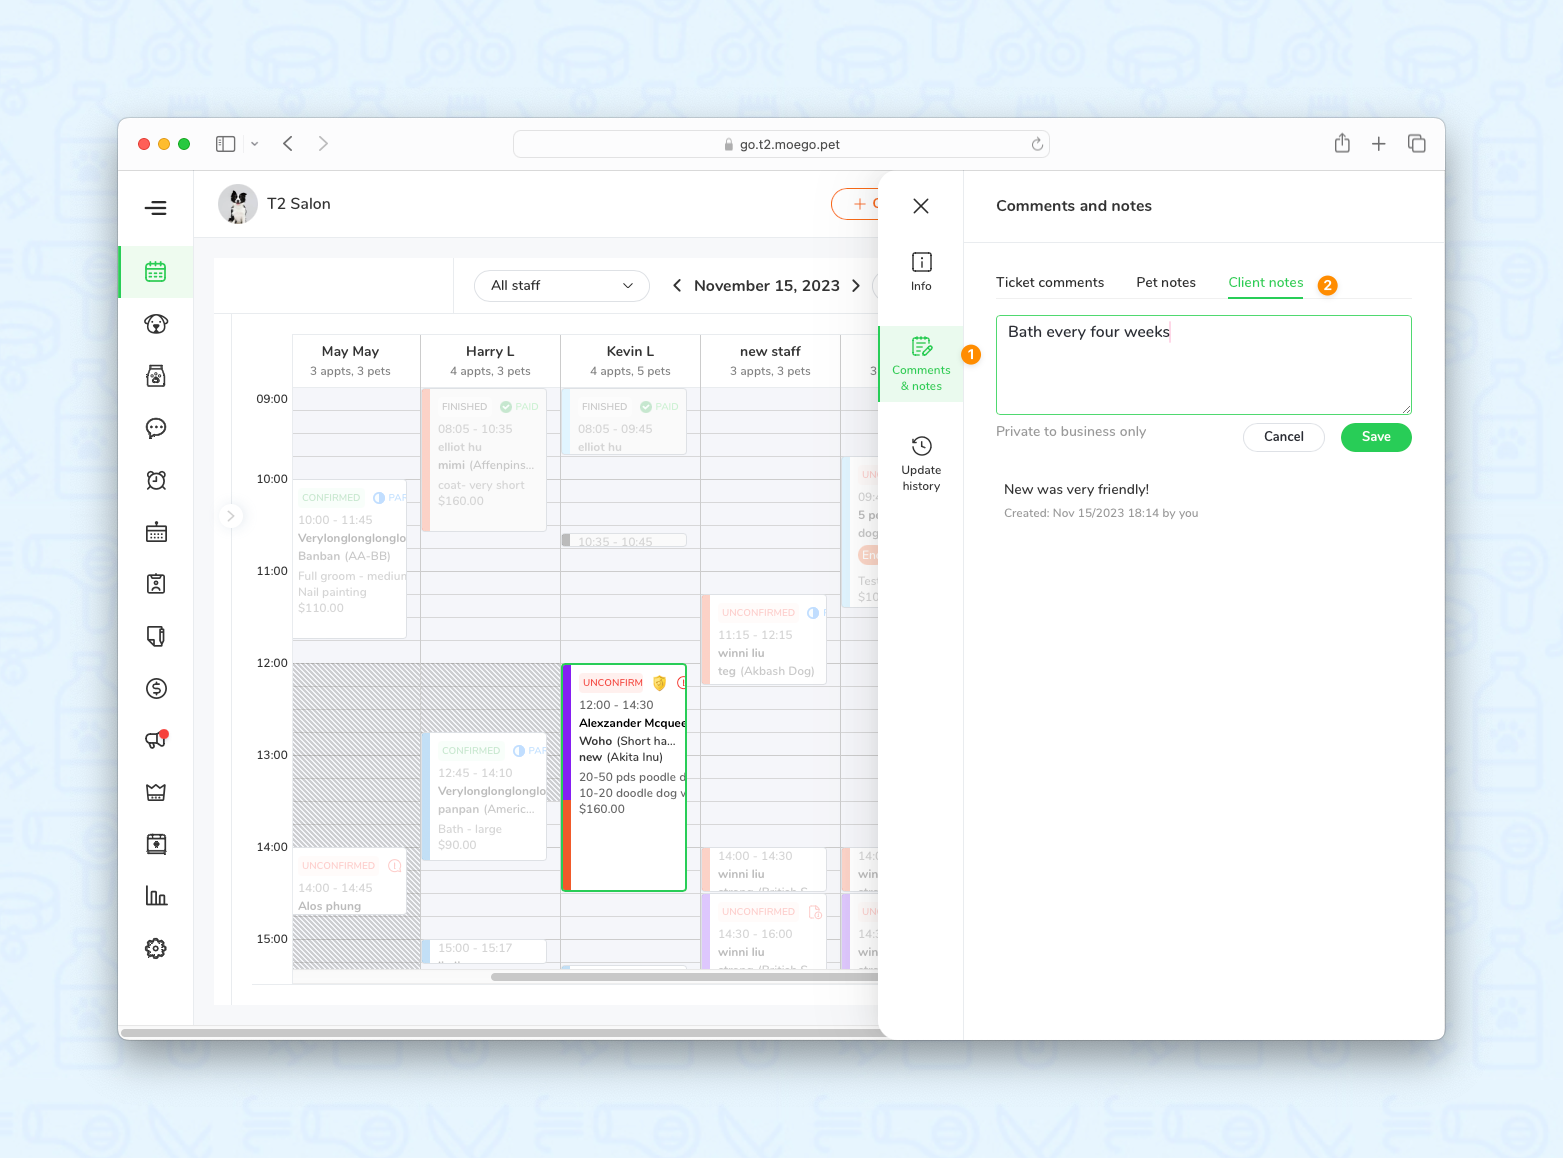
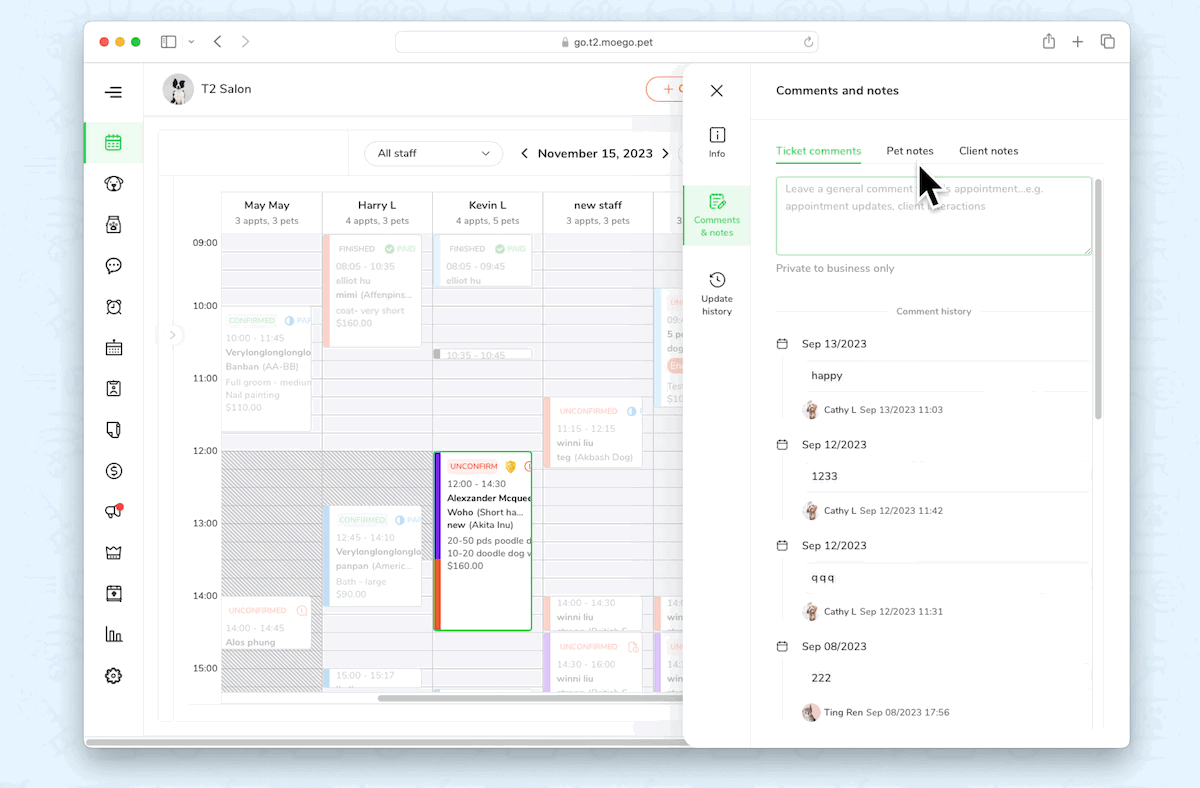
6. Ticket Comments, Pet Notes & Client Notes
To view the comment history for a particular customer's appointment details, click on the appointment in your calendar.
Then, click on < Comments & notes > to see all the history comments & notes of the client.
Click on <Ticket Comments> to add a comment and view all the past comments from your staff regarding the appointments of the clients. You can see the time and the person who added the comment.
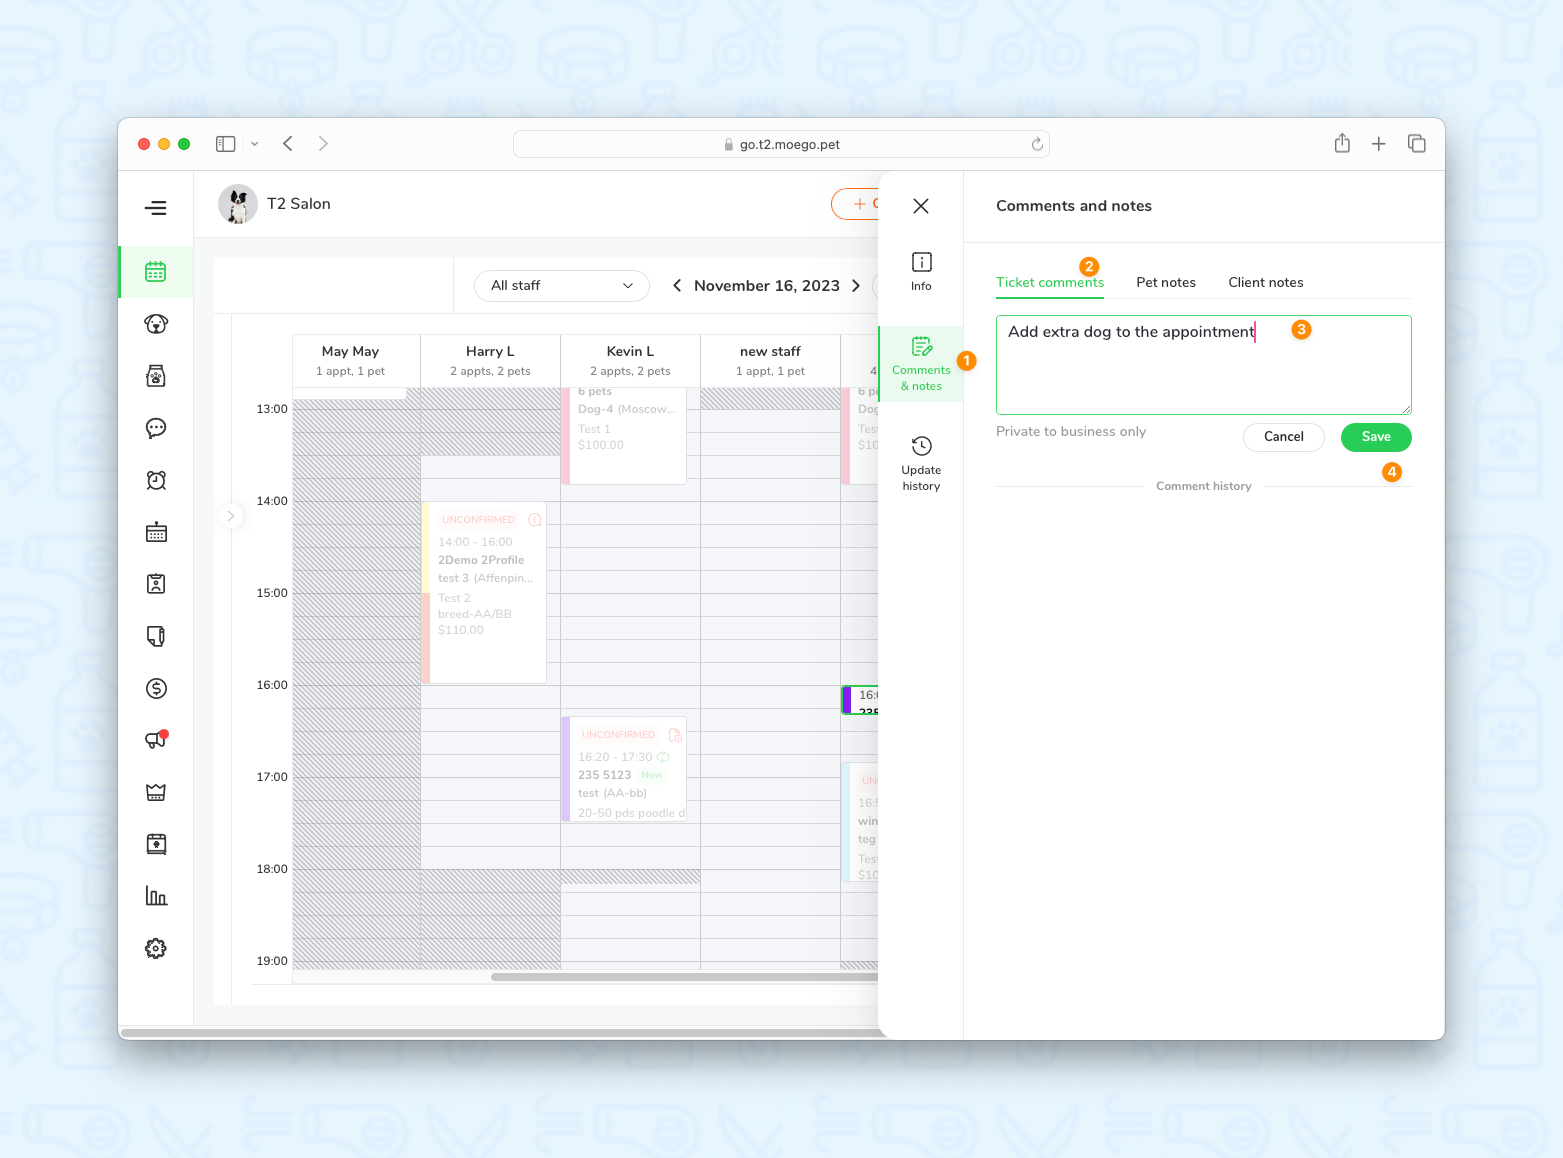
Click on <Pet notes> and select the pet's name if the appointment involves multiple pets. This will allow you to add a note to the pet and view all past comments from your staff regarding the pet, including the time and the person who added the comment.
Click on <Client notes> to add a note to the client. This also allows you to view all past notes you have left to the client, including the time and the person who added the note.