Add an appointment flexibly, customize its date, price, service, assigned staff, and ticket color.
Three ways to create an appointment
🖥️ Desktop:
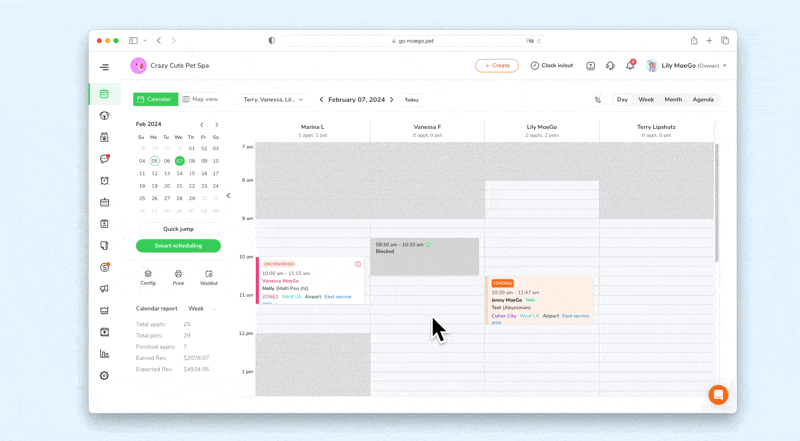
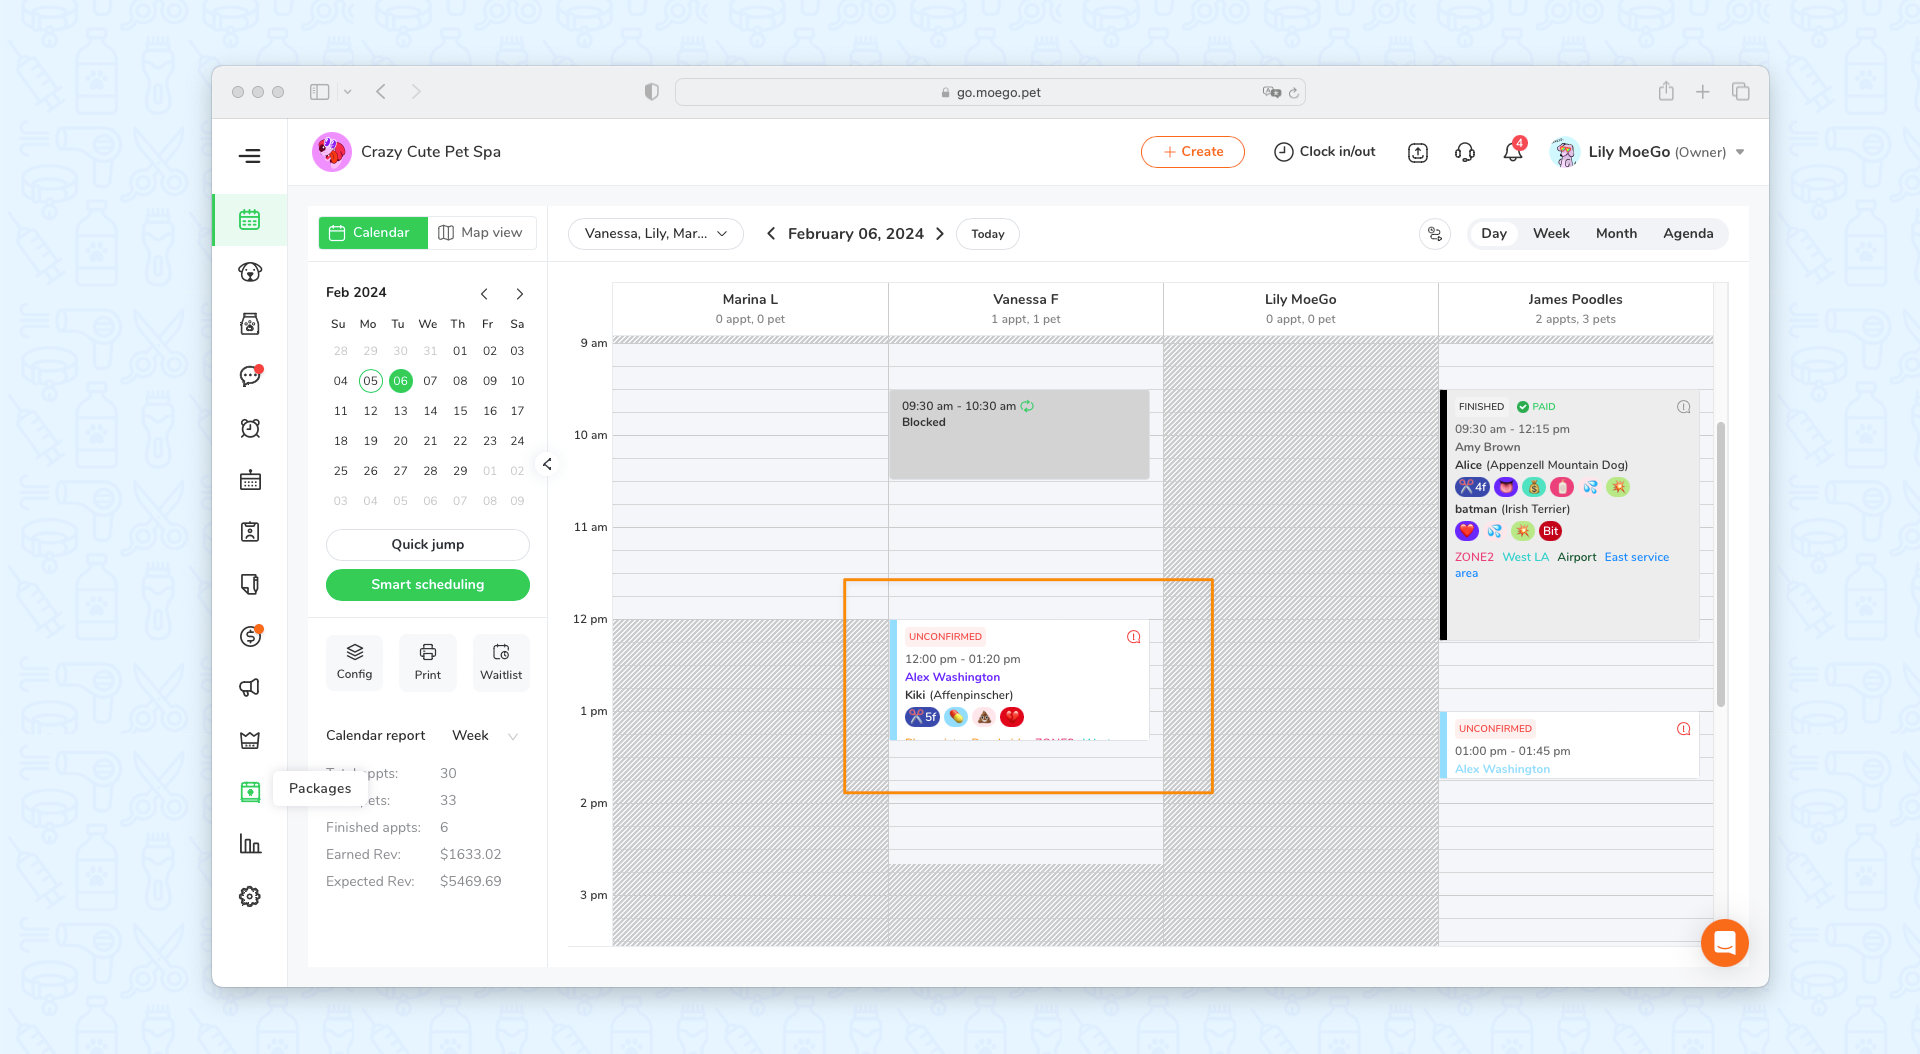
Selected time - From the calendar
- Click on the < Appointment > section on the side menu
- Click on the open slots on the calendar
- Click < Add > to create a new appointment
Selected client - From the client detail
- Click on the < Clients & Pets > tab on the side menu
- Click on a client to enter the client detail page
- Hit <+ New Booking> button to create a new appointment for the client
- Fill in appointment details from the side panel
Same as Last time - From Appointment Detail
- Click on an existing appointment and open an <Appointment detail> popup window
- Click the <Book again> button on the right side to book the exact same services as the selected appointment

Further reading:
Create repeat appointments
Book again
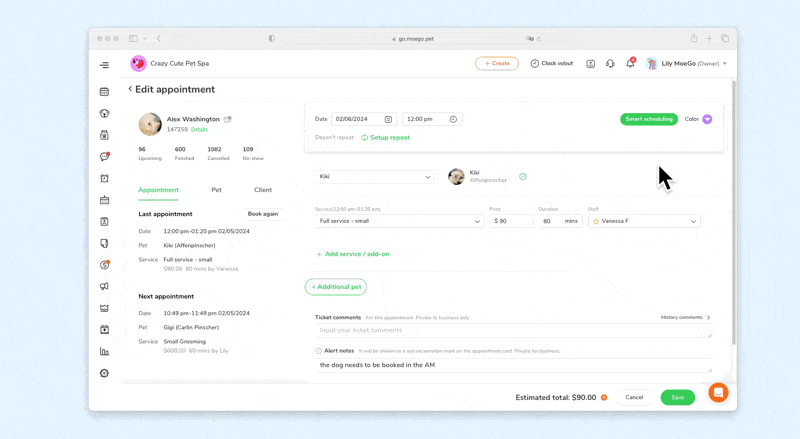
Edit appointment details
Select a Client
- Search for a client by name
- Add a new client
💡 You can refer to the following information by switching the tabs under the client: Last/next appointment record, Pet detail, Client contact, Payments, and Notes.
Select Pets and Services
- Select a < Pet >
- Select a < Service >
💡 There will be a Last service mark for your reference - Select an < Add-on >
- Adjust the < Duration > and < Price > if needed
💡 You can save the duration and price for the pet - Select the < Staff > for the service
💡 You can select different staffs for each pet in one ticket - Add an additional pet for the multi-pet family by clicking the < + Additional pet > button
Date & time
Adjust the date and start time of the appointment here:
💡 When there are conflicts with the existing appointment, there will be a conflict notice.
💡 If the staff is not scheduled to work at the time, there will be a non-working time notice.
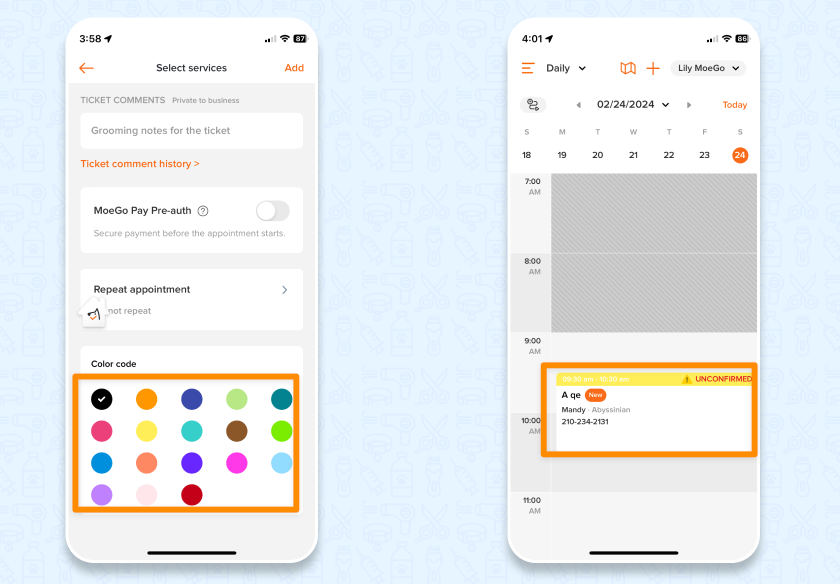
Ticket color
Edit and select your own ticket color here on the appointment detail page.
You can then check your updated color code on your Calendar View:
📱 App:
Three ways to create an appointment and save on the app
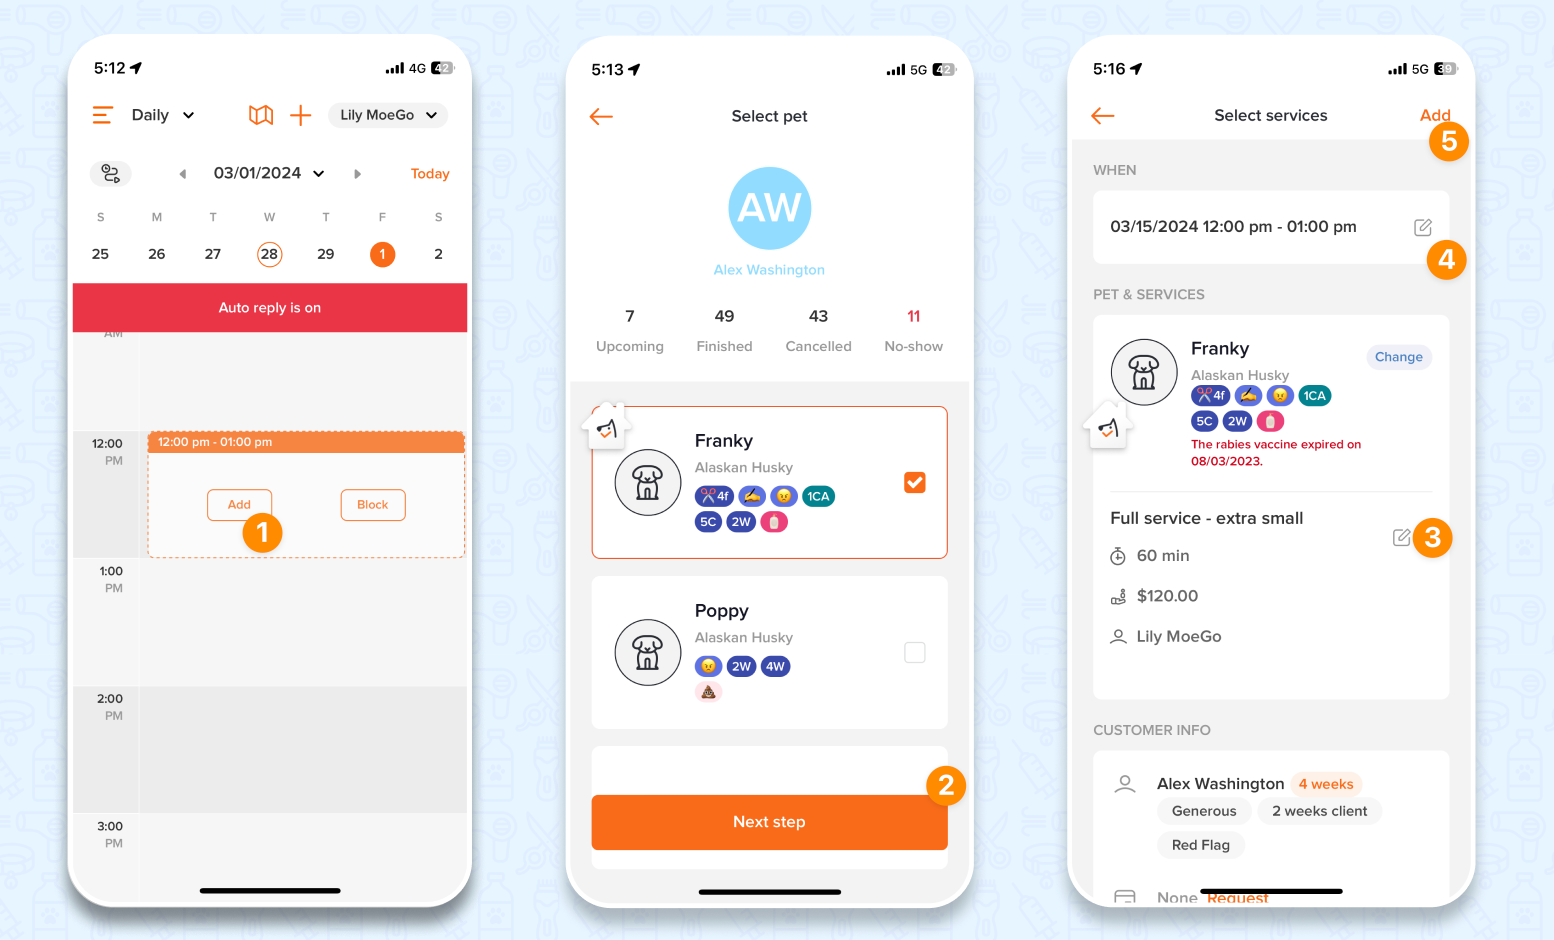
Select Time - from the Calendar
- Select <Appointment> from the side-menu
- Tap on an available slot on the calendar and select <Add>
- Select from the available client list or add a new client
- Select one or more pet(s) and click <Next step>
- Click <Select service> to choose a service or multiple services and click <Add> for every pet
- Click <Add> at the top right corner to save the appointment
Select client - From client detail
- Select <Clients & pets> from the side-menu
- Search the client and select
- Tap <+New appointment>
- Select one or more pet(s) and click <Next step>
- Click <Select service> to choose a service or multiple services and click <Add> for every pet
- Click <Add service time> to either < Select date> manually to use <Smart Scheduling> to aid you in finding a suitable time
- Click <Add> at the top right corner to save the appointment

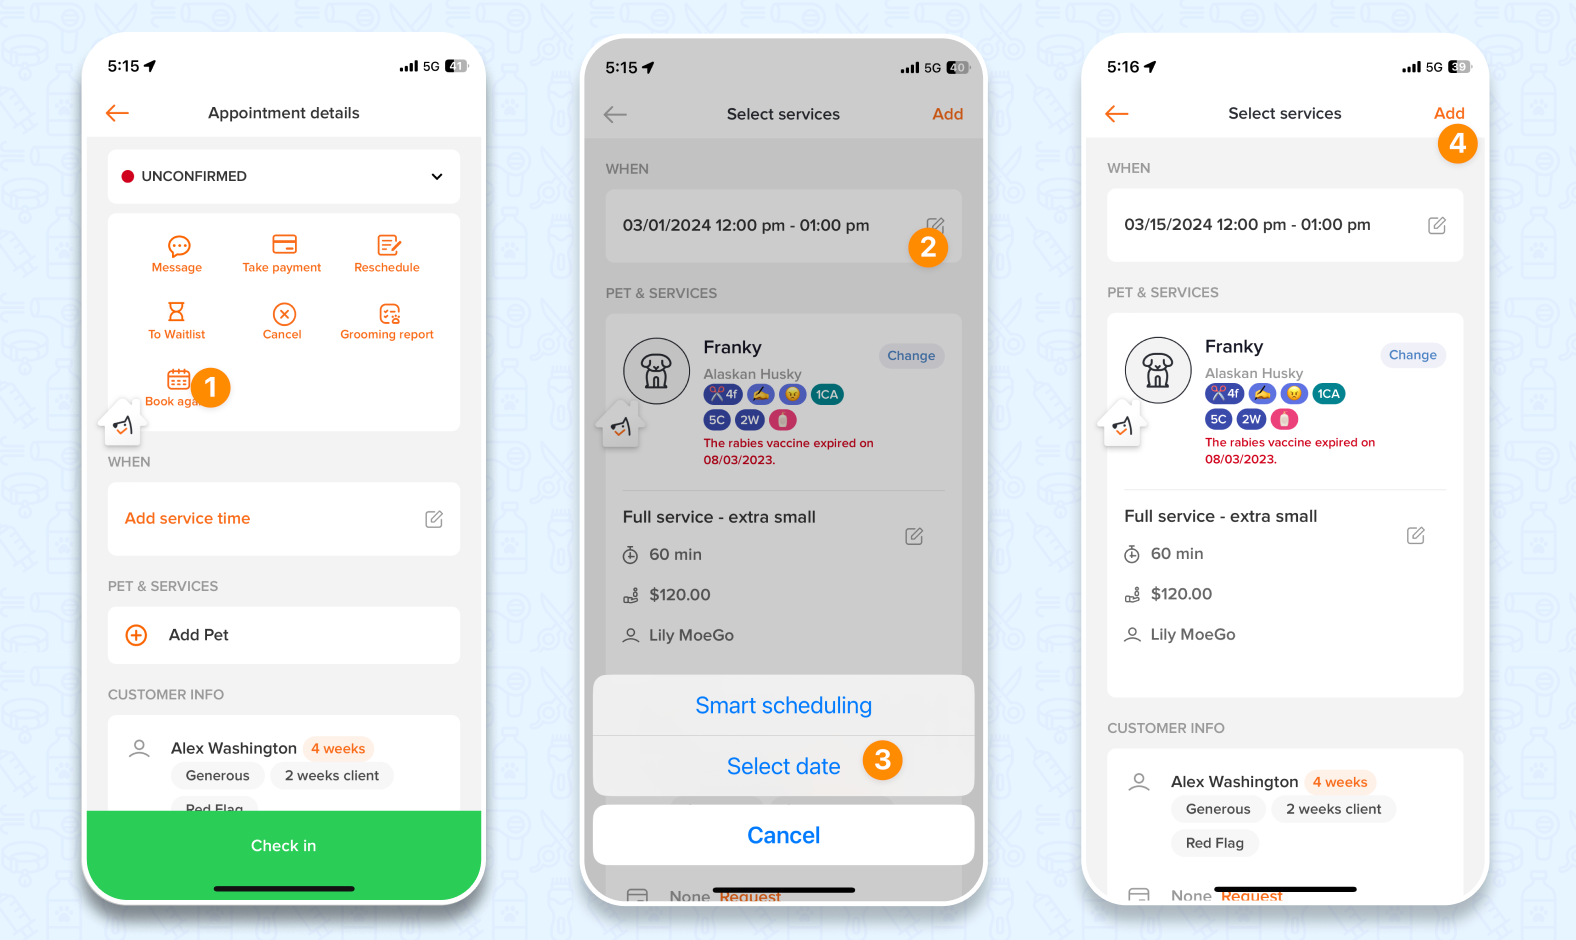
Book Again - From Appointment Detail
- Select an existing appointment from the calendar or client's appointment list
- Click <Book Again> to book the exact same time and service for this client
- Click <Edit button> to either < Select date> manually to use <Smart Scheduling> to aid you in finding a suitable time
- Click <Add> at the top right corner to save the appointment
💡 When there are conflicts with the existing appointment, there will be a conflict notice before you save the appointment.
💡 If the staff is not scheduled to work at the time, there will be a non-working time notice before you save the appointment.
Appointment colors
Before saving the appointment, you can add a custom color code to the appointment at the bottom of the select service page.