
Manage customer attendance by sending them confirmation reminders and edit appointment status
🖥️ Desktop:
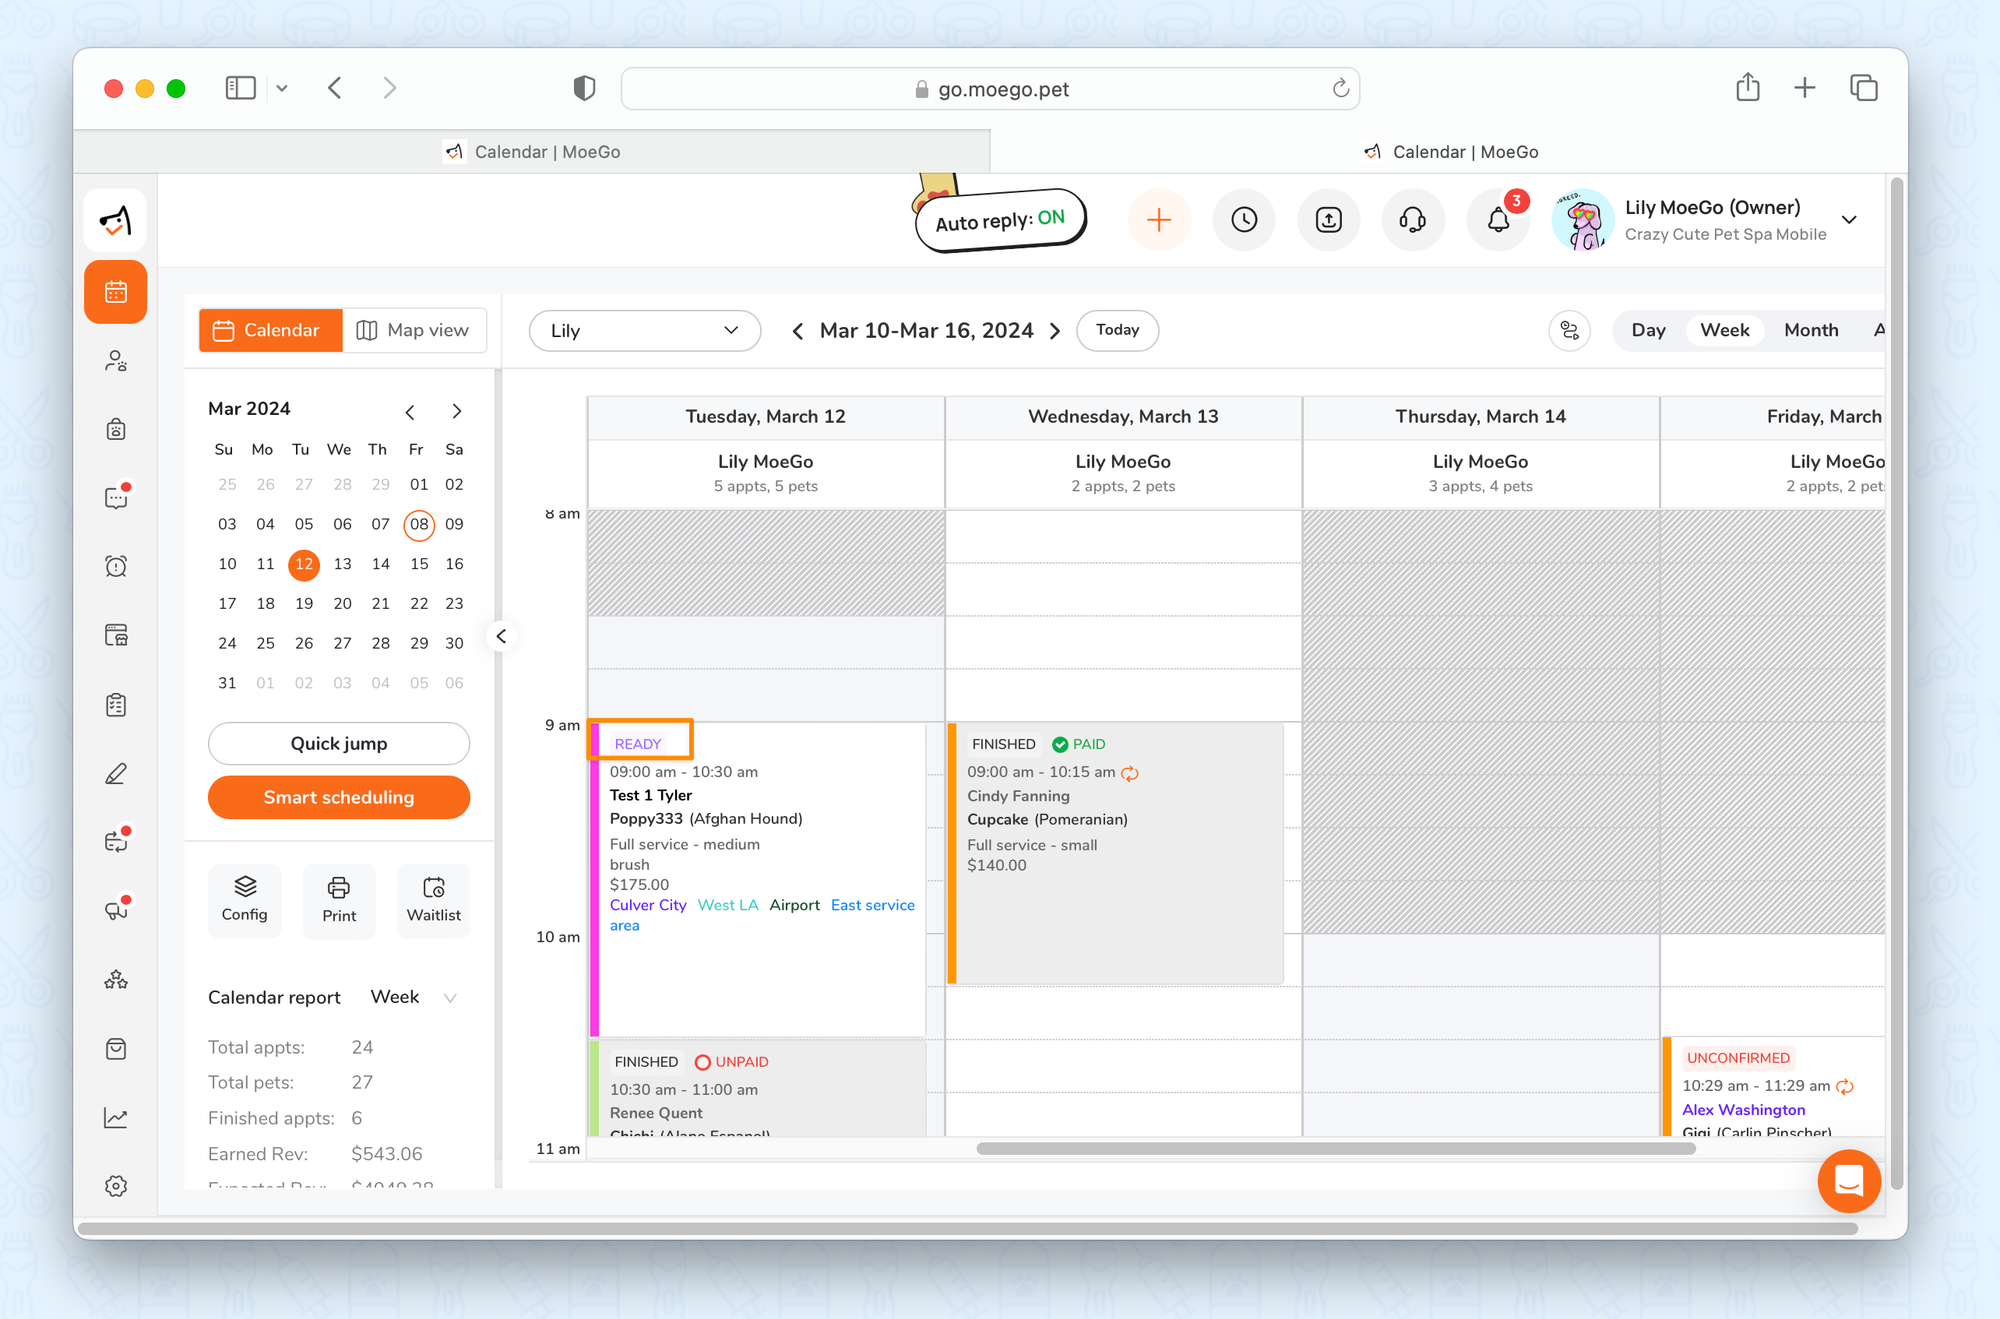
Confirm
You can confirm an appointment automatically or manually
1️⃣ Automatically:
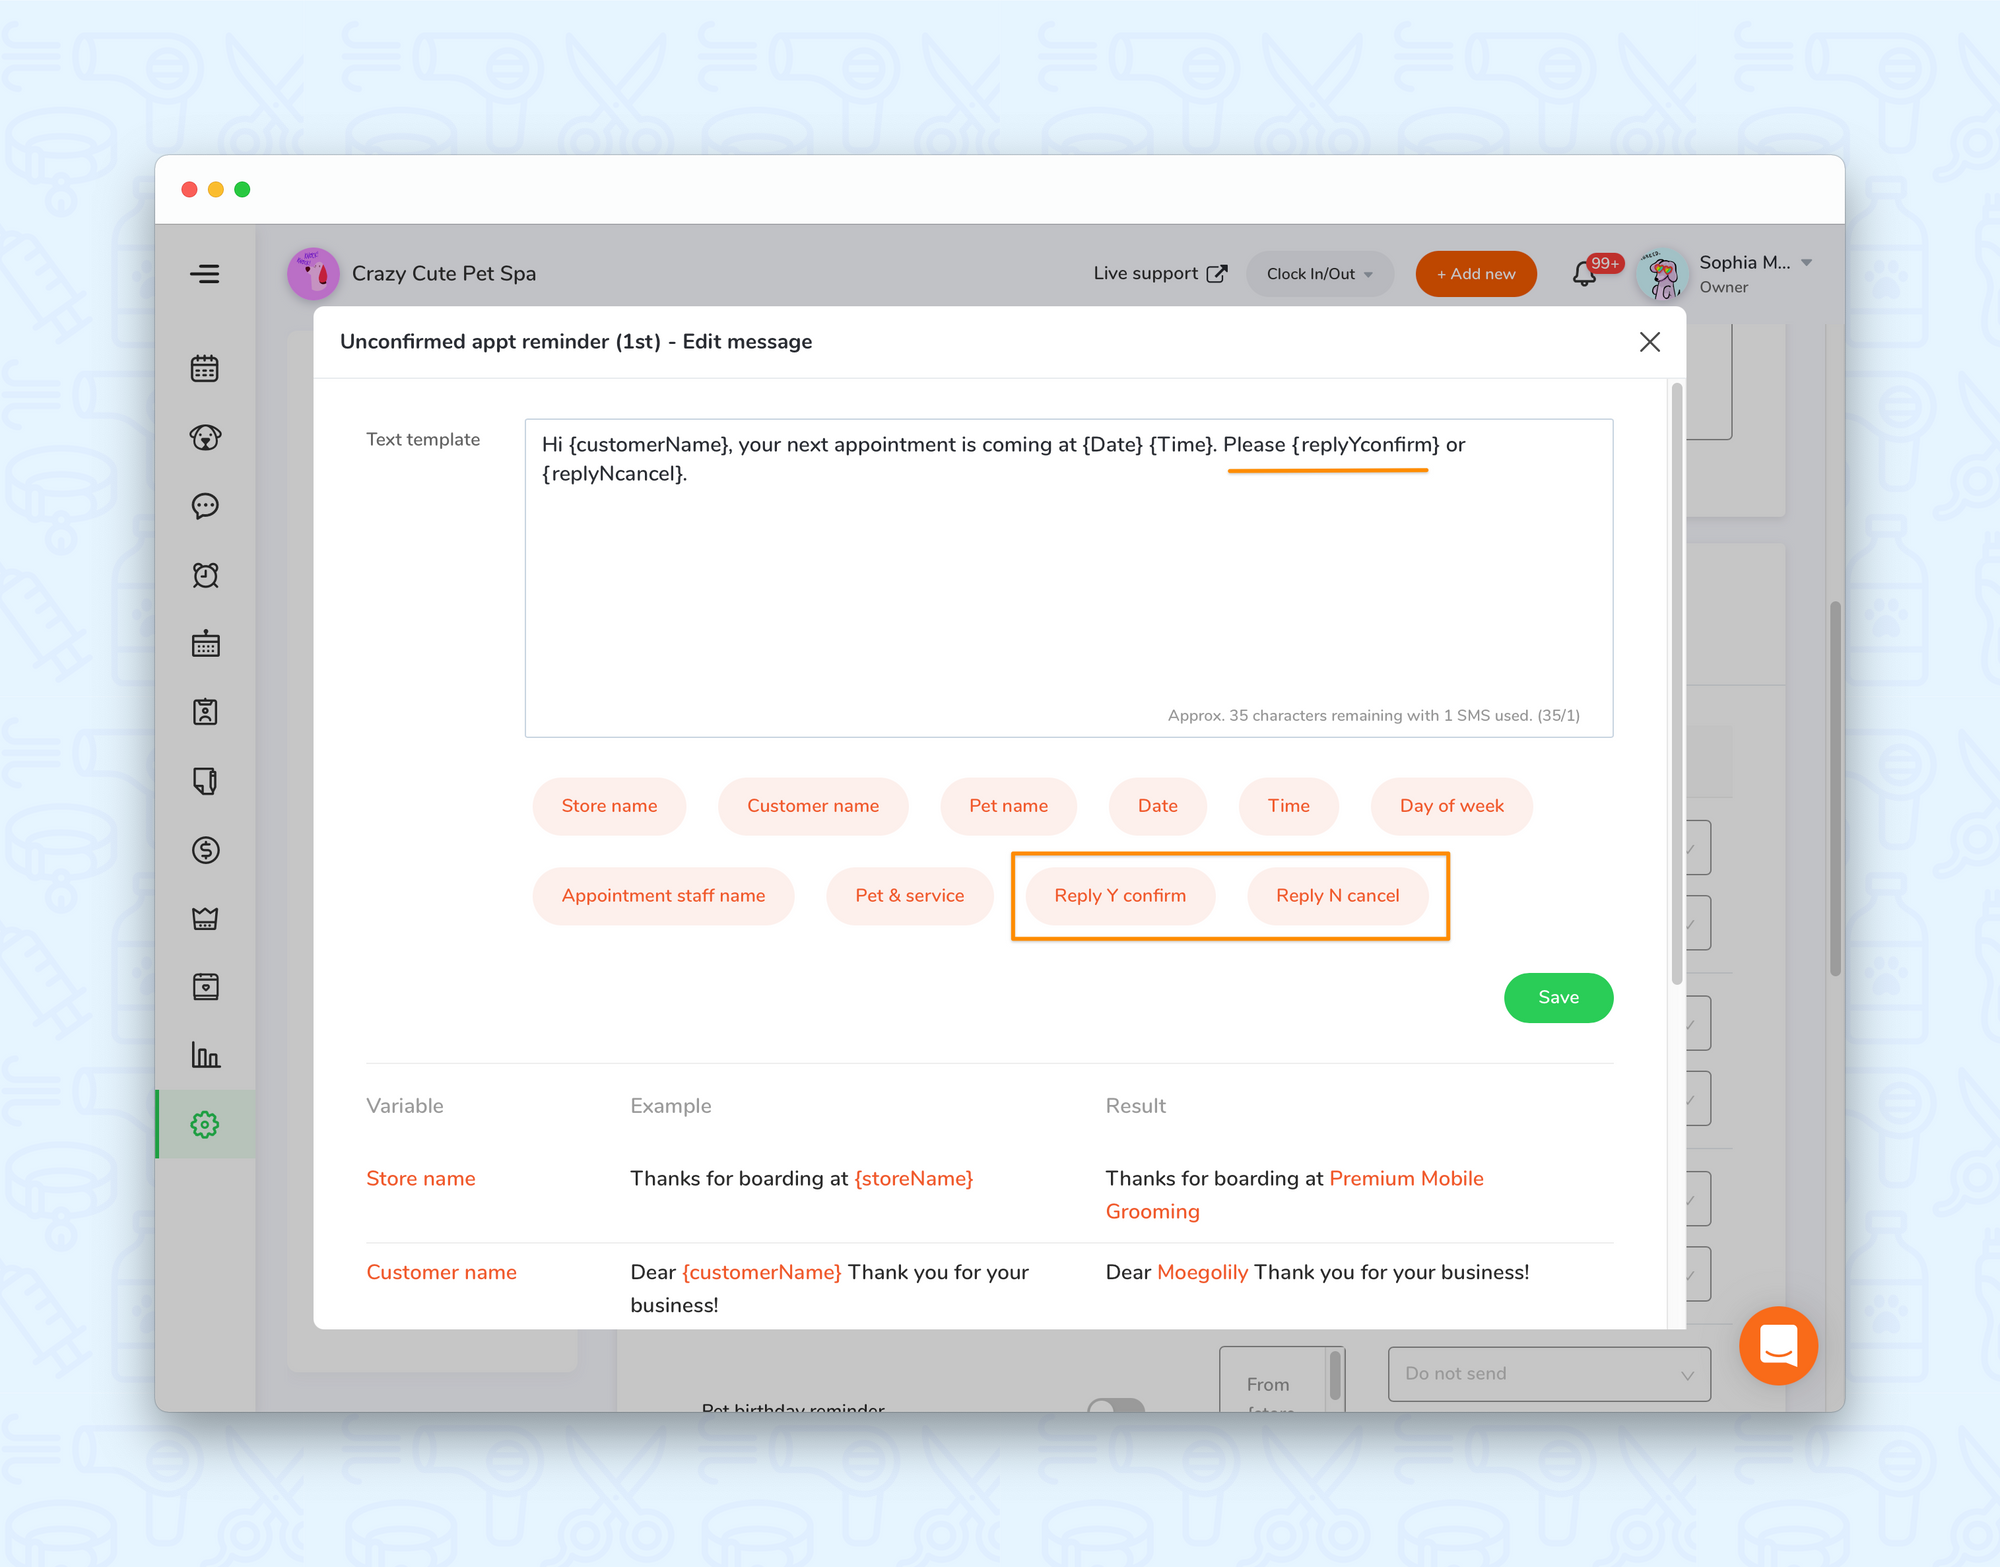
- Go to <Setting>
- Click <Auto message>
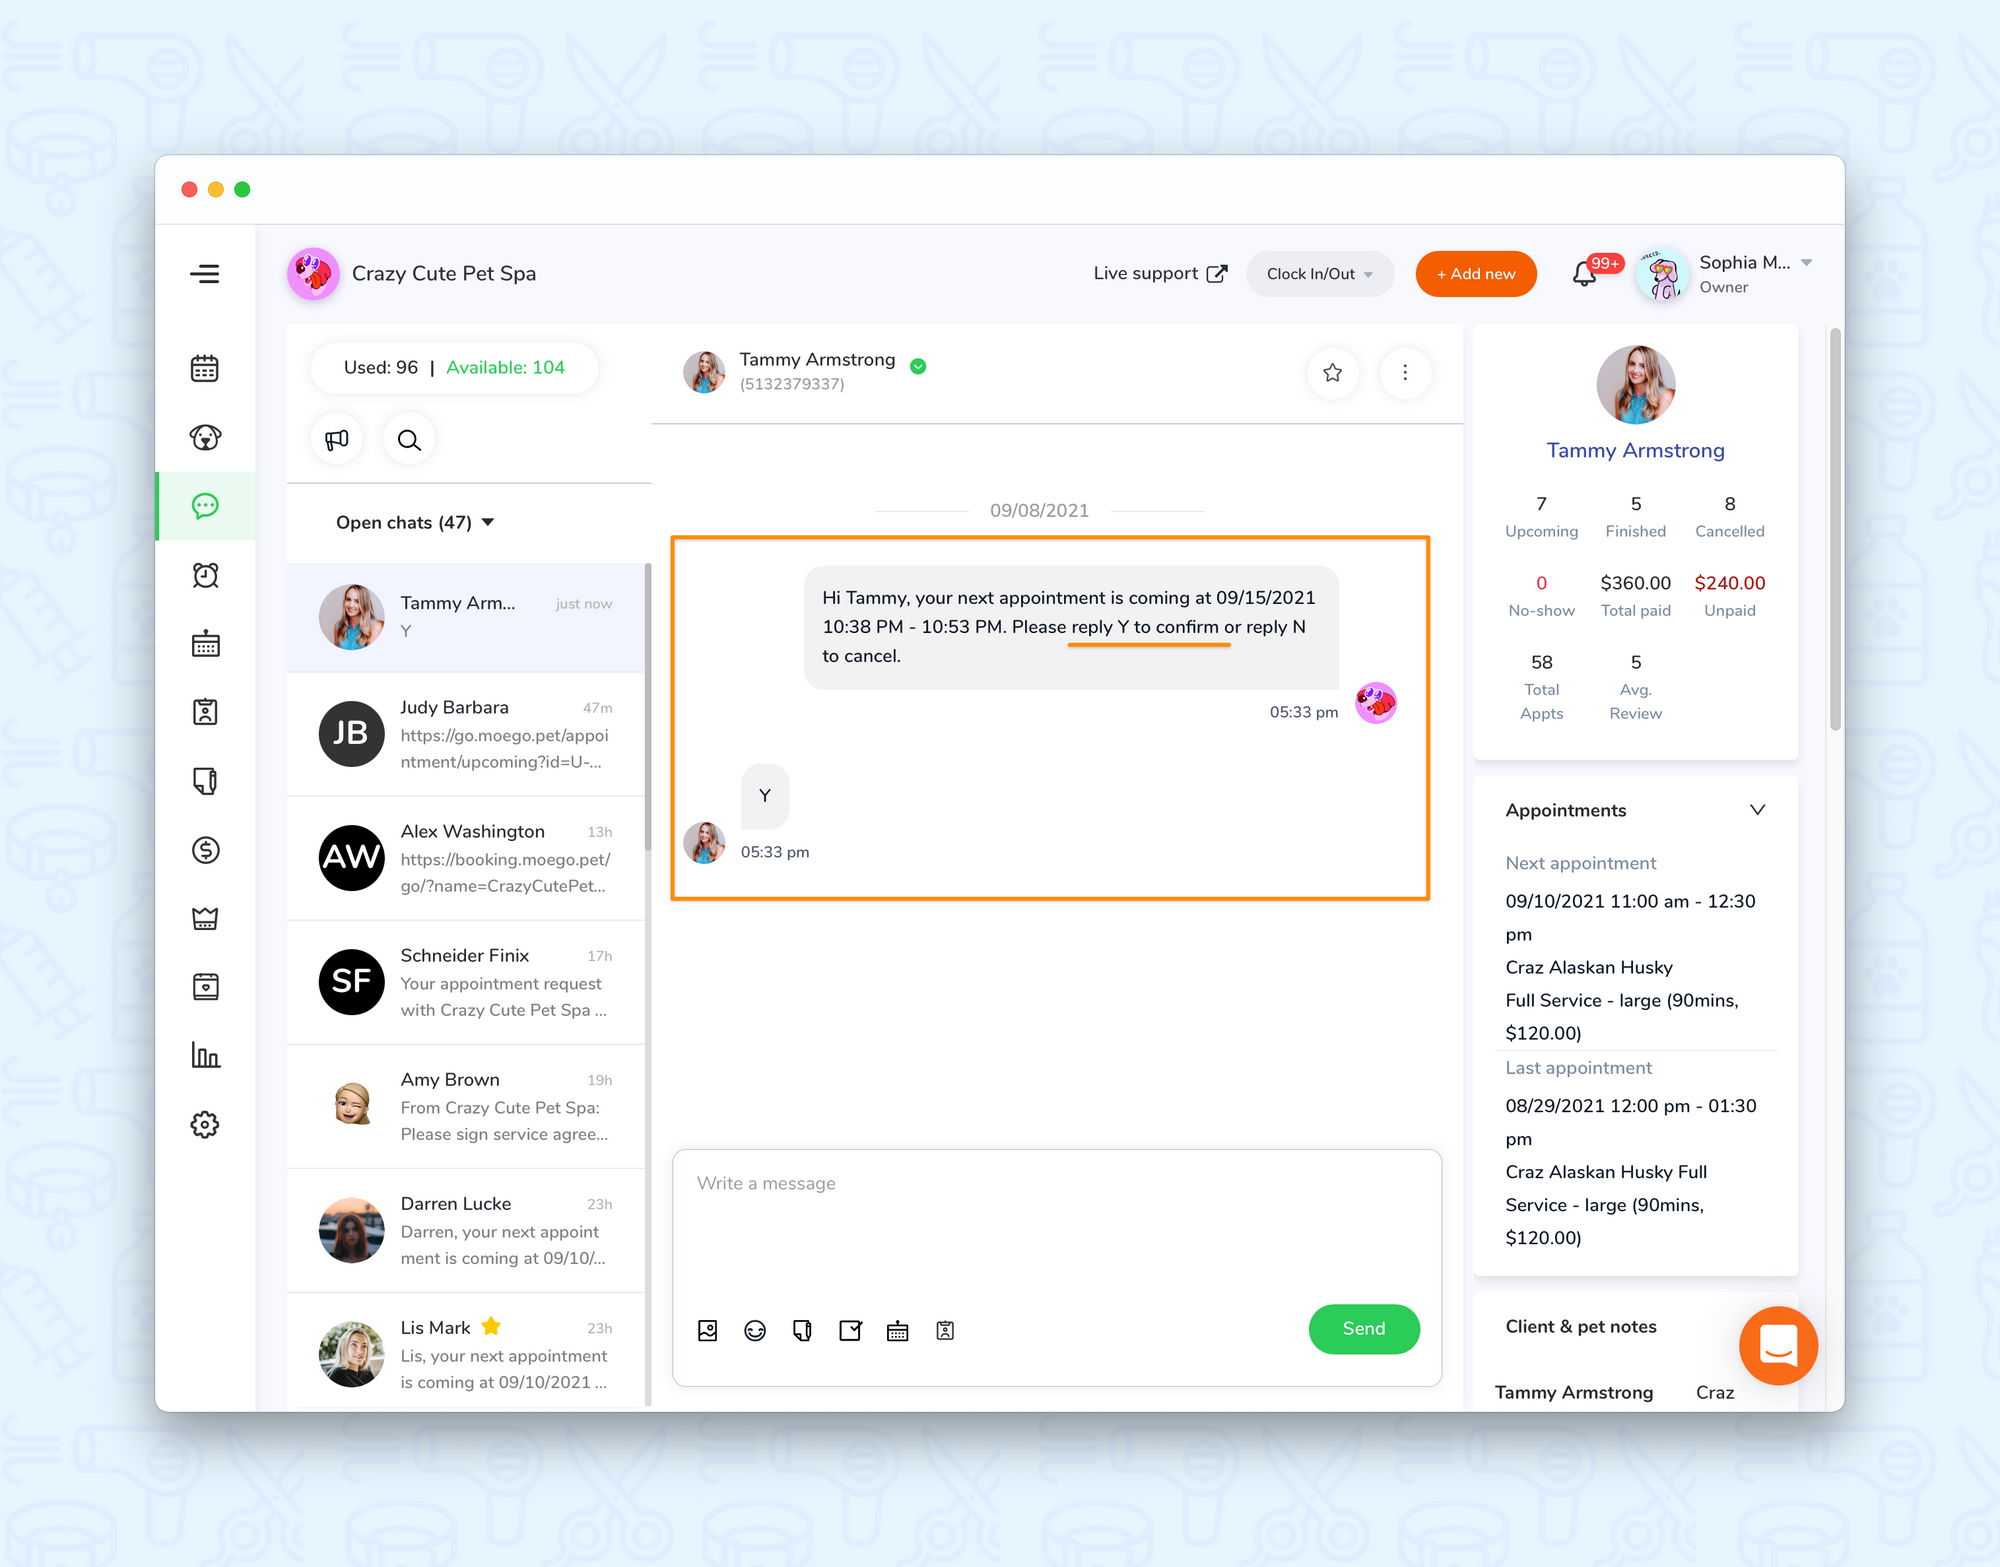
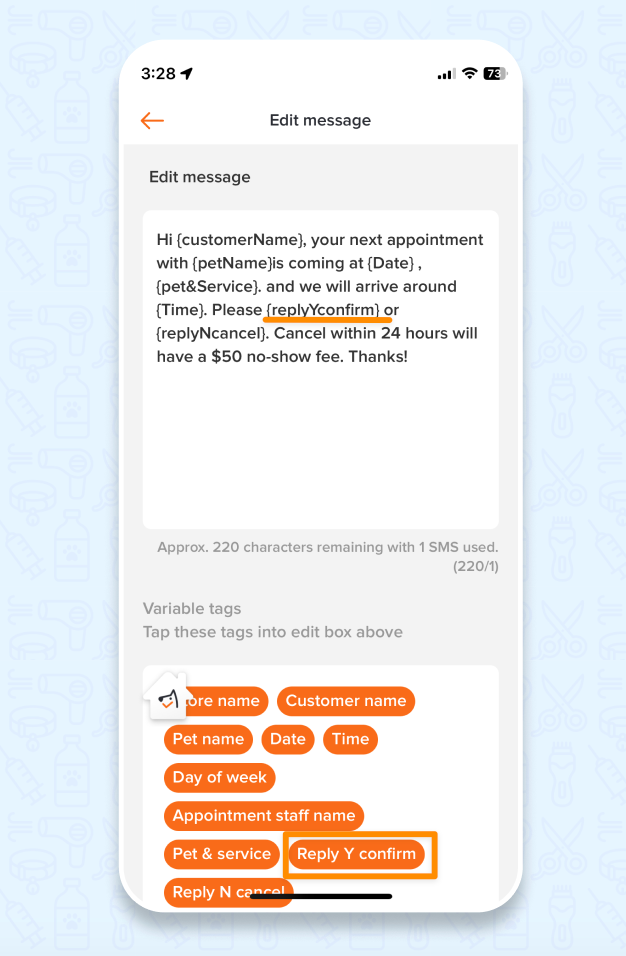
- Edit unconfirmed appt reminder (1st and 2nd) to include <Reply Y Confirm> tag
- If the customer replies to the reminder with a "Y", the appointment status will automatically be changed to "confirmed"
Further reading: Detailed explanation on unconfirmed appt reminder
2️⃣ Manually:
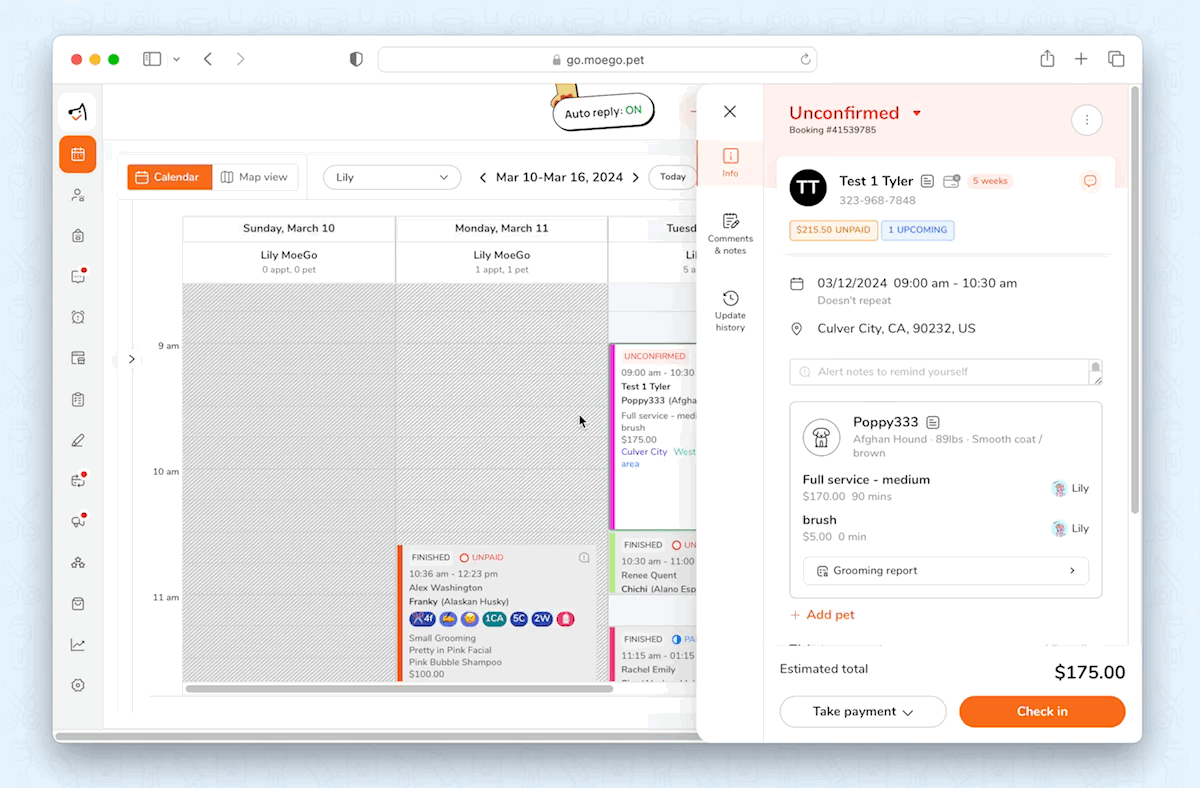
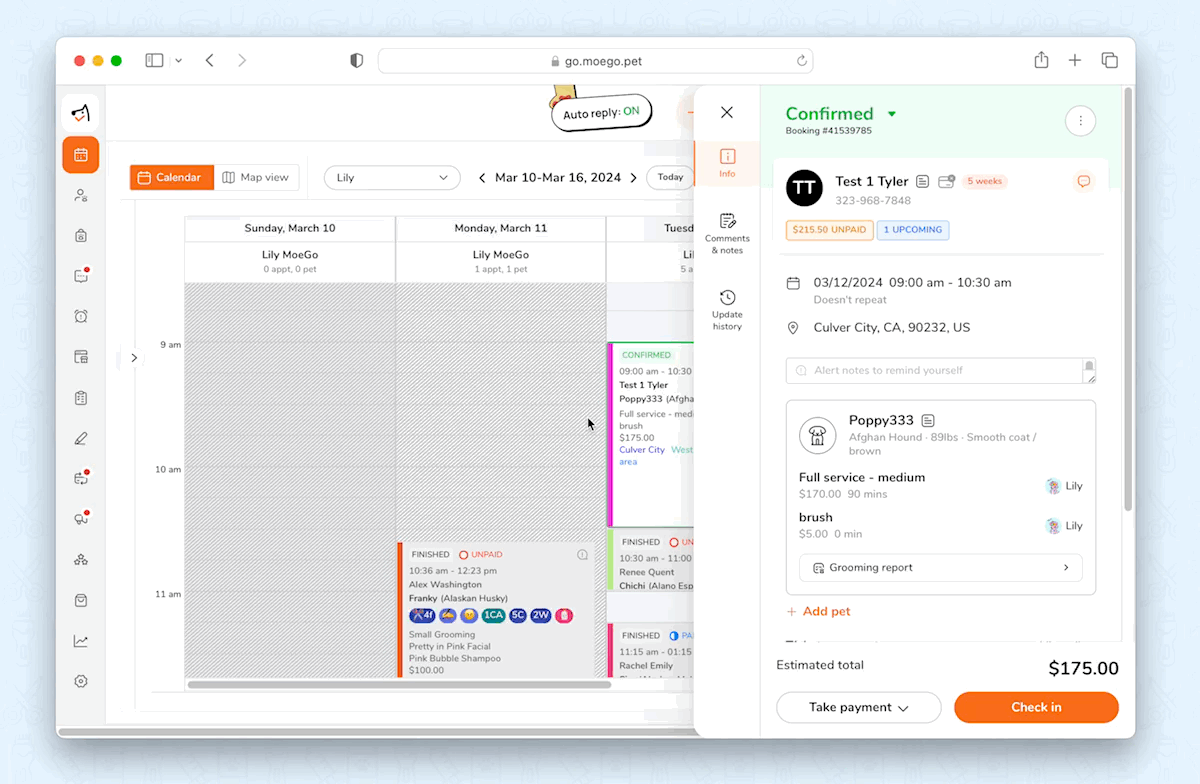
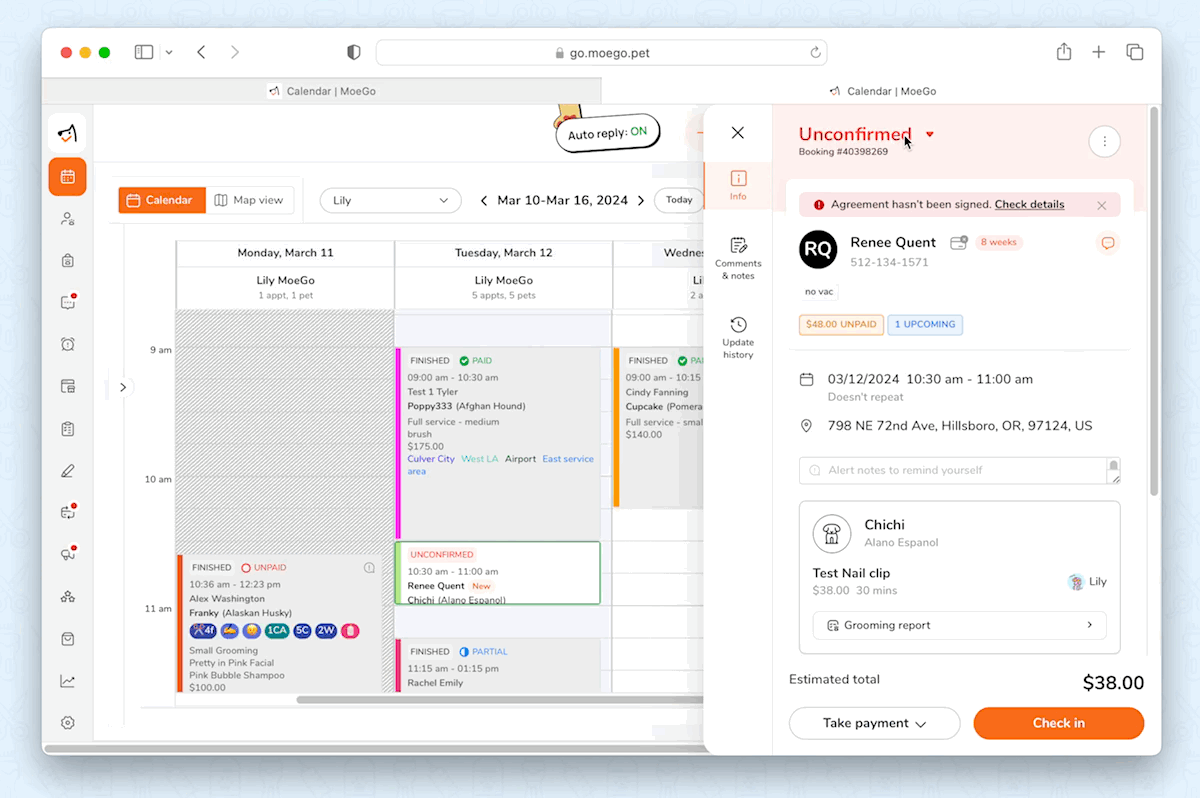
- Go to <Appointment> and click on an unconfirmed appointment
- Click the drop-down menu and choose <confirmed>. Undo it by choosing <unconfirmed>
Check-in & out, and marking ready
Check-in
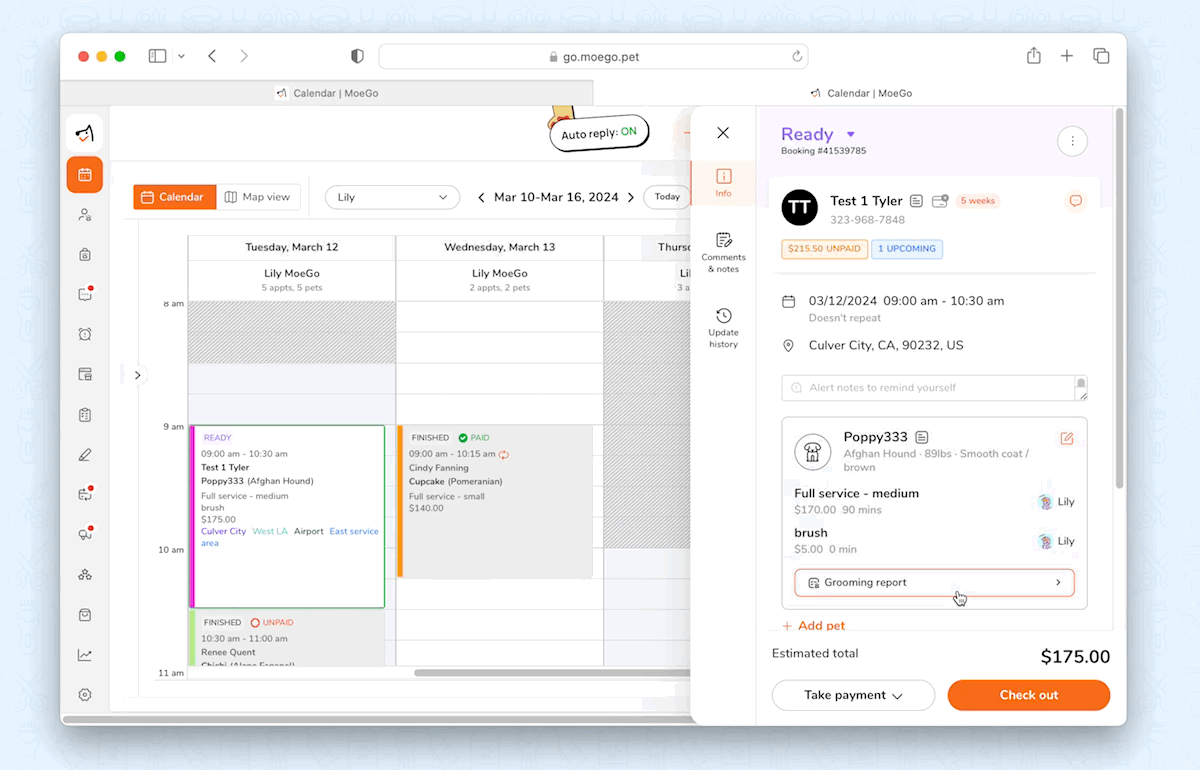
- Go to <Appointment> and click on an appointment that is not checked-in yet
- Enter an <Appointment detail> popup window
- Click the green <Check in> button to check in the appointment
Click the blue <Undo> icon to undo the check in
💡 Checking in an unconfirmed appointment will automatically confirm the it
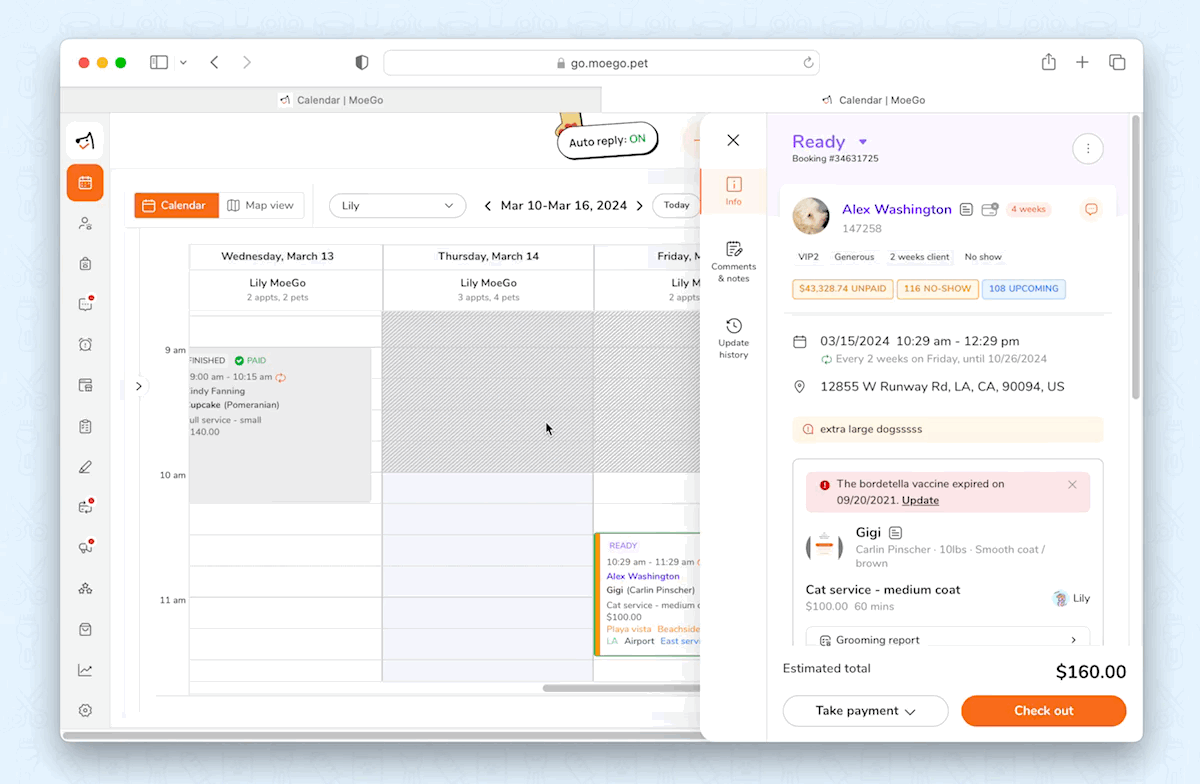
Marking an appointment as Ready
After checking in, when the appointment is ready and you want to notify the pet parents to pick them up, you can turn the appointment status into 'Ready’ and automatically send pickup notifications.
- Go to <Appointment> and find the appointment that is already checked in
- Click <Mark as ready> to change the appointment to the ready status
- Check the option to <send ready to pickup message> if you prefer, depending on your auto message and email settings for this client you will be able to send SMS or Email
- Click <Confirm>

The Status of the appointment will be shown as Ready in the calendar view
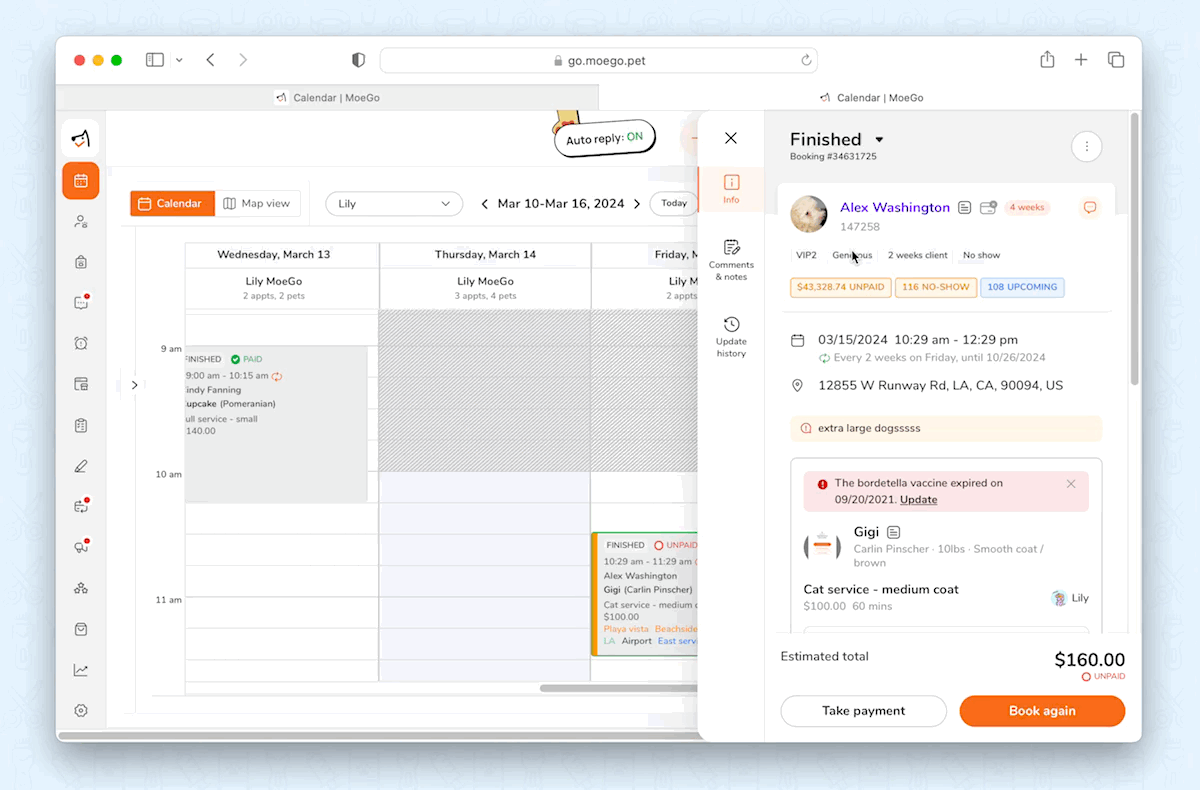
Check out
After marking appointment as ready
- Click the <Check out> button
- Click <Confirm>
- Take payment or exit, existing without marking payment will also mark the appointment as checked out and finished.
💡 Checking out will mark the appointment as finished.
💡It is possible to by-pass all previous steps to check out the appointment by clicking <Take payment> > <Take payment> to mark a full payment for the appointment to check out the appointment. Once full payment is collected, the appointment will be checked out automatically.
View and edit check-in & out time on invoice
- Hover on <3-dots> at the top right-hand corner of the appointment drawer
- Click <Edit check in/out time>
- View the times and/or edit, click <Confirm> to save the change
Set message receive method for Ready message
If the message-sending options didn't pop up, please go to the client profile and check your settings in Client details > Receive auto message > Receive auto email/message. By turning on these settings, you are able to send ready to pickup message to the pet parents through email or SMS.

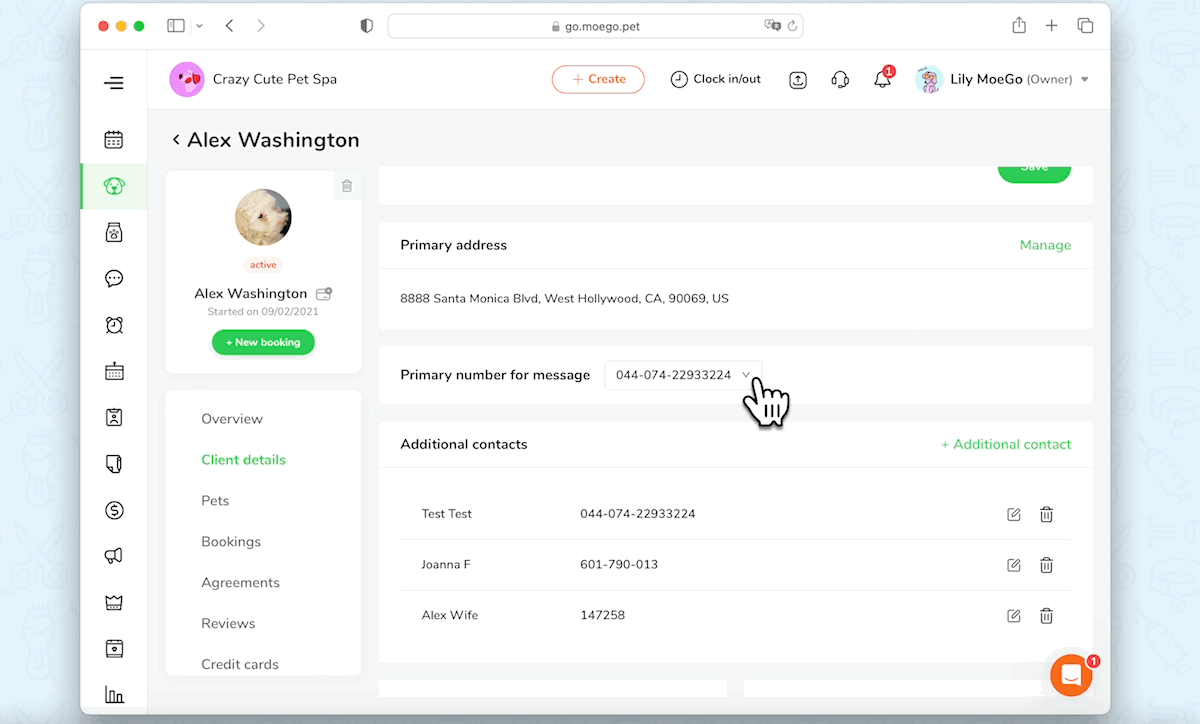
Set primary number for message
If the clients have more than one number on file. Go to Client's profile > Client details > Primary number for message. The ready to pick-up message will be sent to the primary number.
Undo the Ready Status
Hover on the Ready satus icon and click <Undo ready> button to undo the Ready status.
💡 By clicking the button, the status will be reversed, but the sent message/email will not be recalled
Cancel
- Go to <Appointments> and click on an appointment
- Hover over the status icon and select <Cancel>
- In the Appointment detail page, click <cancel>
- You can select <no-show> or <cancel appointment> before you confirm
💡 You may be requested to send an appointment cancelled message/email, depending on your auto message/email settings
📱 App:
Confirm
Same as on the desktop version, you can confirm an appointment either manually or automatically
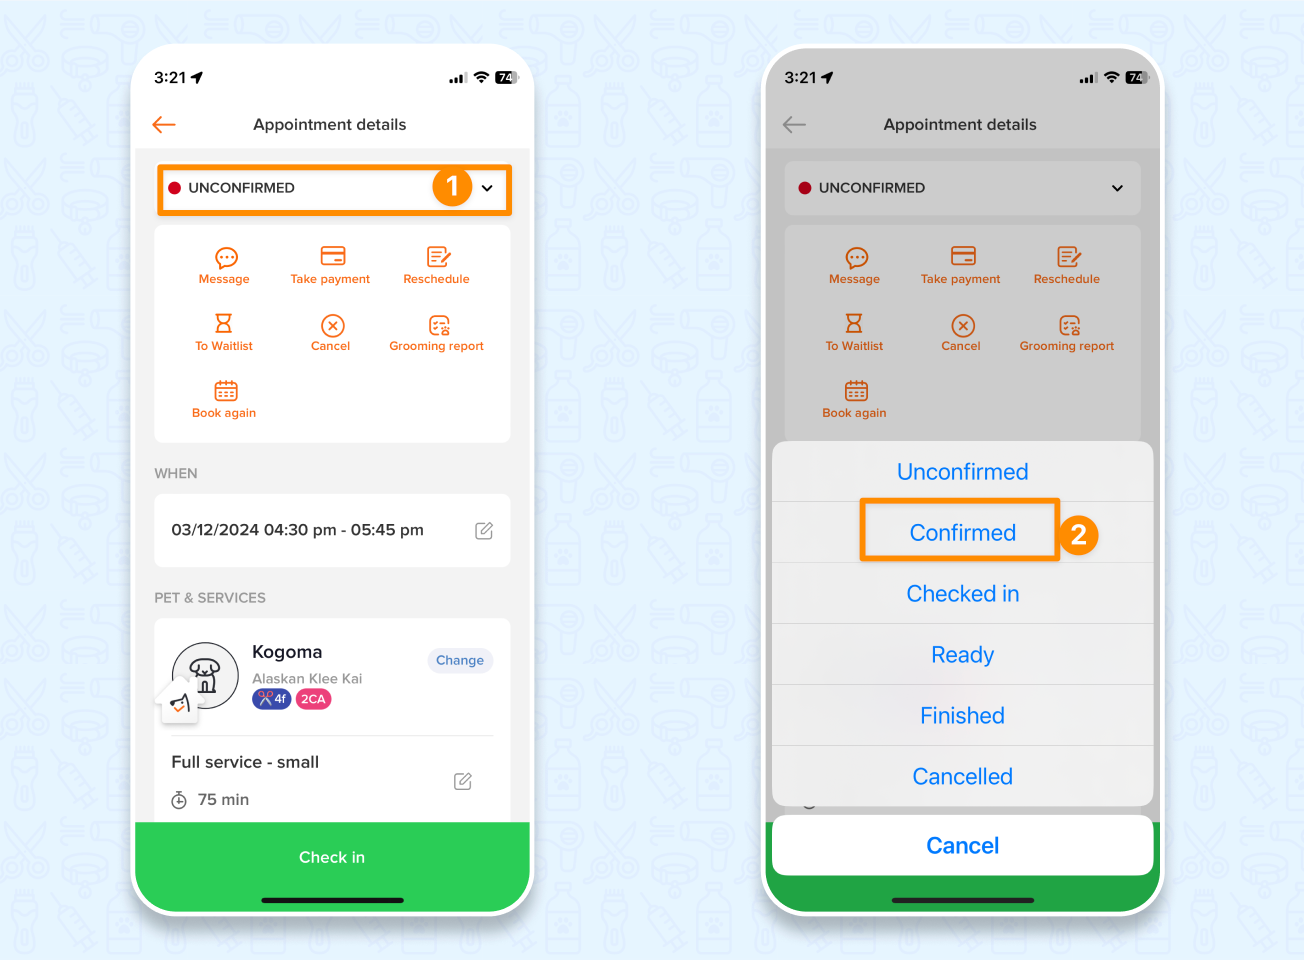
1️⃣ Manually
- Go to <Appointments> and select an appointment
- Select the <status bar> at the top
- Select <Confirmed> to update the status
2️⃣ Automatically
- Go to <Setting>
- Click <Auto reminder>
- Edit unconfirmed appt reminder (1st and 2nd) to include <Reply Y Confirm> tag
- If the customer replies to the reminder with a "Y", the appointment status will automatically be changed to "confirmed"
Check-in & out
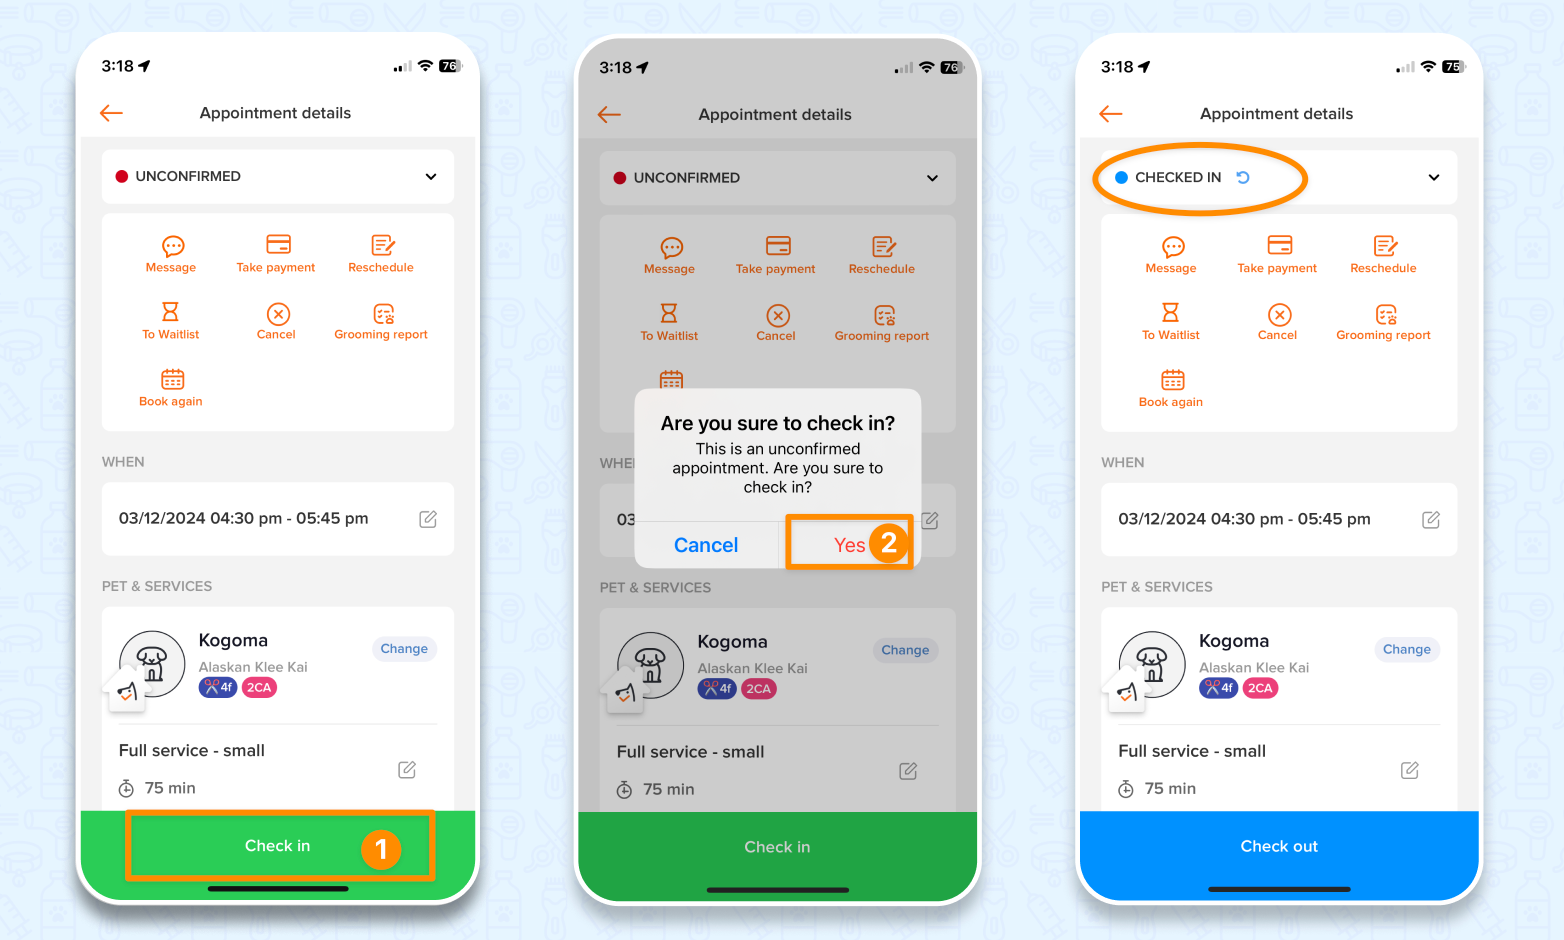
Check-in
- Go to <Appointments> and select the appointment
- Click the <Check in> at the bottom
- Click <Yes> to confirm
💡 Once checked-in, the status bar at the top will indicate <CHECKED IN>
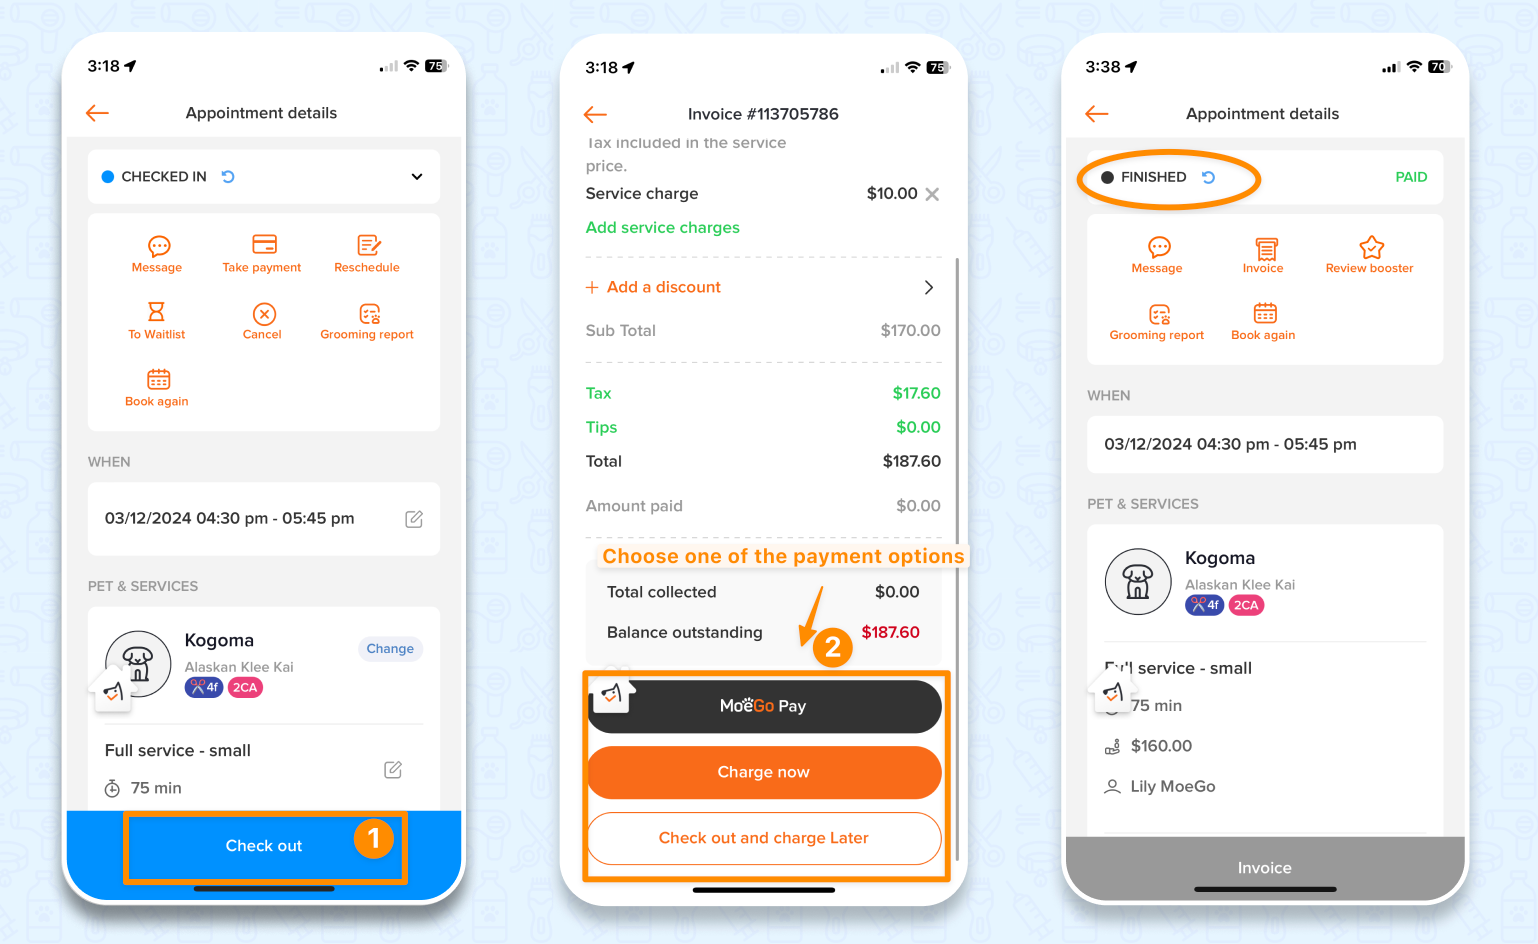
Check-out
- Go to <Appointments> and select the appointment
- Click the <Check out> at the bottom
- Choose one of the <payout options> to complete the checkout. You do not necessarily need to mark a payment to check out the appointment.
💡 Once checked-in, the status bar at the top will indicate <FINISHED>
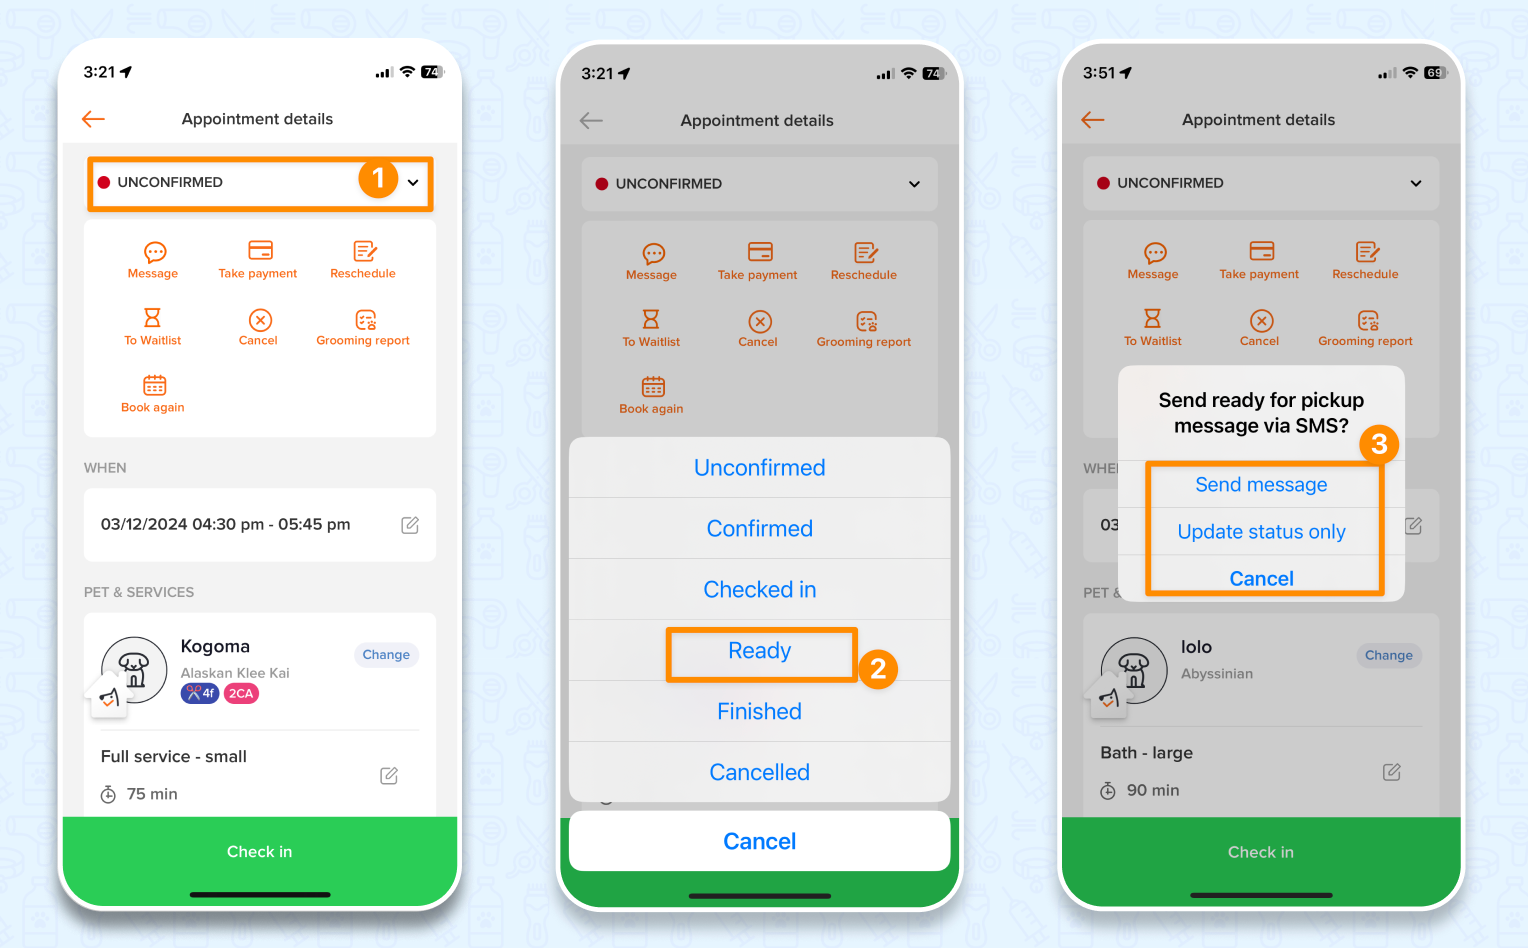
Marking an appointment as Ready
- Go to <Appointments> and select an appointment
- Select the <status bar> at the top
- Select <Ready>
- Select whether to <Send message> or <Update status only>
- On the app, you can only send Ready-for-pickup message via SMS and two-way messaging is required for your subscription plan.
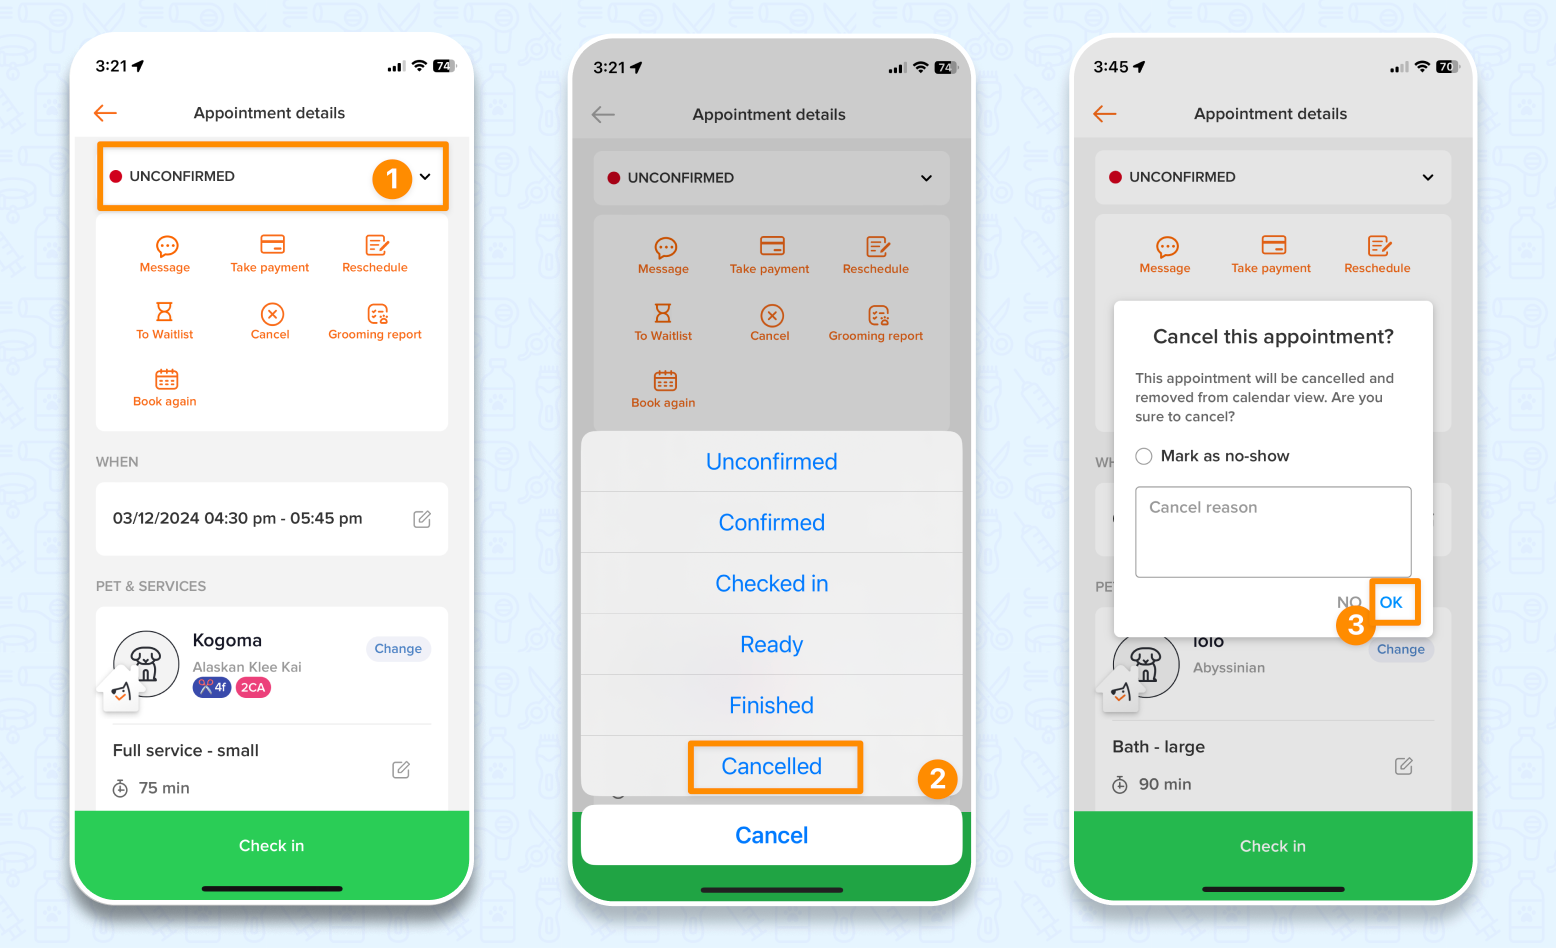
Cancel
- Go to <Appointments> and select an appointment
- Select the <status bar> at the top
- Select <Cancel>
- Optionally input a cancel reason and/or select <Mark as no-show>, tap <OK> to confirm
Frequently asked questions
Q: Can I cancel an appointment after it's been checked out?
A: Yes, you can cancel an appointment when it's at any status - paid or unpaid.
Q: I want to save time. Can I skip checking in and marking appointment as ready to check out the appointment right away?
A: Yes, you can click <Take payment> to mark a full payment for the appointment. This will automatically check out the appointment. You can also click the <Status bar> to change the status to <Finished> if you prefer not to mark a full payment.
Q: Do I have to confirm an appointment?
A: No, whether to confirm an appointment is completely optional. It will not affect how you deal with the appointment at later stages.