You can set different types of auto messages, reminders, and auto-replies to meet different circumstances.
Where to set up auto messages:
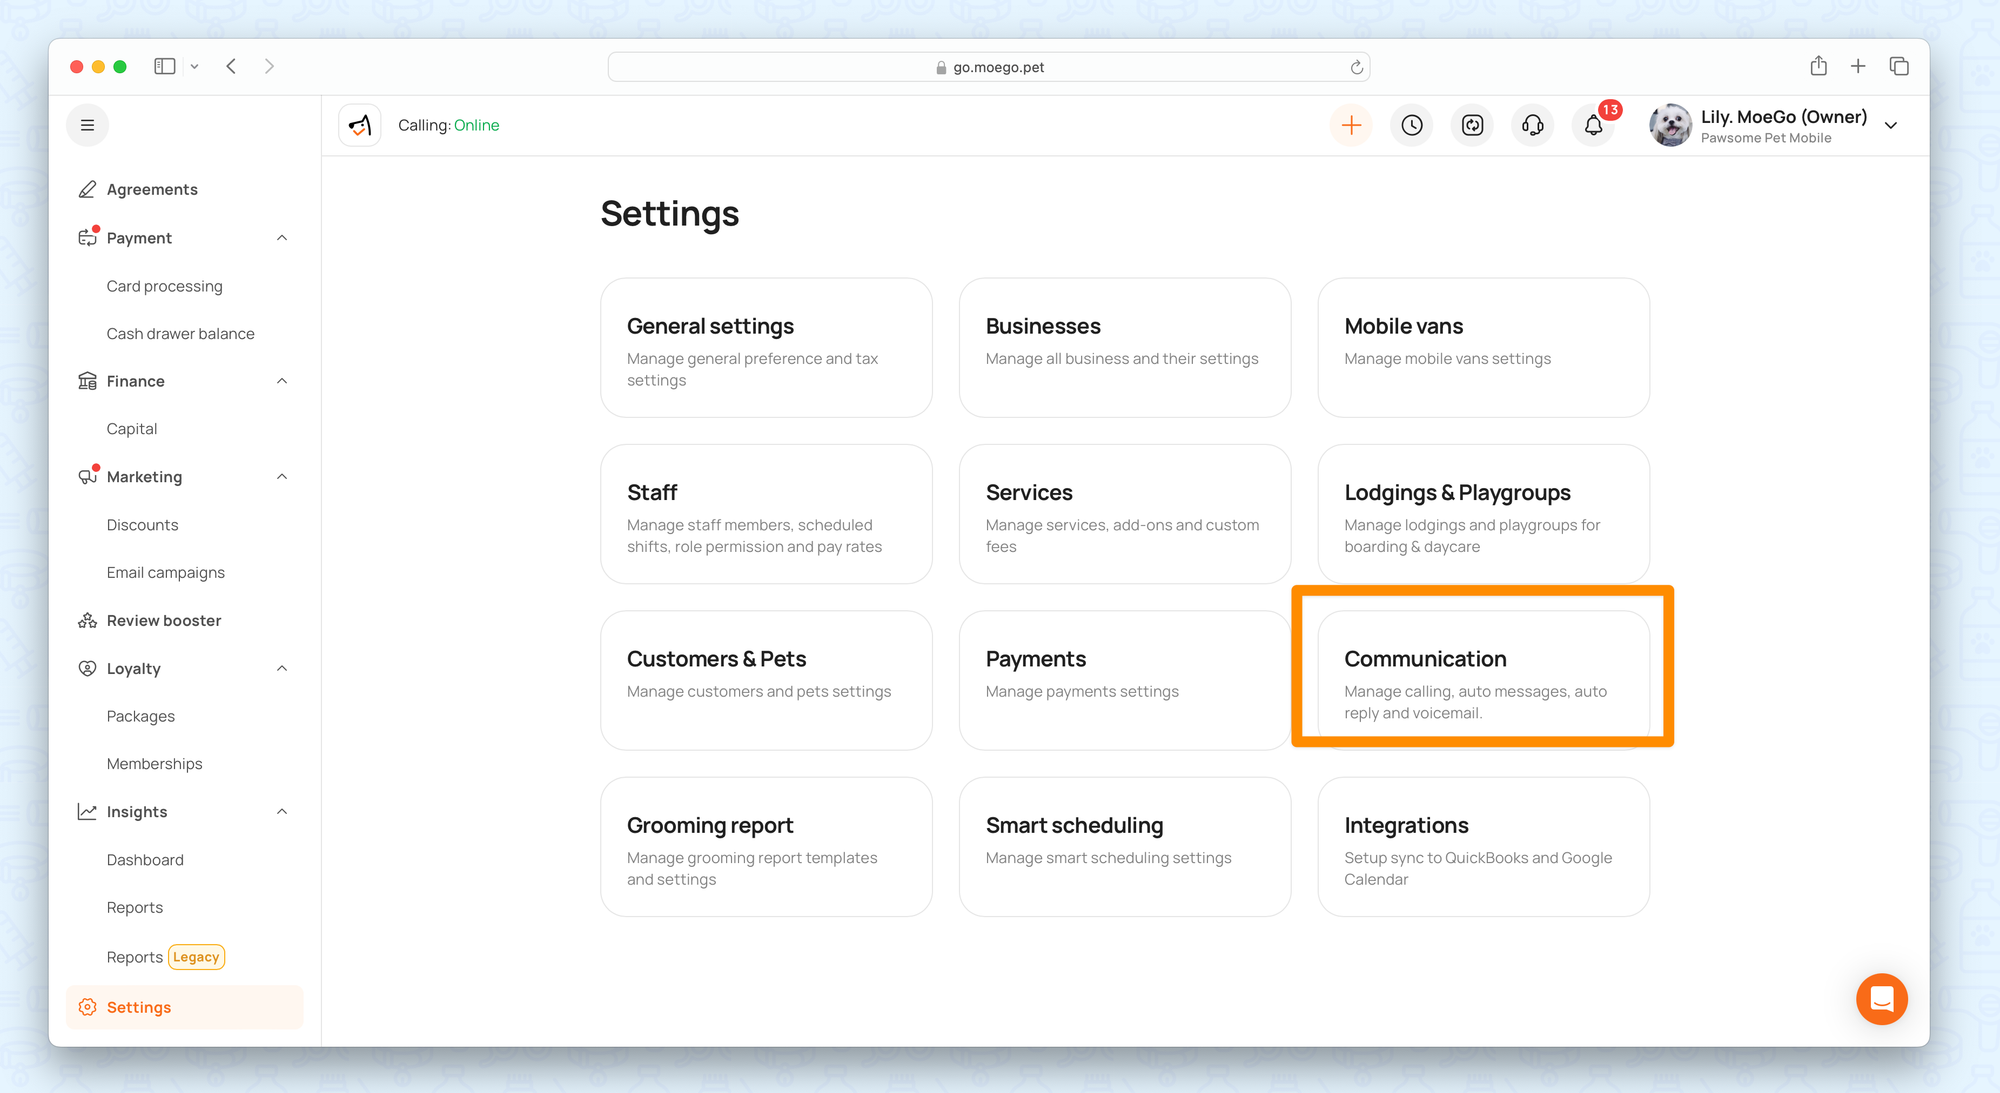
- Go to < Setting > on the side menu
- Click < Communication >
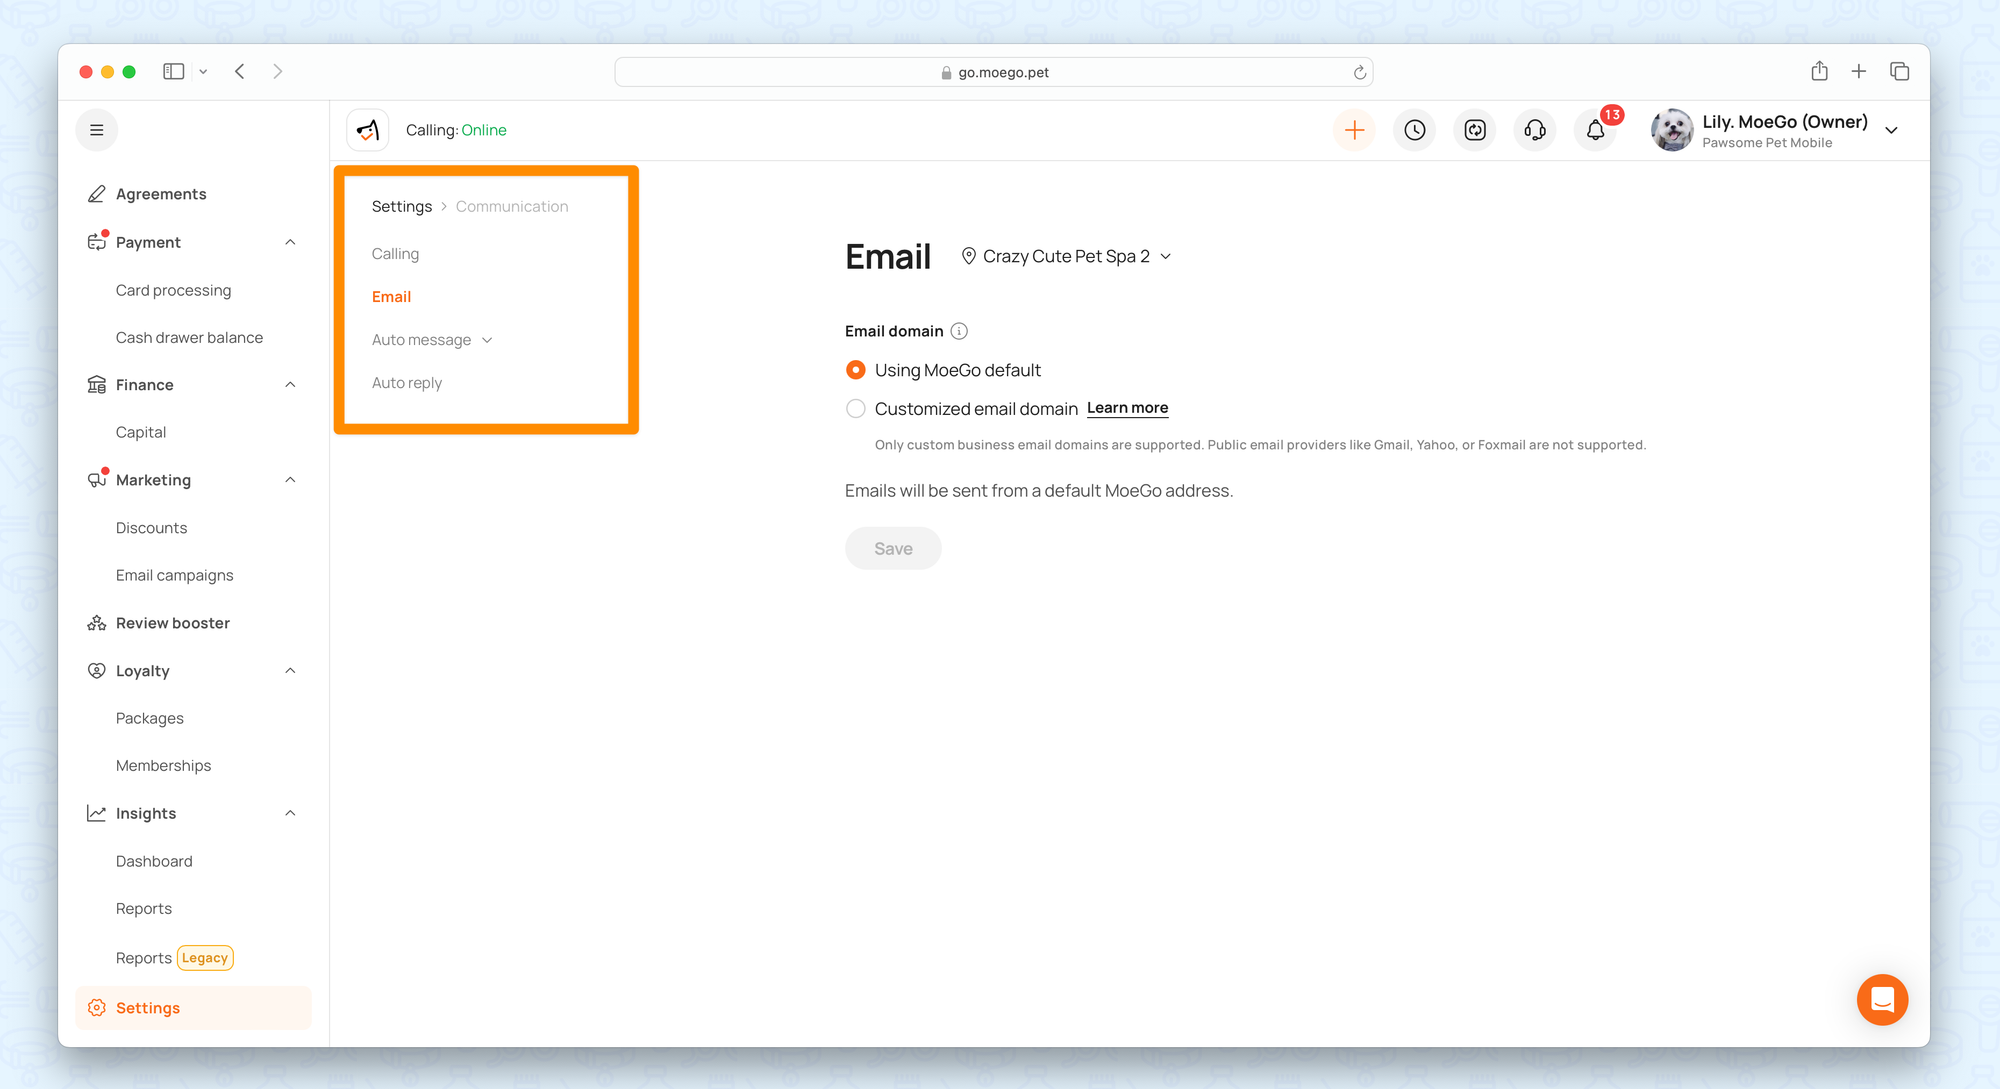
- In this section, you can set up all communication methods, while we will focus on messages on this page:
- Calling: On Closed Beta. Enrollment is now by invitation only.
- Email: To custom email domain, please see here for more details.
- Auto messages: Includes auto messages that will require your confirmation before the message is sent out for toggled-on events and auto messages that will automatically be sent out for toggled-on events.
- Reminders: Reminders will be sent automatically at the time you set up for selected events
- Auto reply: Once turned on, anyone who sends a message to you will get this reply at the set date and time.
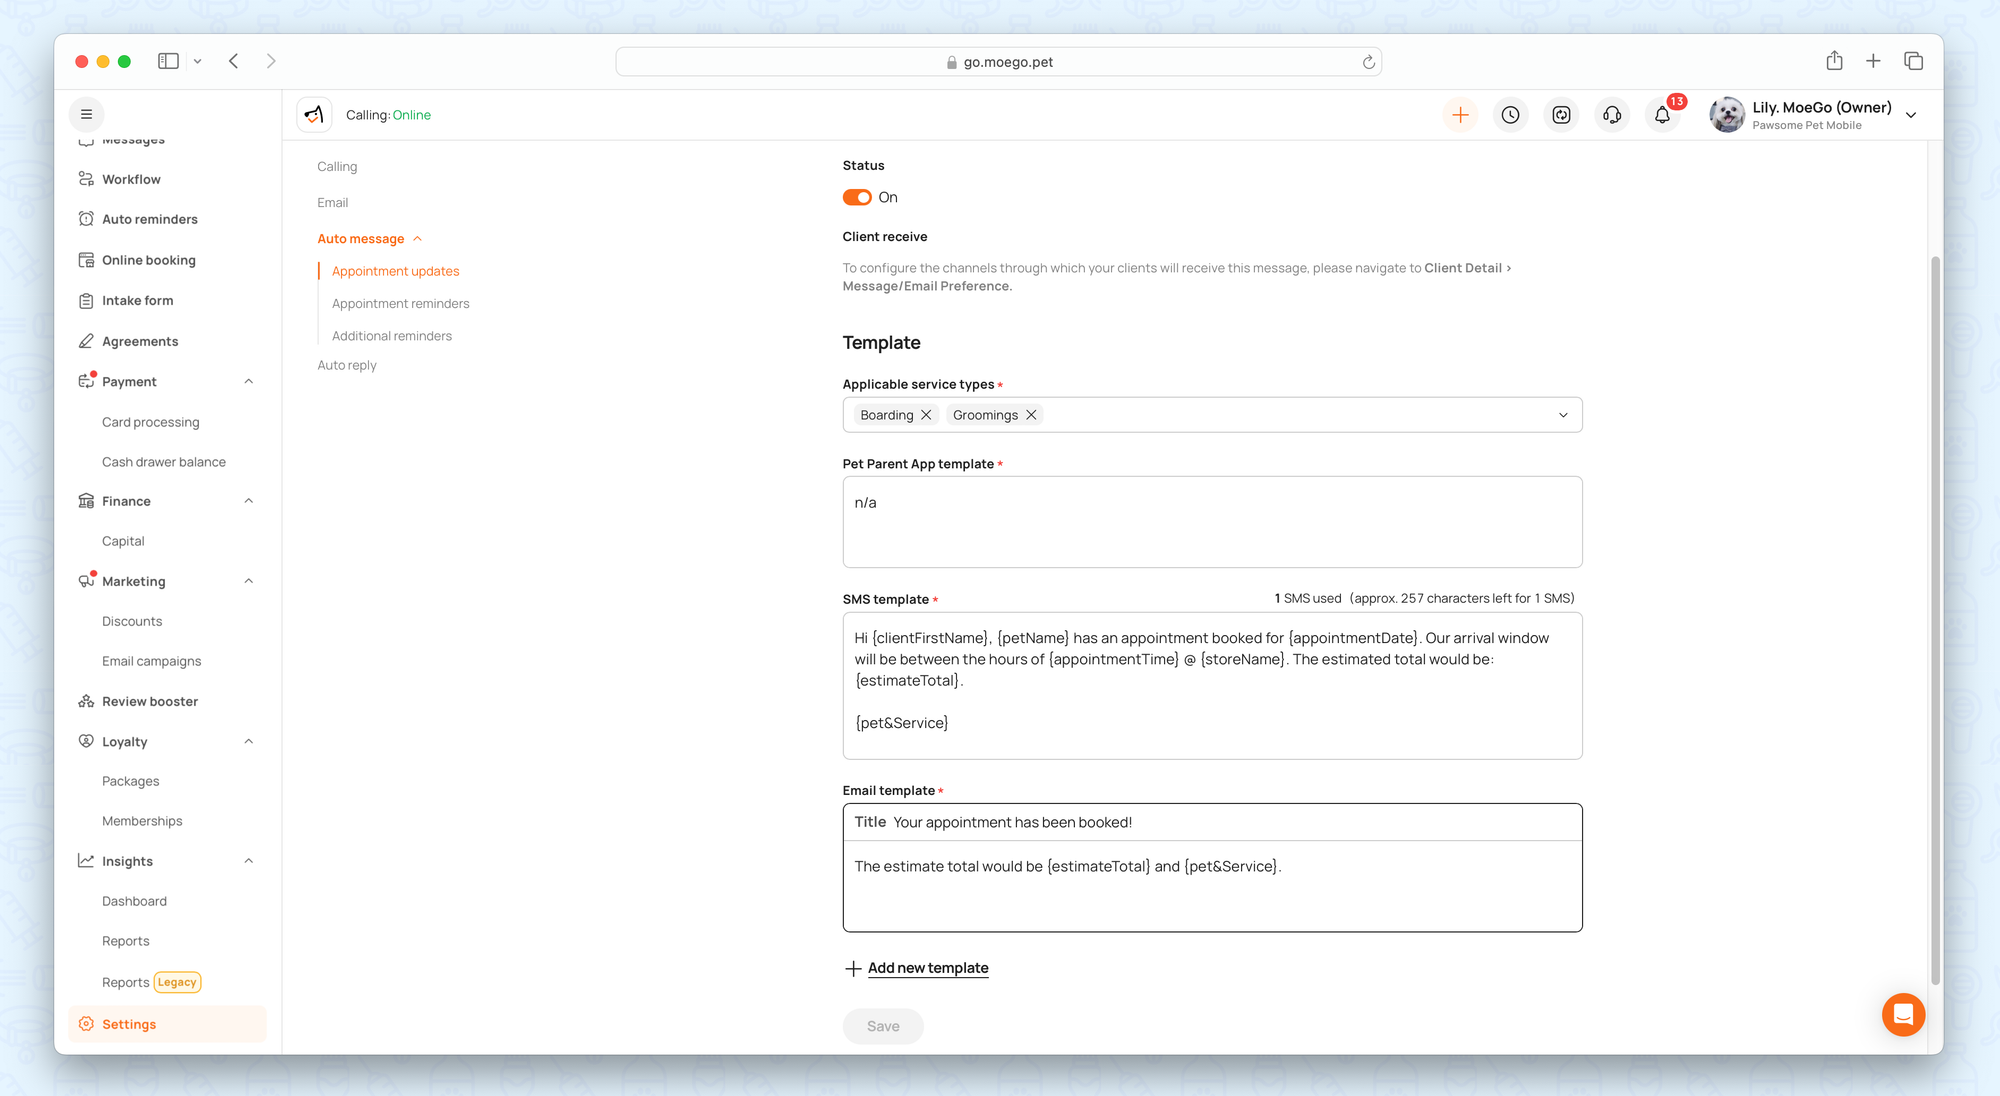
Set Up Appointment Updates
Auto messages are used to give your customers an update based on appointment status. It includes 3 types of update messages:
- Online Booking Requests
- Appointment
- Payments
To set them up:
- Click on a message to <edit> it
- Inside the Edit message page, <edit> the text template
- There are saved variables you can add to the template. For example, if you use the variable "customer name," then it will automatically become the customer's name in a sent message.
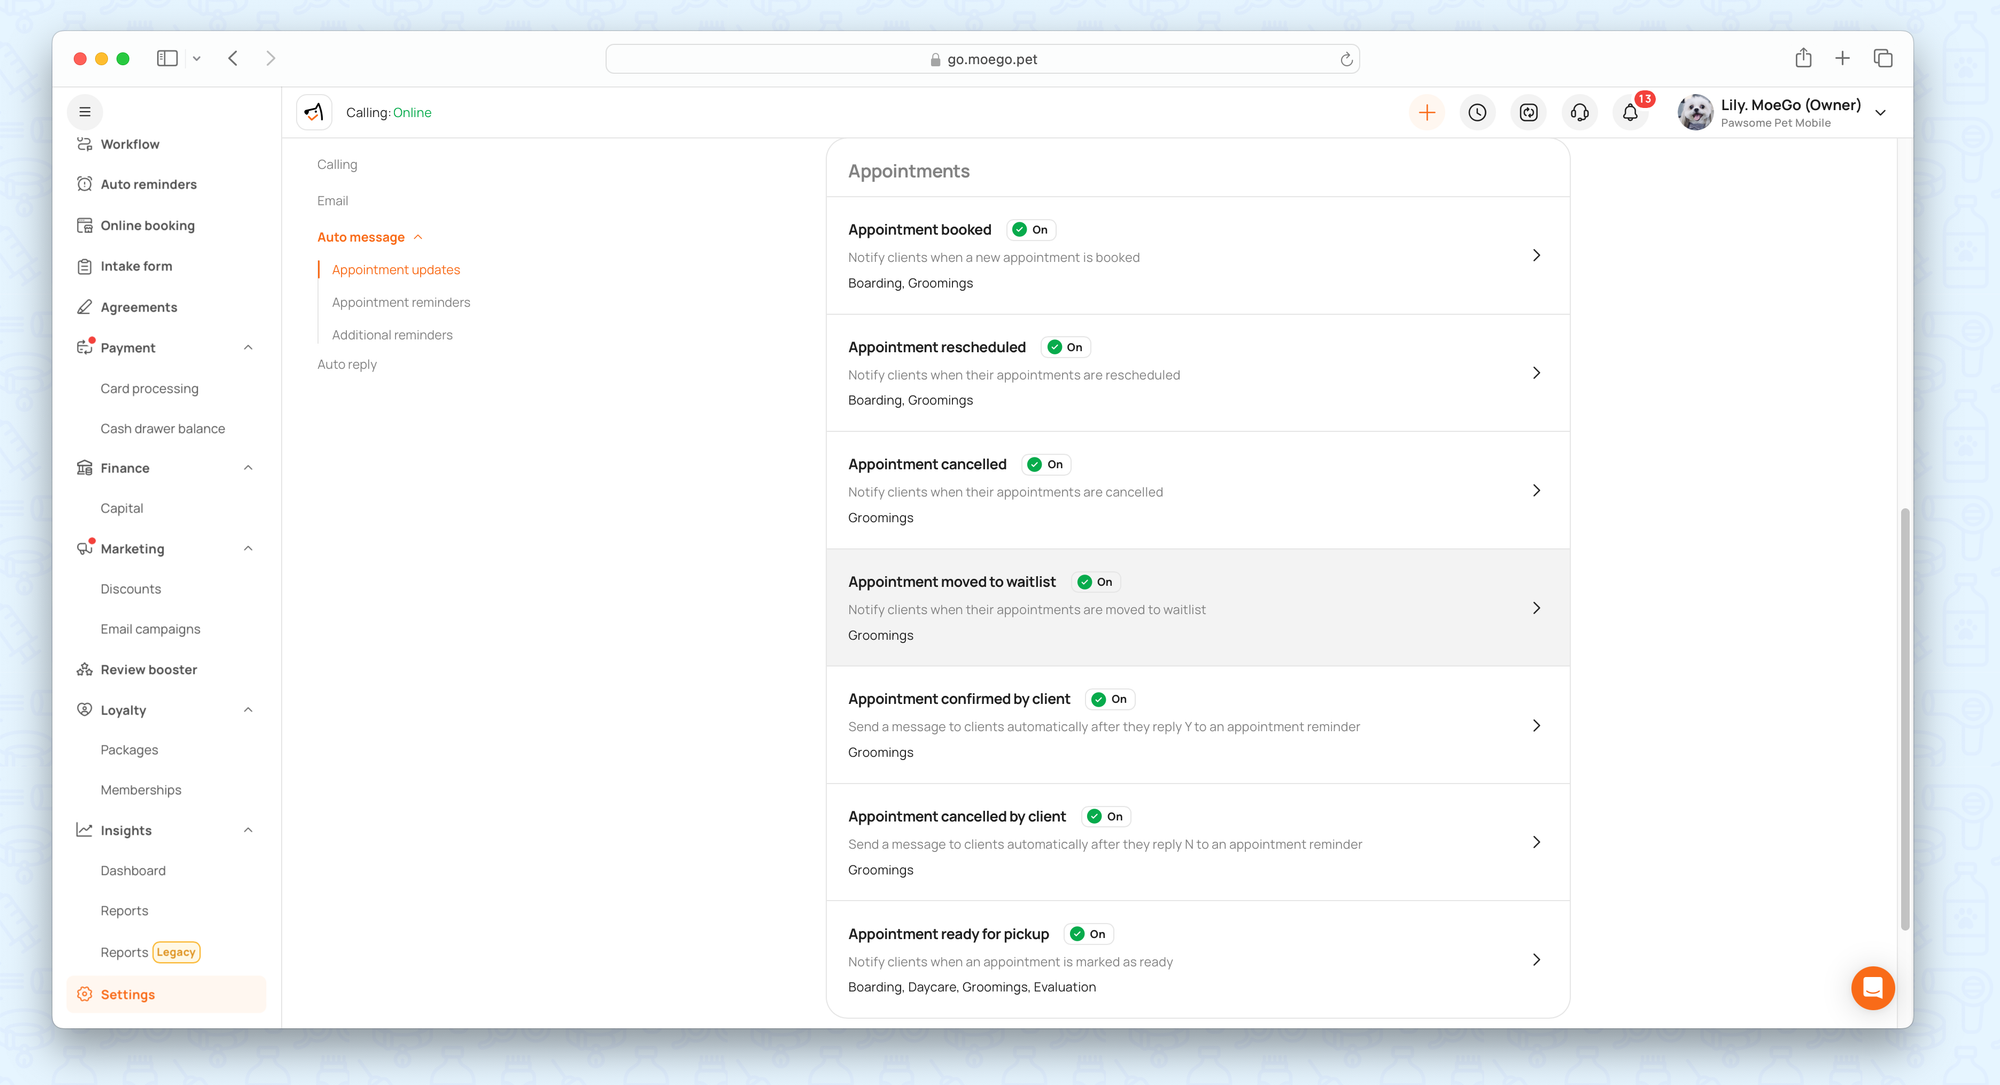
How are auto messages to be sent out
For Messages that required your input or confirmation before being sent out:
- When the appointment is booked: if toggle on, an appointment created notice will pop up and ask if you would like to send the message.
- When the appt is rescheduled or updated: once toggled on, an appointment rescheduled notice will pop up and ask if you would like to send the message.
- When the appointment is canceled: if enabled, an appointment canceled notice will pop up and ask if you would like to send the message.
- When the appointment is ready for pick up, a notice will pop up asking you to confirm marking the appointment as ready, and you can check send message box if needed.
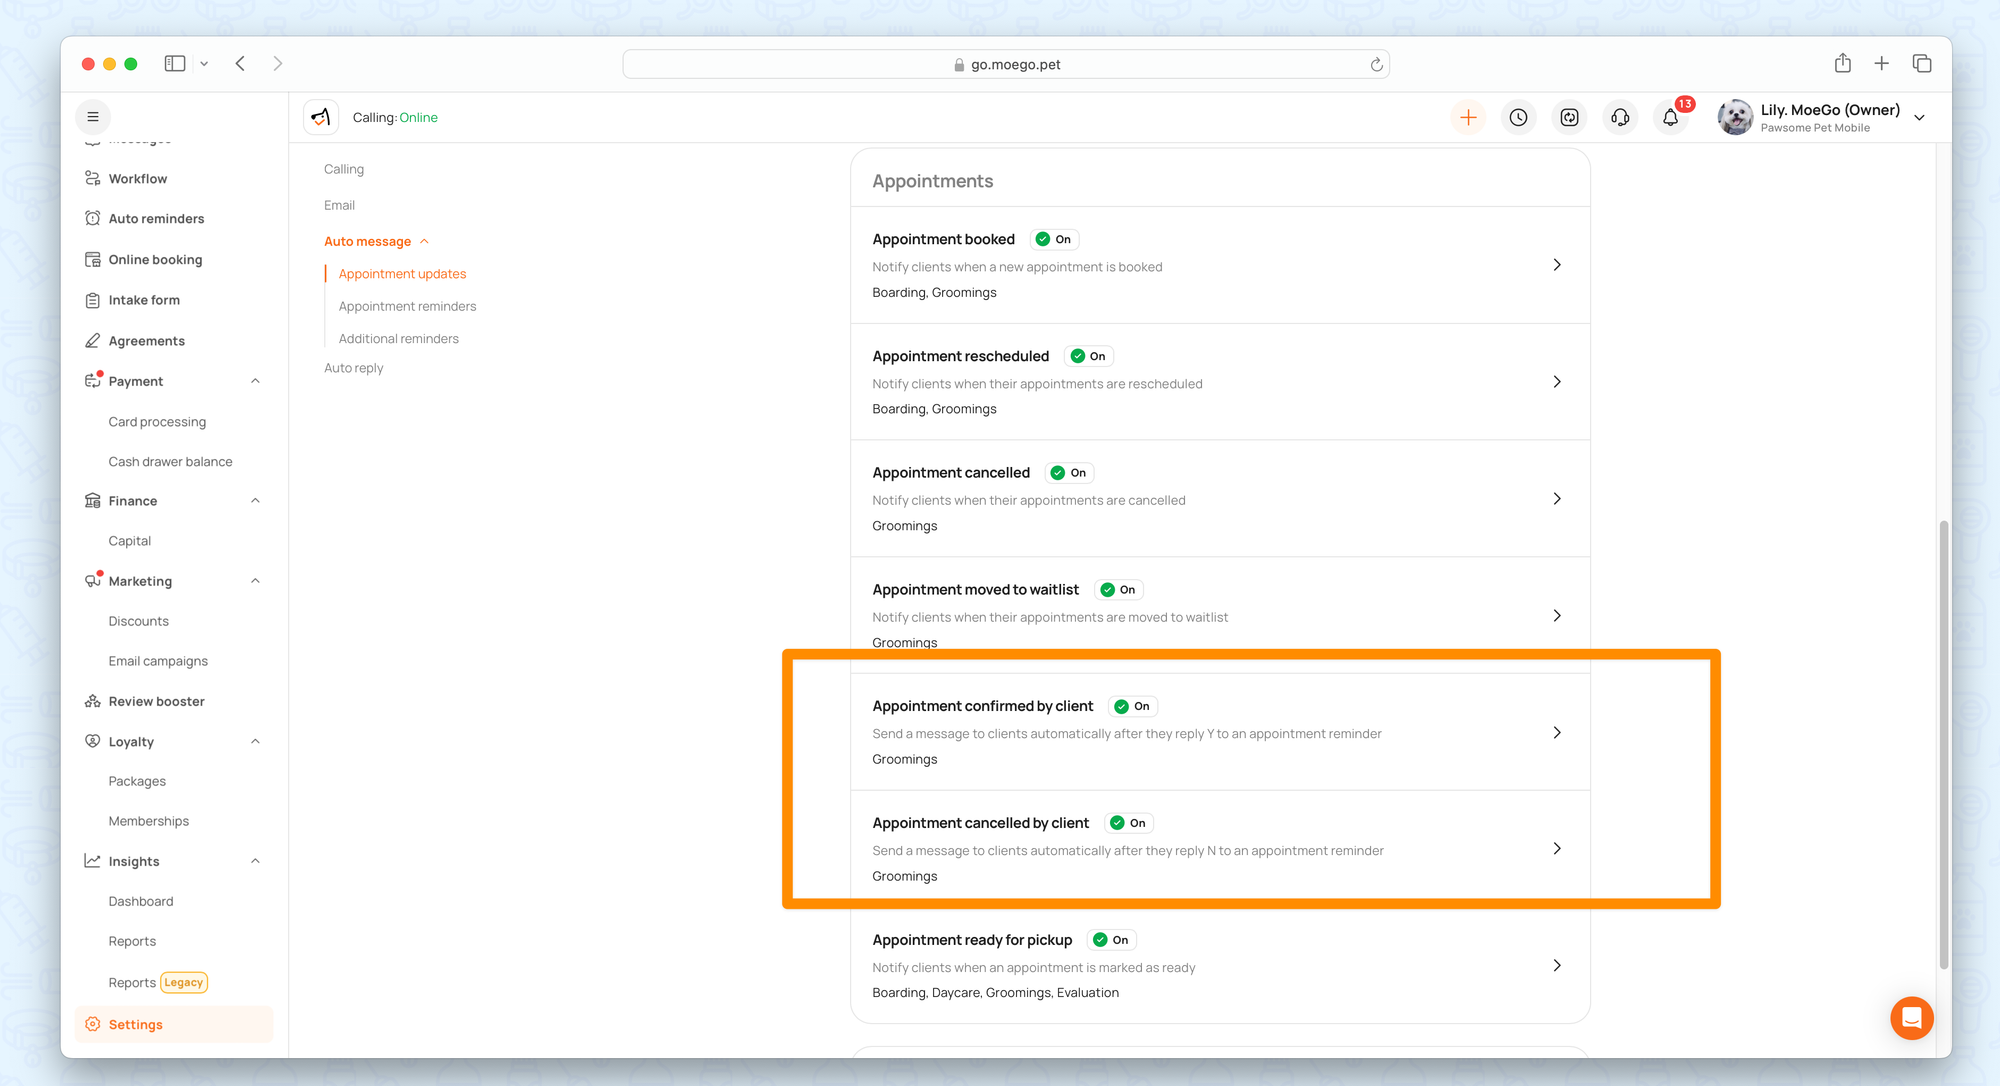
For Messages that will be sent out automatically for toggled-on events:
- When an appointment is confirmed or canceled by the client,is if toggle on, the auto message will be sent to the client automatically after the client replies Y (to confirm) or N (to cancel) to an appointment reminder with the text content you customize.
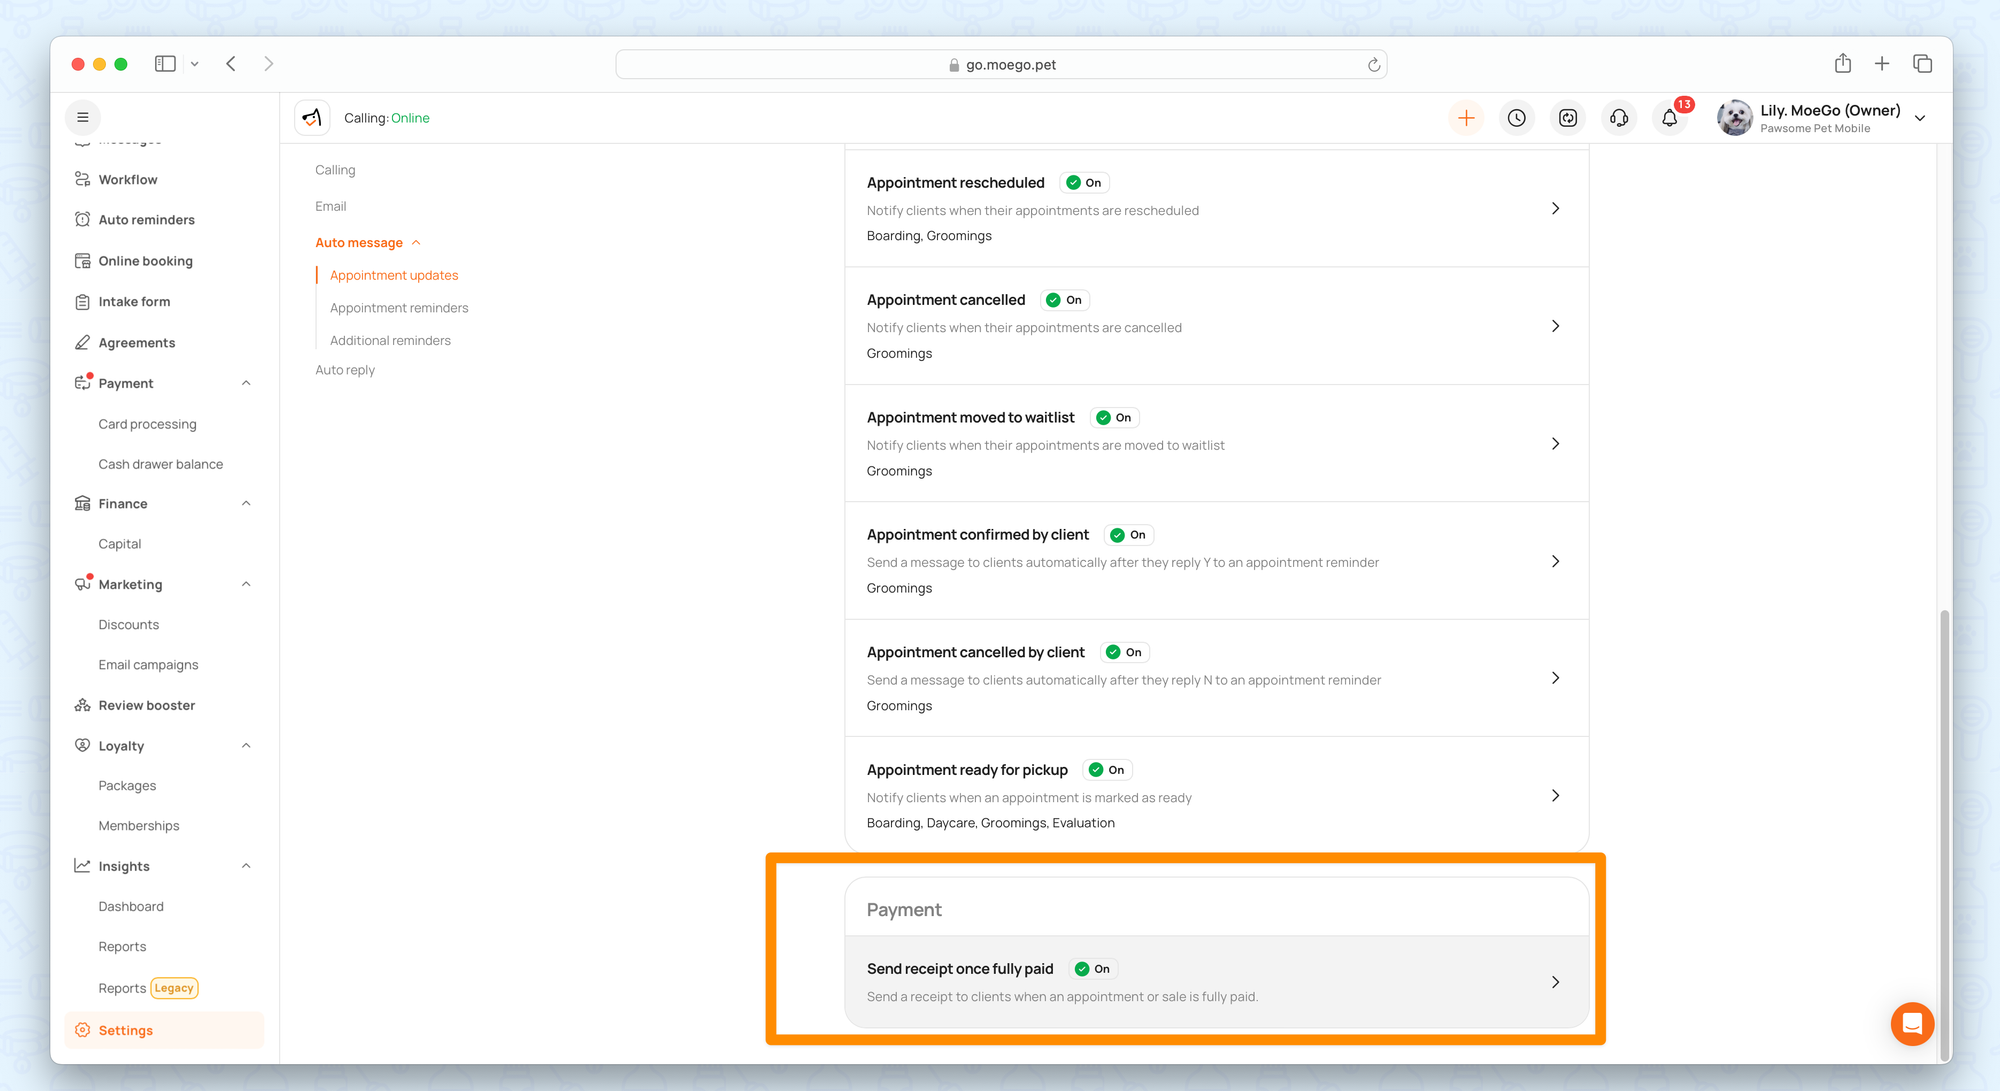
- Send receipt when a ticket is fully paid: Once toggled on, the receipt will be automatically sent after the client's first full payment. It will only be triggered once, and you can always send the receipt again manually if needed.
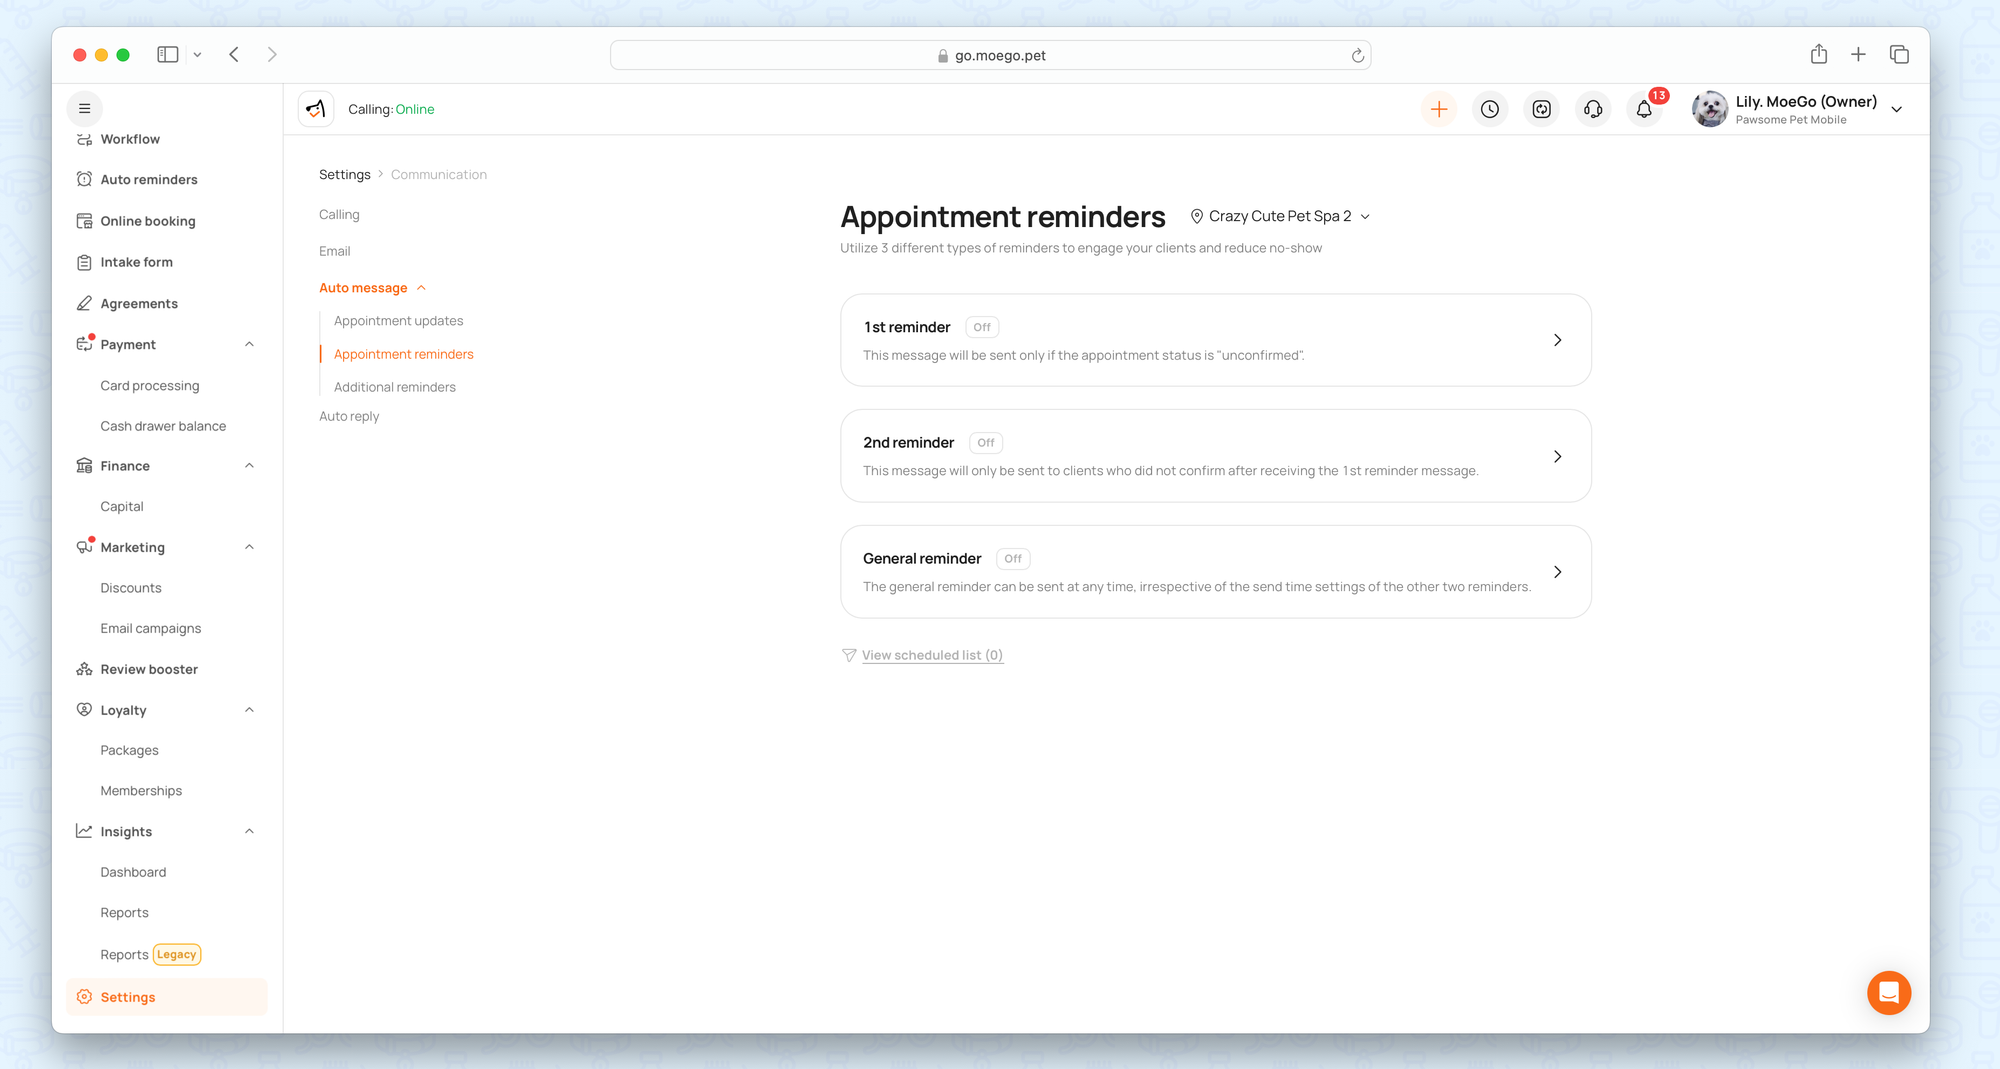
Set up Appointment Reminders
Reminders will be sent automatically when certain conditions are met.
- Switch the <toggle> under control to turn on or off a certain reminder
- Click on a message to <edit> it
- Under When to send, edit triggering conditions for sending a reminder
💡 To learn more about the 3 types of appointment reminders, please click here
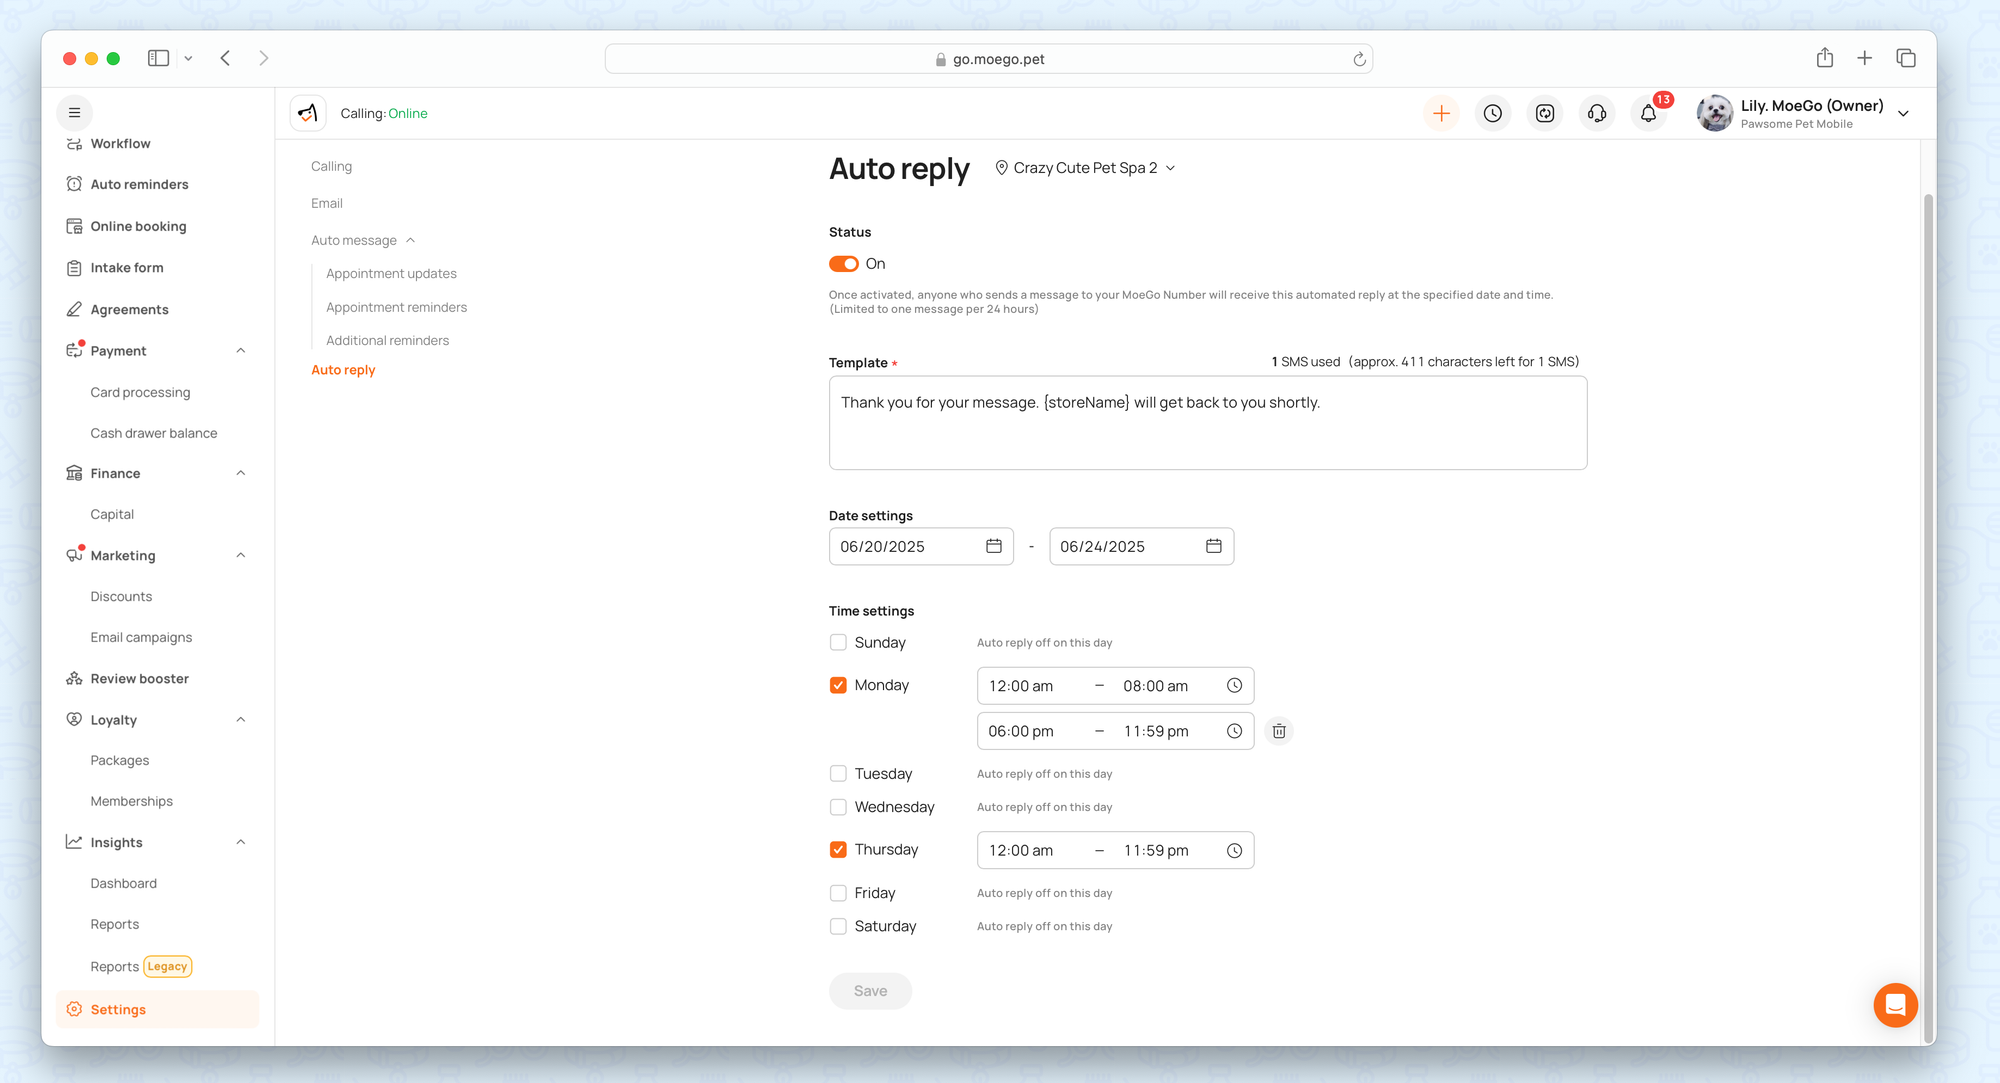
Set up auto-reply
Anyone who sends you a message will receive an auto-reply if you have turned it on.
- Under the Auto reply section, switch the <toggle> to turn on or off auto-reply.
- Click on a message template to <edit> it.
- Edit the start date and end date to adjust the auto reply's effective period.