
Welcome to our guide on blocking time with MoeGo calendar! Blocking time serves several crucial purposes in managing your schedule effectively:
- Highlight Unavailability:
- It allows you to highlight periods when you are unavailable to provide services, ensuring clarity and preventing scheduling conflicts.
- Communicate Availability to Team Members:
- Blocking time also communicates to your team members that you are not available during those specific intervals, facilitating smoother coordination within your business.
- Versatility for Personal Commitments:
- MoeGo calendar's versatility extends beyond professional commitments; you can also use it to block time for personal activities, such as lunch breaks or other engagements.
- Control Over Online Booking Availability:
- Blocked time will not be available for online booking, providing you with full control over your availability.
Join us as we explore how to utilize this feature to optimize your scheduling process and enhance productivity.
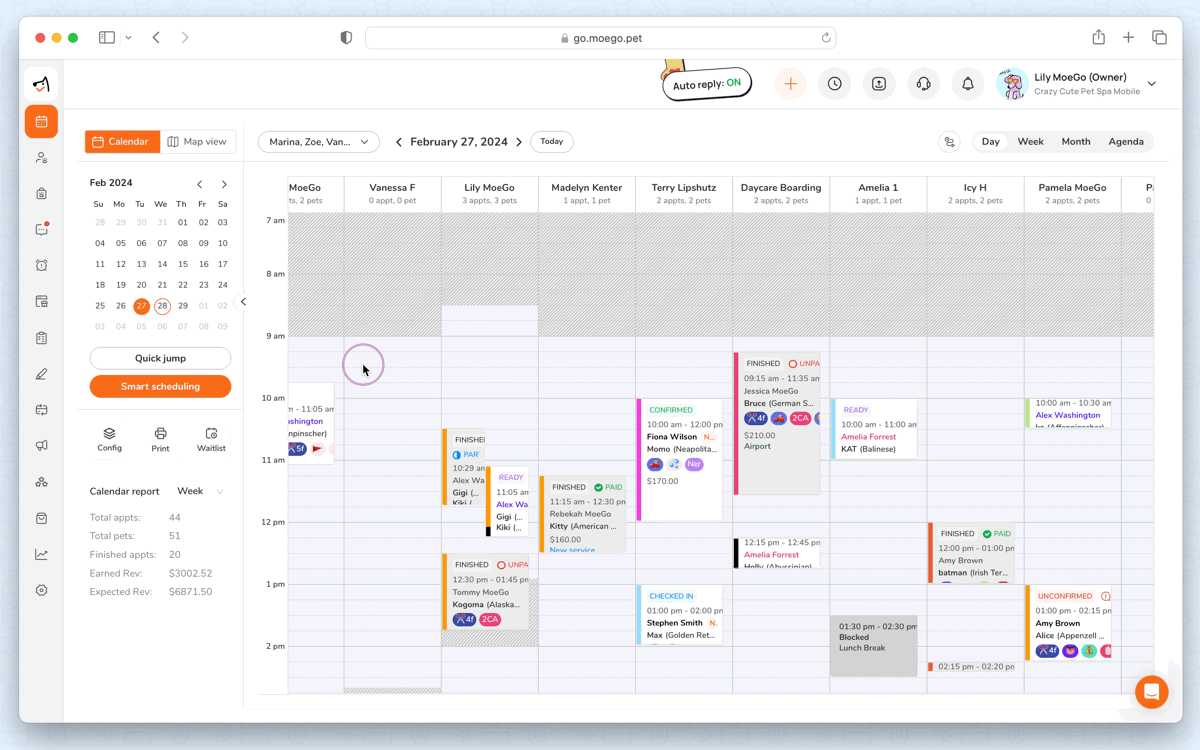
Creating a block on the calendar
Regular block
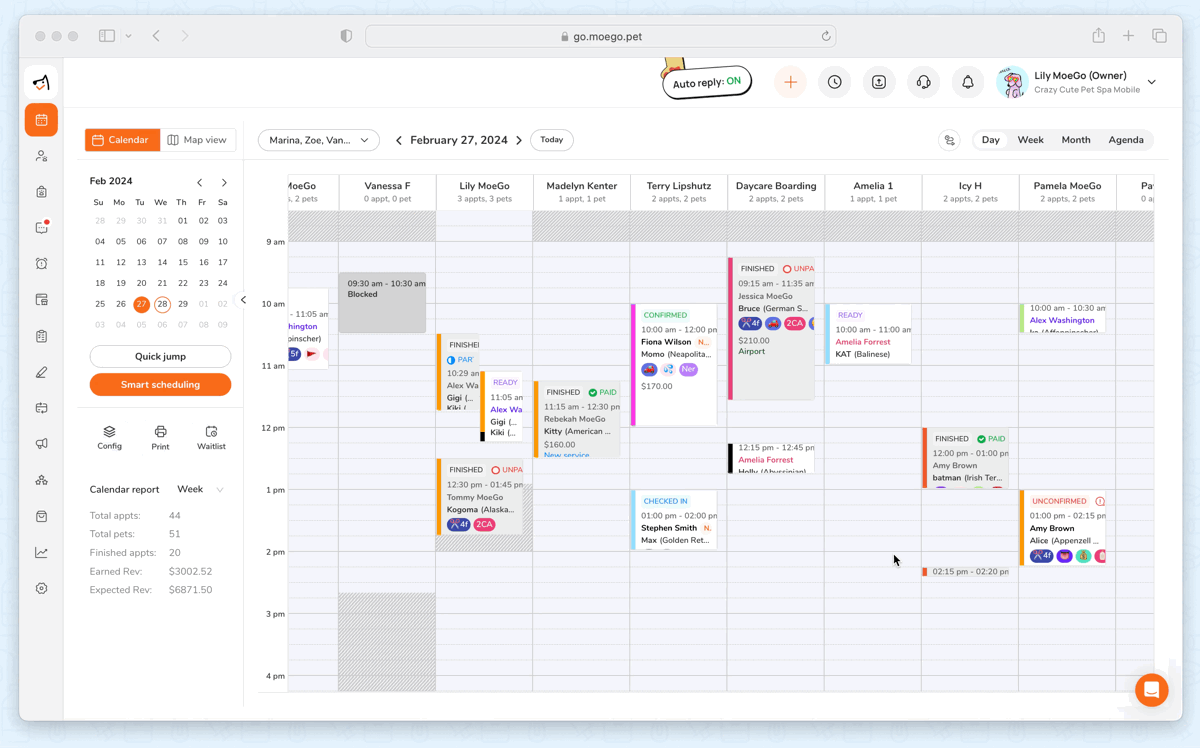
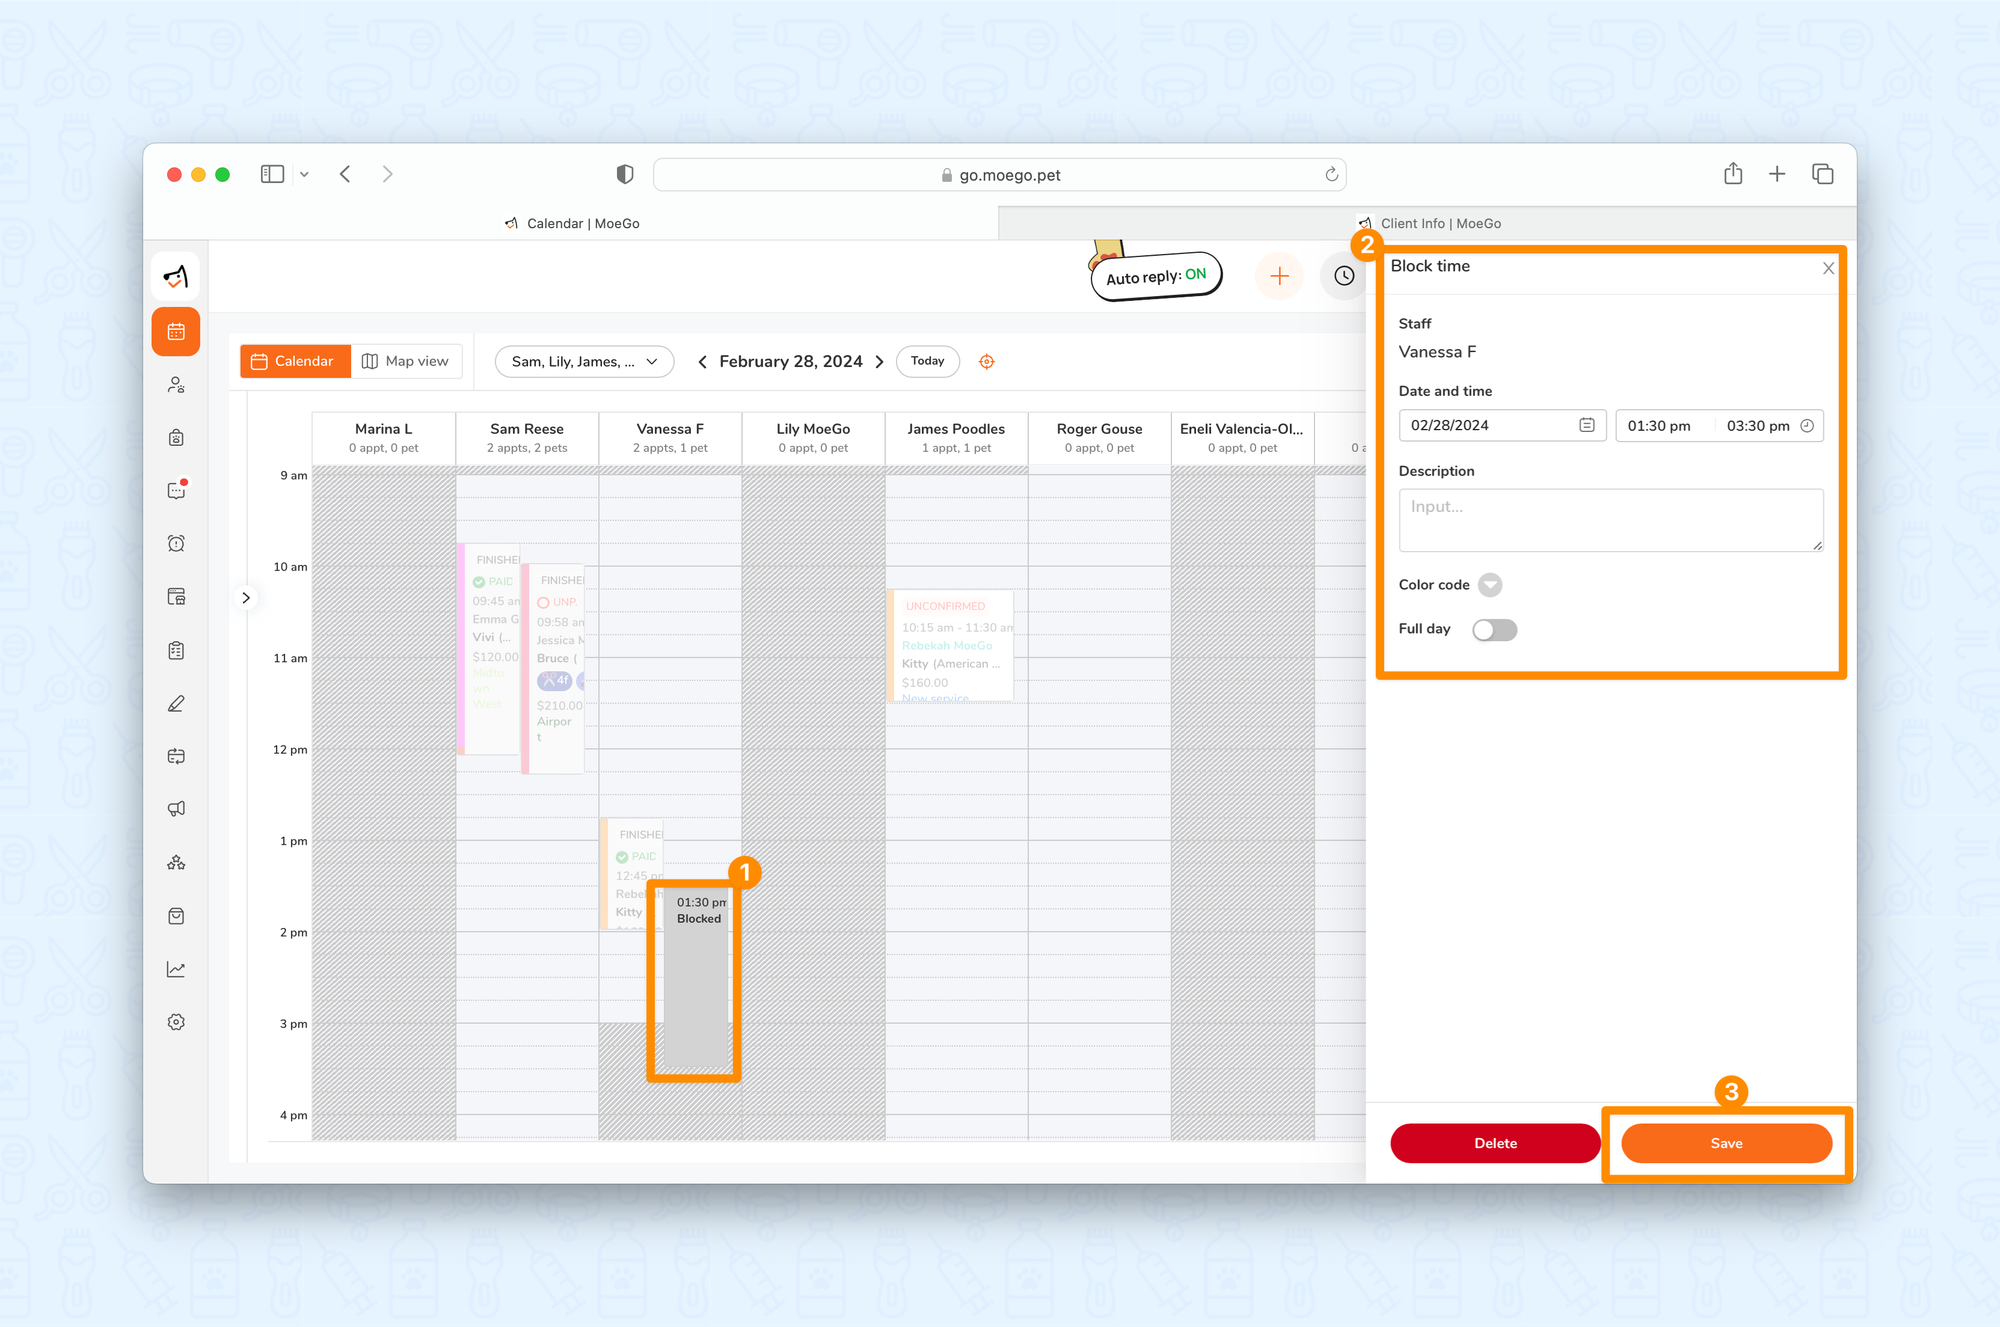
🖥️Desktop:
To create a regular block on the calendar using the desktop, simply:
- Go to < Appointments >
- Click the time that you want to create a block on the calendar
- Click < Block > on the popup
- Adjust the < Date and time >, add a < Description >, and select a < Color code > for the block
- Hit < Save >
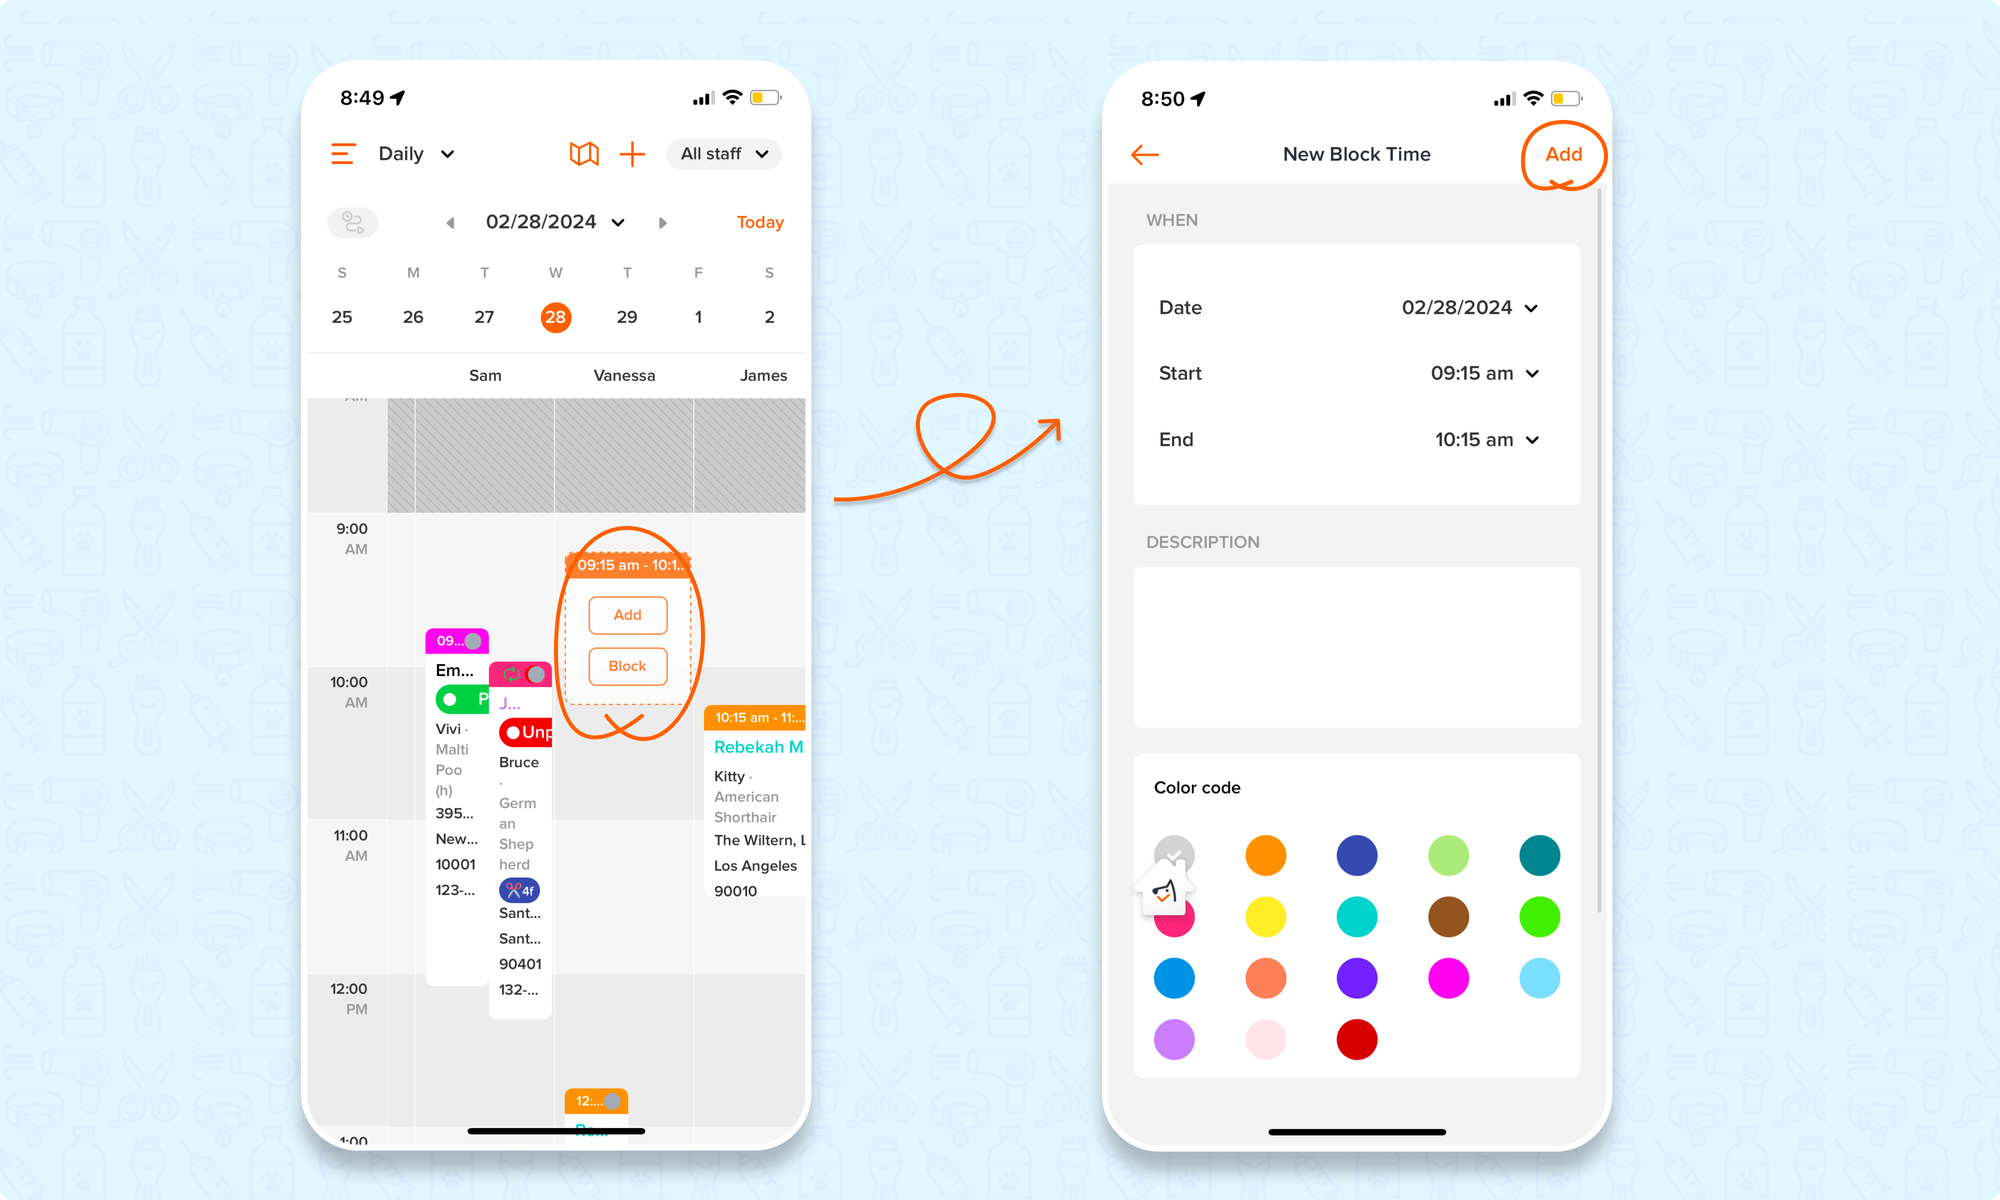
📱App:
To create a regular block on the calendar using the app, simply:
- Go to < Appointments > and switch to the < calendar > view
- Click the time that you want to create a block on the calendar
- Click < Block > on the popup
- Adjust the < Date >, < start >, and < end > times
- Add a < Description > and select a < Color code > for the block
- Select < Add >
Full-day block
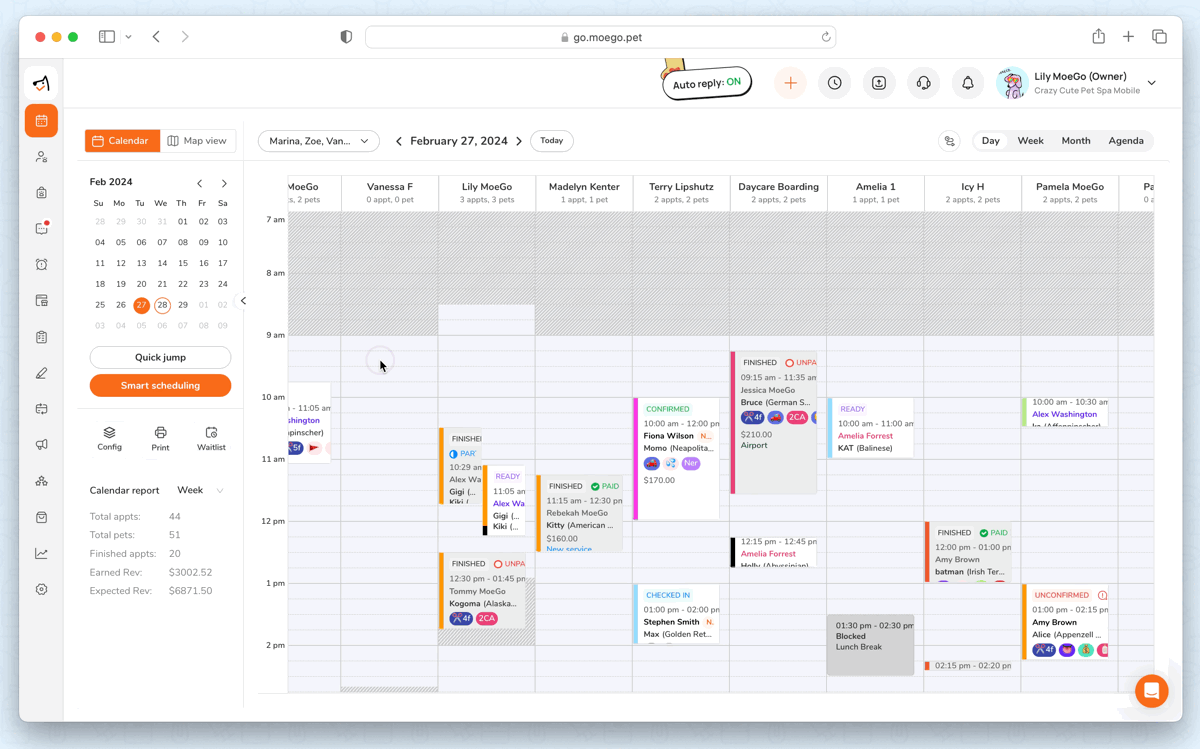
🖥️Desktop:
To create a full-day block on the calendar using the desktop, simply:
- Go to < Appointment >
- Click the time that you want to create a block on the calendar
- Click < Block > on the popup
- Toggle on the < full day > option
- Adjust the < Date >, add a < Description >, and select a < Color code > for the block
- Select < Save >
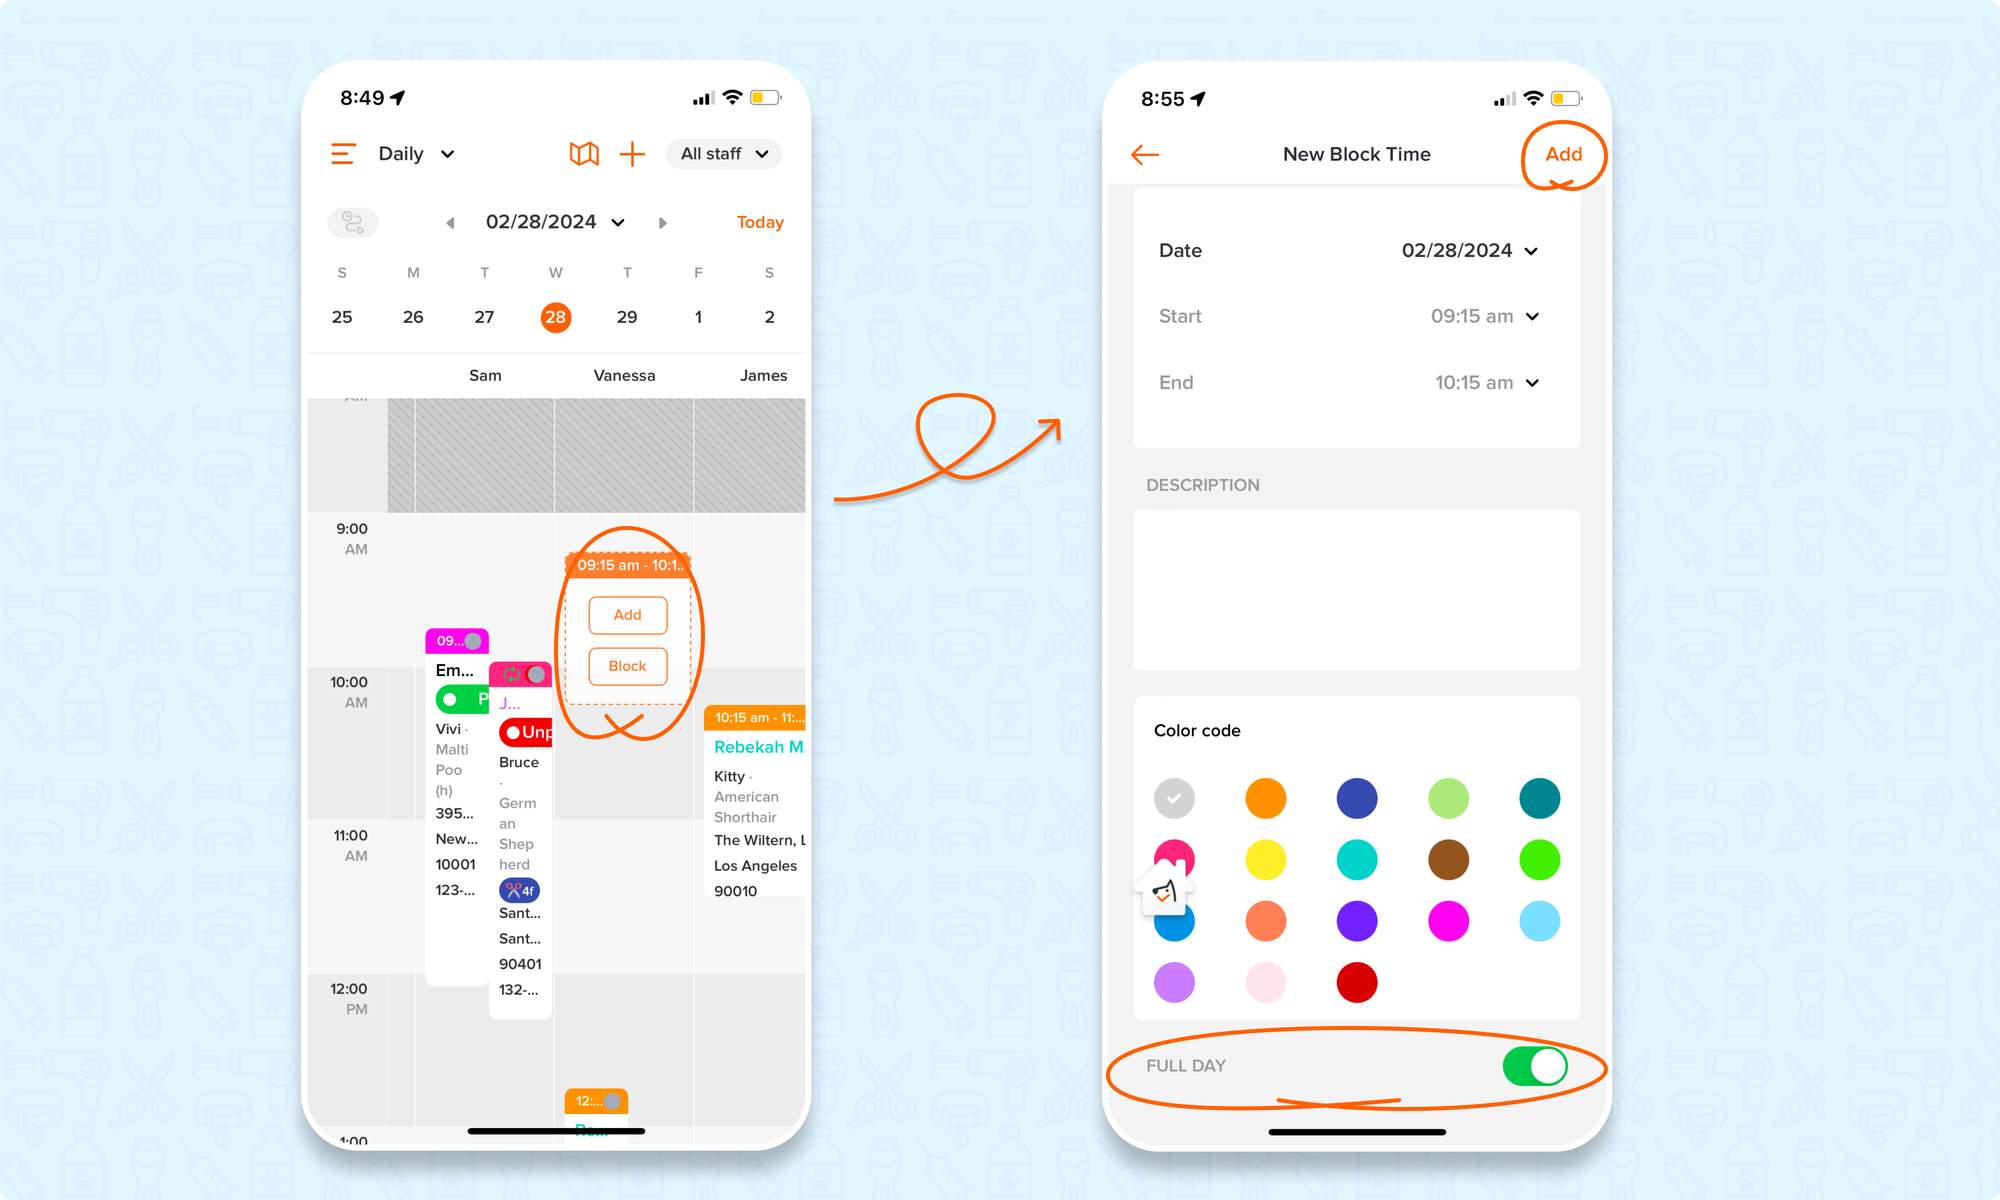
📱App:
To create a full-day block on the calendar using the app, simply:
- Go to < Appointments > and switch to the < calendar > view
- Click the time that you want to create a block on the calendar
- Click < Block > on the popup
- Toggle on the < full day > option
- Set the < Date >
- Add a < Description > and select a < Color code > for the block
- Select < Add >
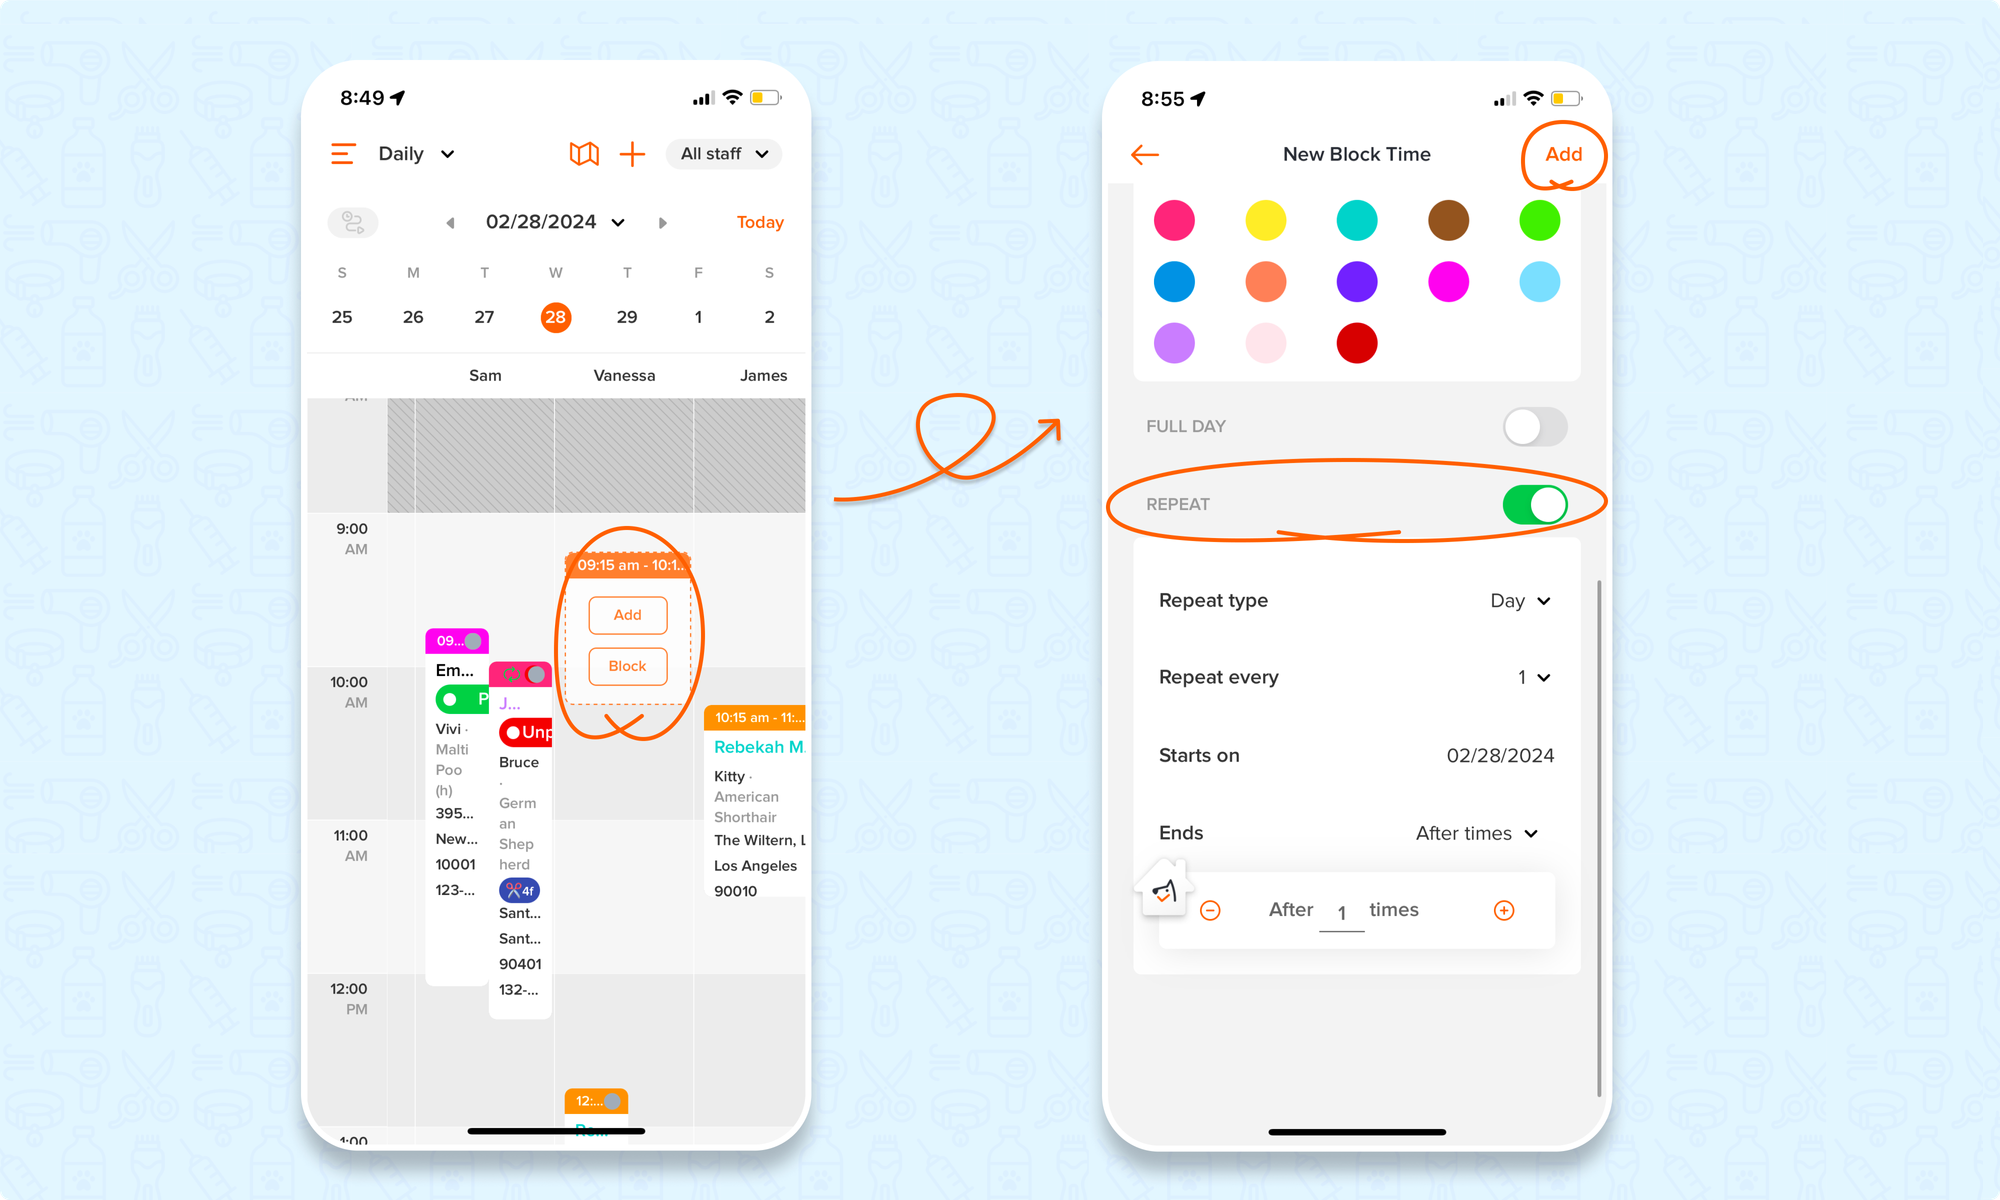
Repeat block
💡 Please note: Repeat blocks will have an orange icon in the desktop and a green icon in the app
🖥️Desktop:
To create a repeat block on the calendar using the desktop, simply:
- Go to < Appointments >
- Click the time that you want to create a block on the calendar
- Click < Block > on the popup
- Adjust the < Date and time >, add a < Description >, and select a < Color code > for the block
- Toggle on the < repeat > option and set up repeat rules
- Select < Save >
📱App:
To create a repeat block on the calendar using the app, simply:
- Go to < Appointments > and switch to the < calendar > view
- Click the time that you want to create a block on the calendar
- Click < Block > on the popup
- Adjust the < Date >, < start >, and < end > times
- Add a < Description > and select a < Color code > for the block
- Toggle on the < repeat > option and set up repeat rules
- Select < Add >
Editing a block
🖥️Desktop:
To edit a block on the desktop, simply:
- Select the < block >
- Edit the < date and time >, < description >, and < color >.
- Elect to switch off or on the < full day toggle >
- If this block belongs to a repeating series, 3 options will be offered to you when select < Save > :
- Only this one
- Apply to this and all following blocks
- Apply to all blocks in the repeat series
💡You can also click directly on a block and drag it to change its date and time
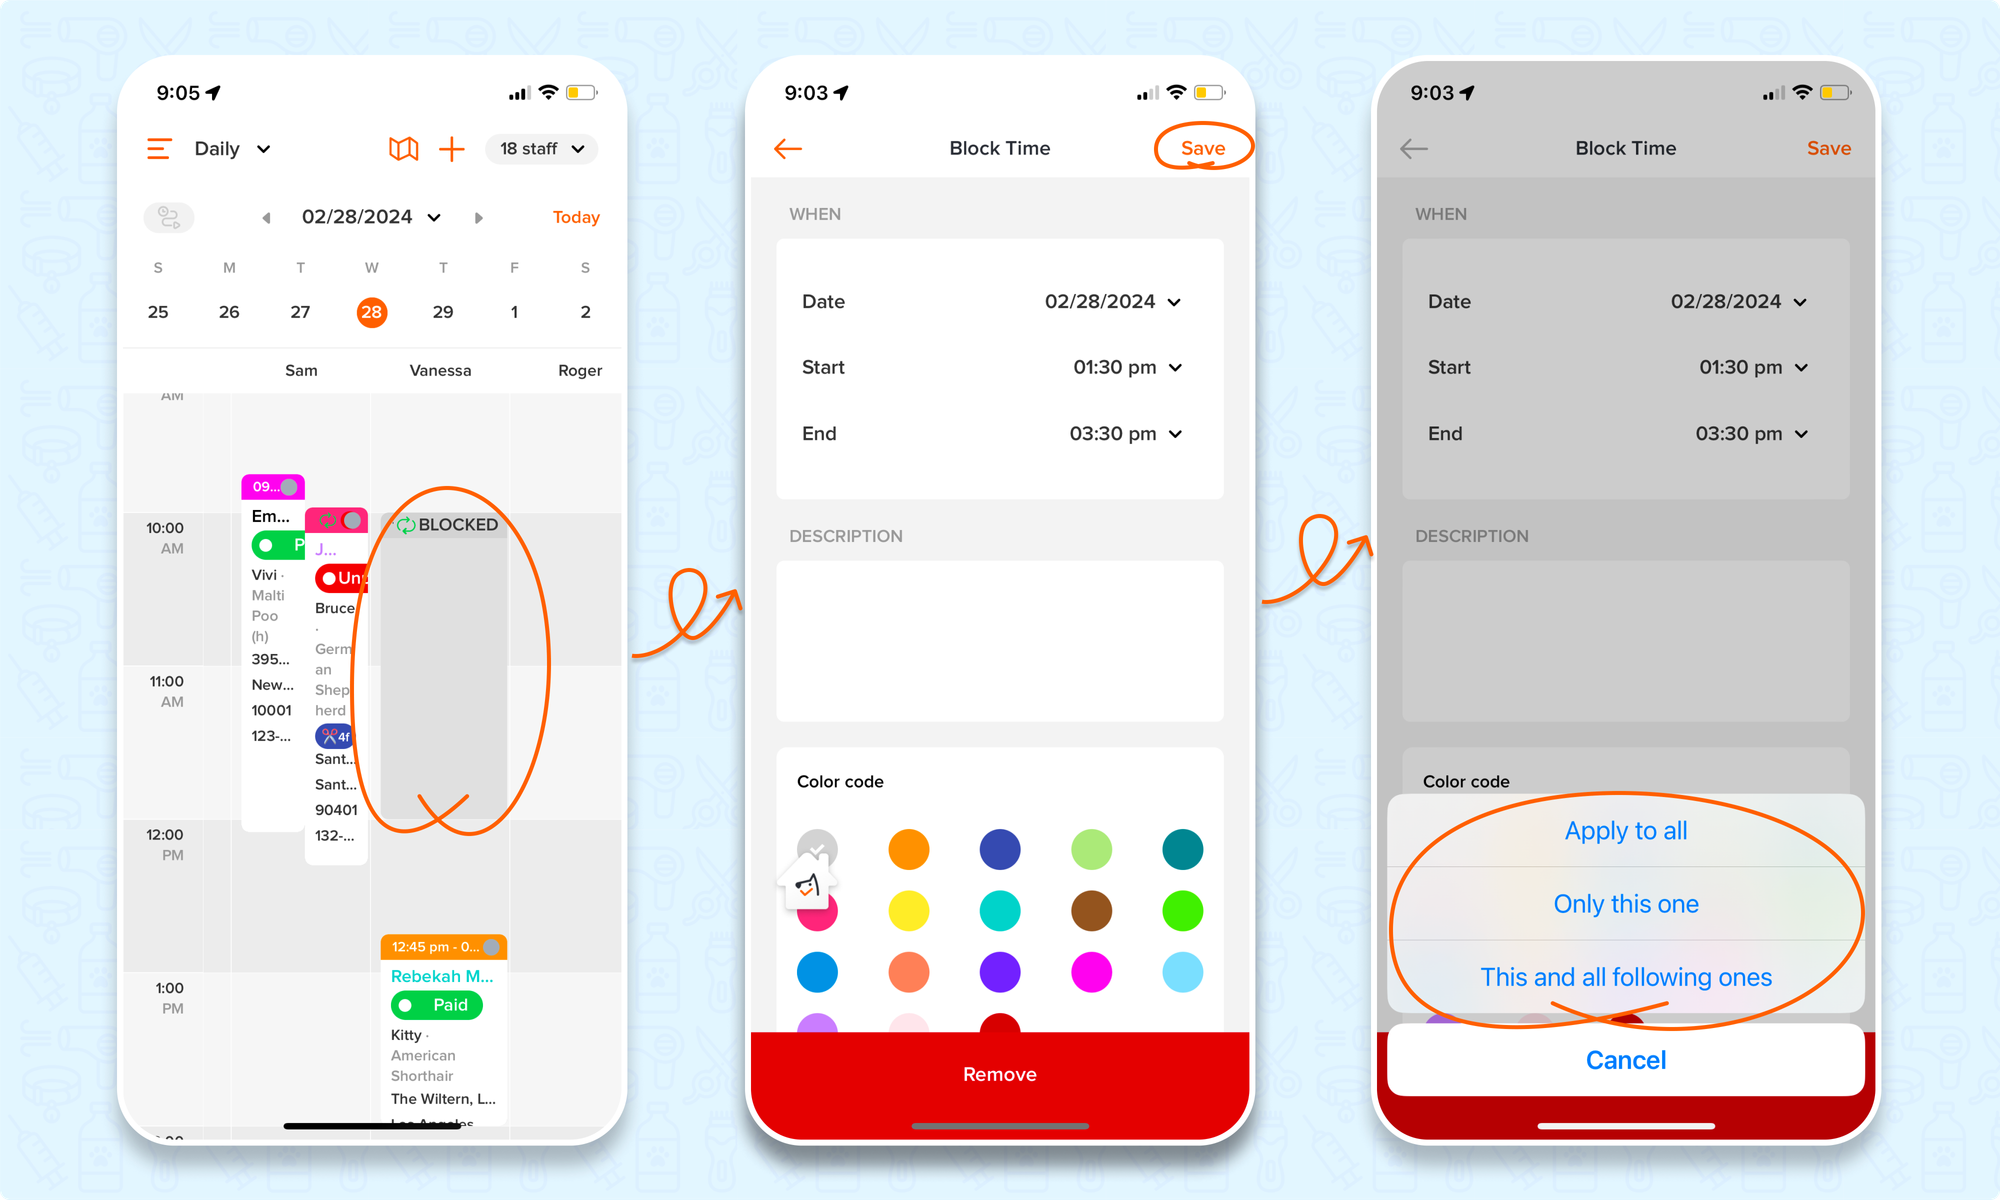
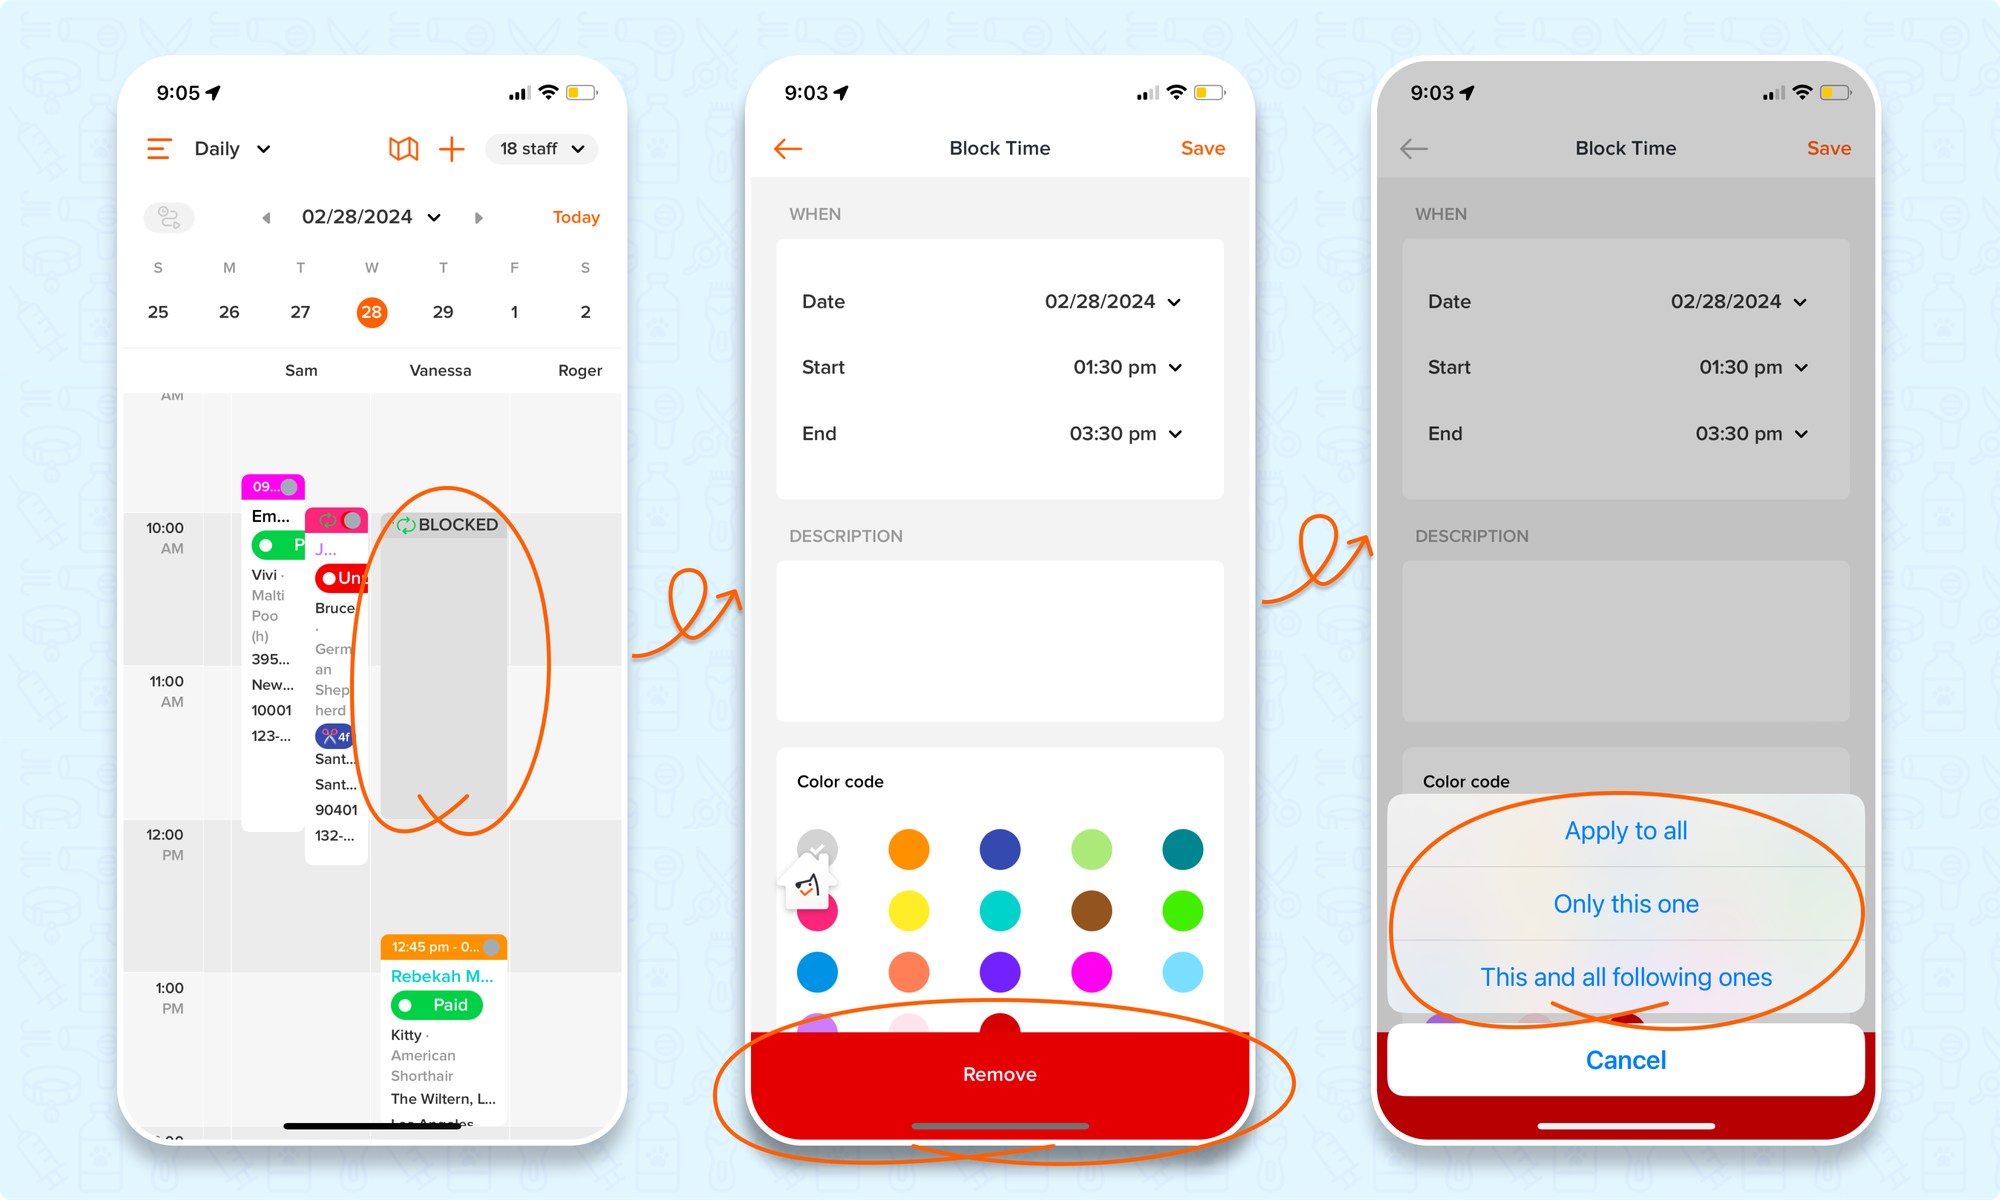
📱App:
To edit a block on the app, simply:
- Select the < block >
- Edit the < Date >, < start >, and < end > time
- Adjust the < Description > or select a new < Color code > for the block
- Elect to switch off or on the < full day toggle >
- If this block belongs to a repeating series, 3 options will be offered to you when select < Save > :
- Apply to all
- Only this one
- This and all following ones
💡You can also click directly on a block and drag it to change its date and time
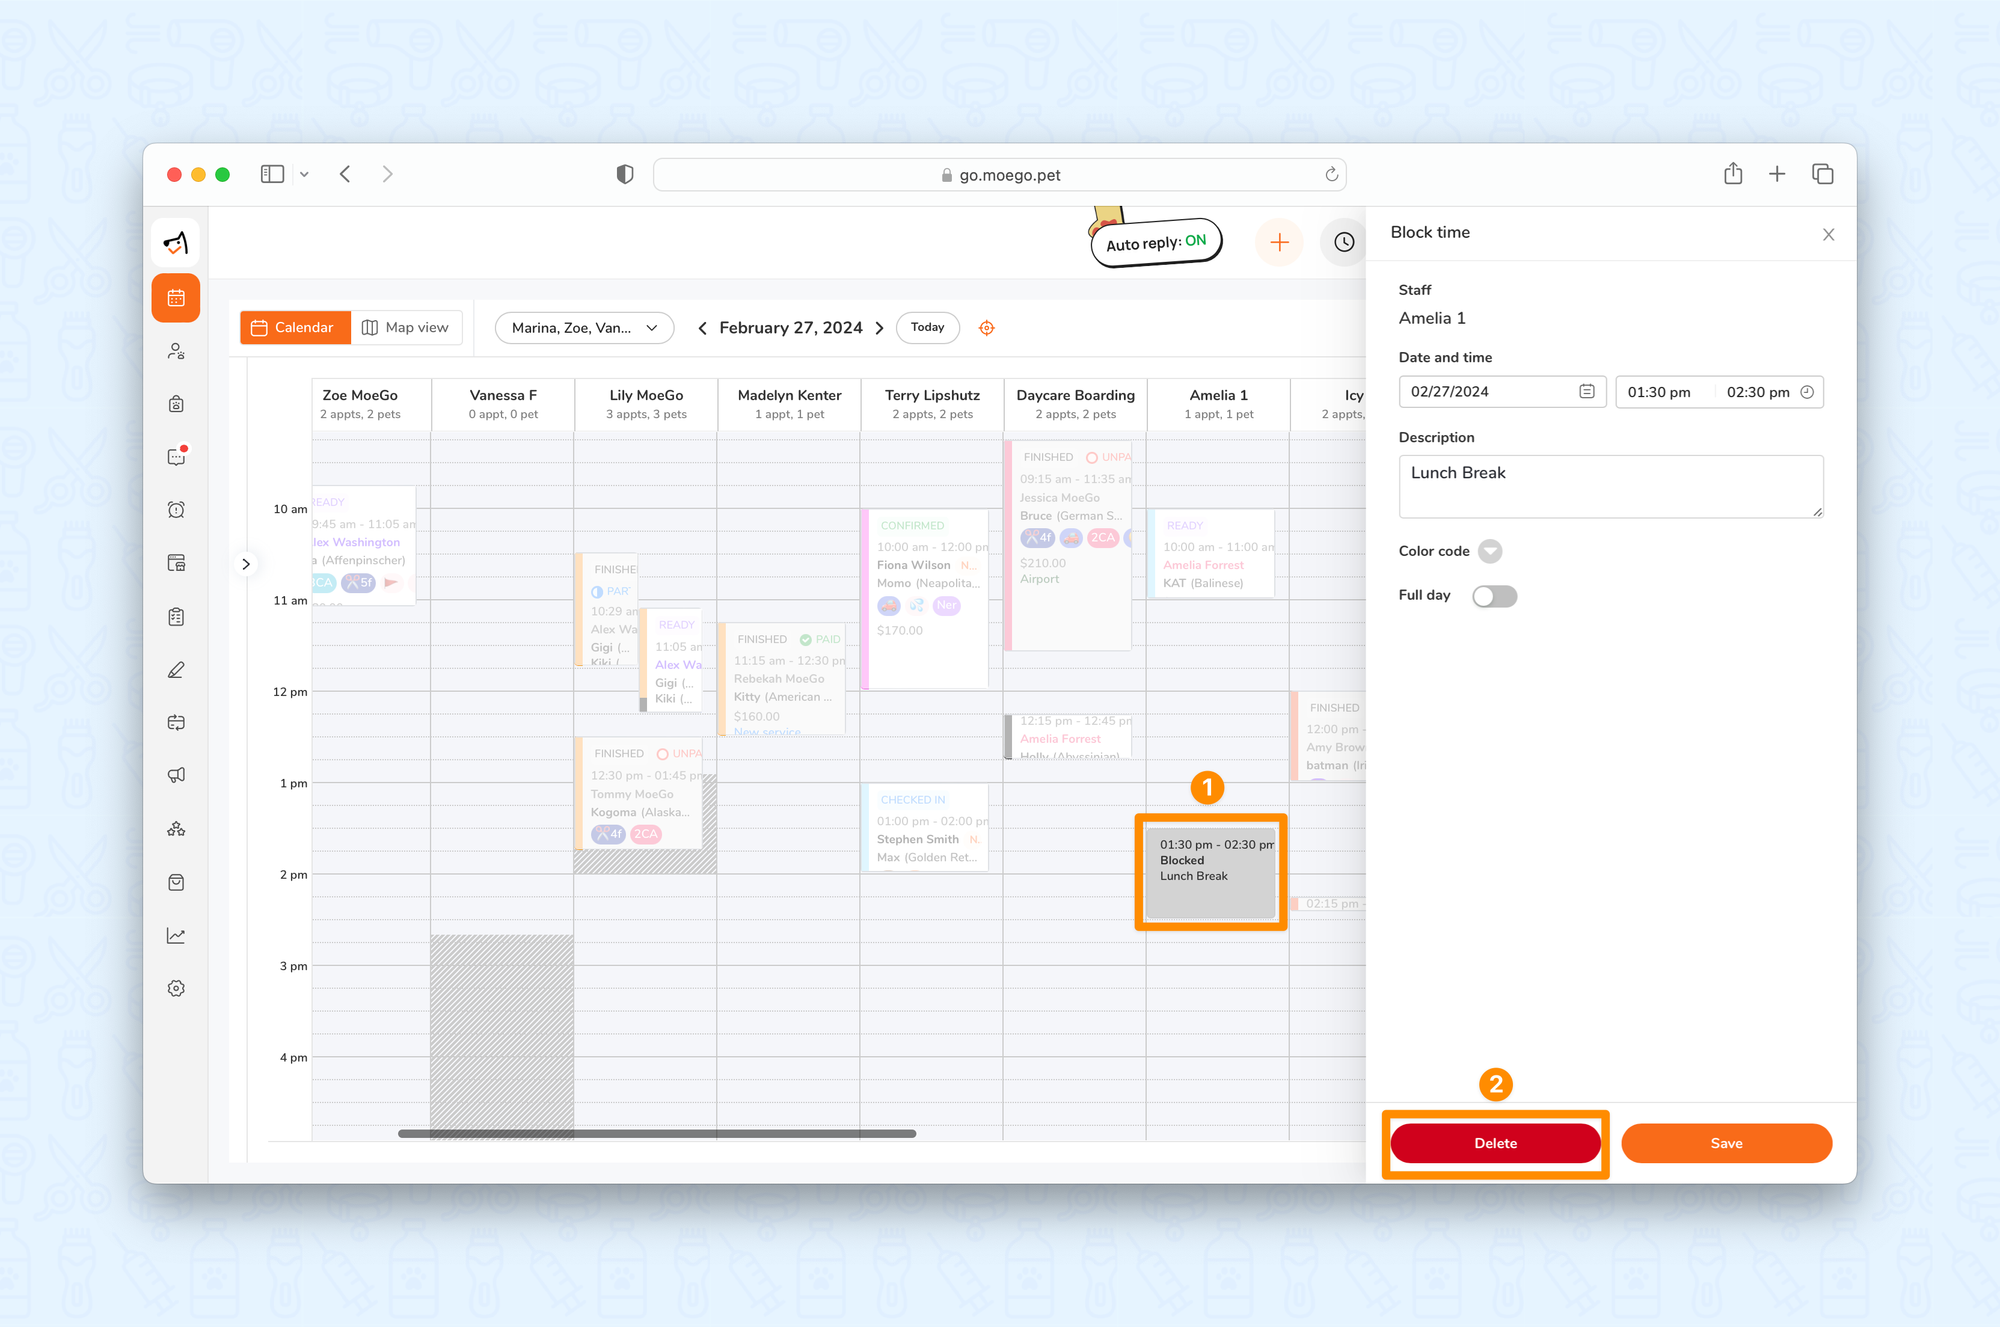
Deleting a block
🖥️Desktop:
To delete a block on the desktop, simply:
- Select the < block >
- Select < Delete >
- If this block belongs to a repeating series, 3 options will be offered to you when select < Delete > :
- Only this one
- Apply to this and all following blocks
- Apply to all blocks in the repeat series
📱App:
To delete a block on the app, simply:
- Select the < block >
- Select < Delete >
- If this block belongs to a repeating series, 3 options will be offered to you when select < Delete > :
- Apply to all
- Only this one
- This and all following ones
FAQ
Q1. Can I add a block for multiple groomers all at once?
Answer: Currently, MoeGo does not support adding a block for multiple groomers simultaneously.