
Managing retail operations efficiently is a cornerstone of running a successful business. MoeGo's Retail Management module is designed to streamline inventory tracking, product sales, and reporting, giving you the tools to manage your retail operations with ease. Whether you're selling shampoos, treats, or grooming tools, this feature helps you stay organized and provides valuable insights into your retail performance.
This page will guide you through setting up your retail inventory and managing stock. Explore how MoeGo simplifies retail management, saving you time and allowing you to focus on growing your business.
1.Manage the product list
1.1 Add a product
Step 1: Navigate to Retail from the left navbar to find the < +Add > button on the right-hand
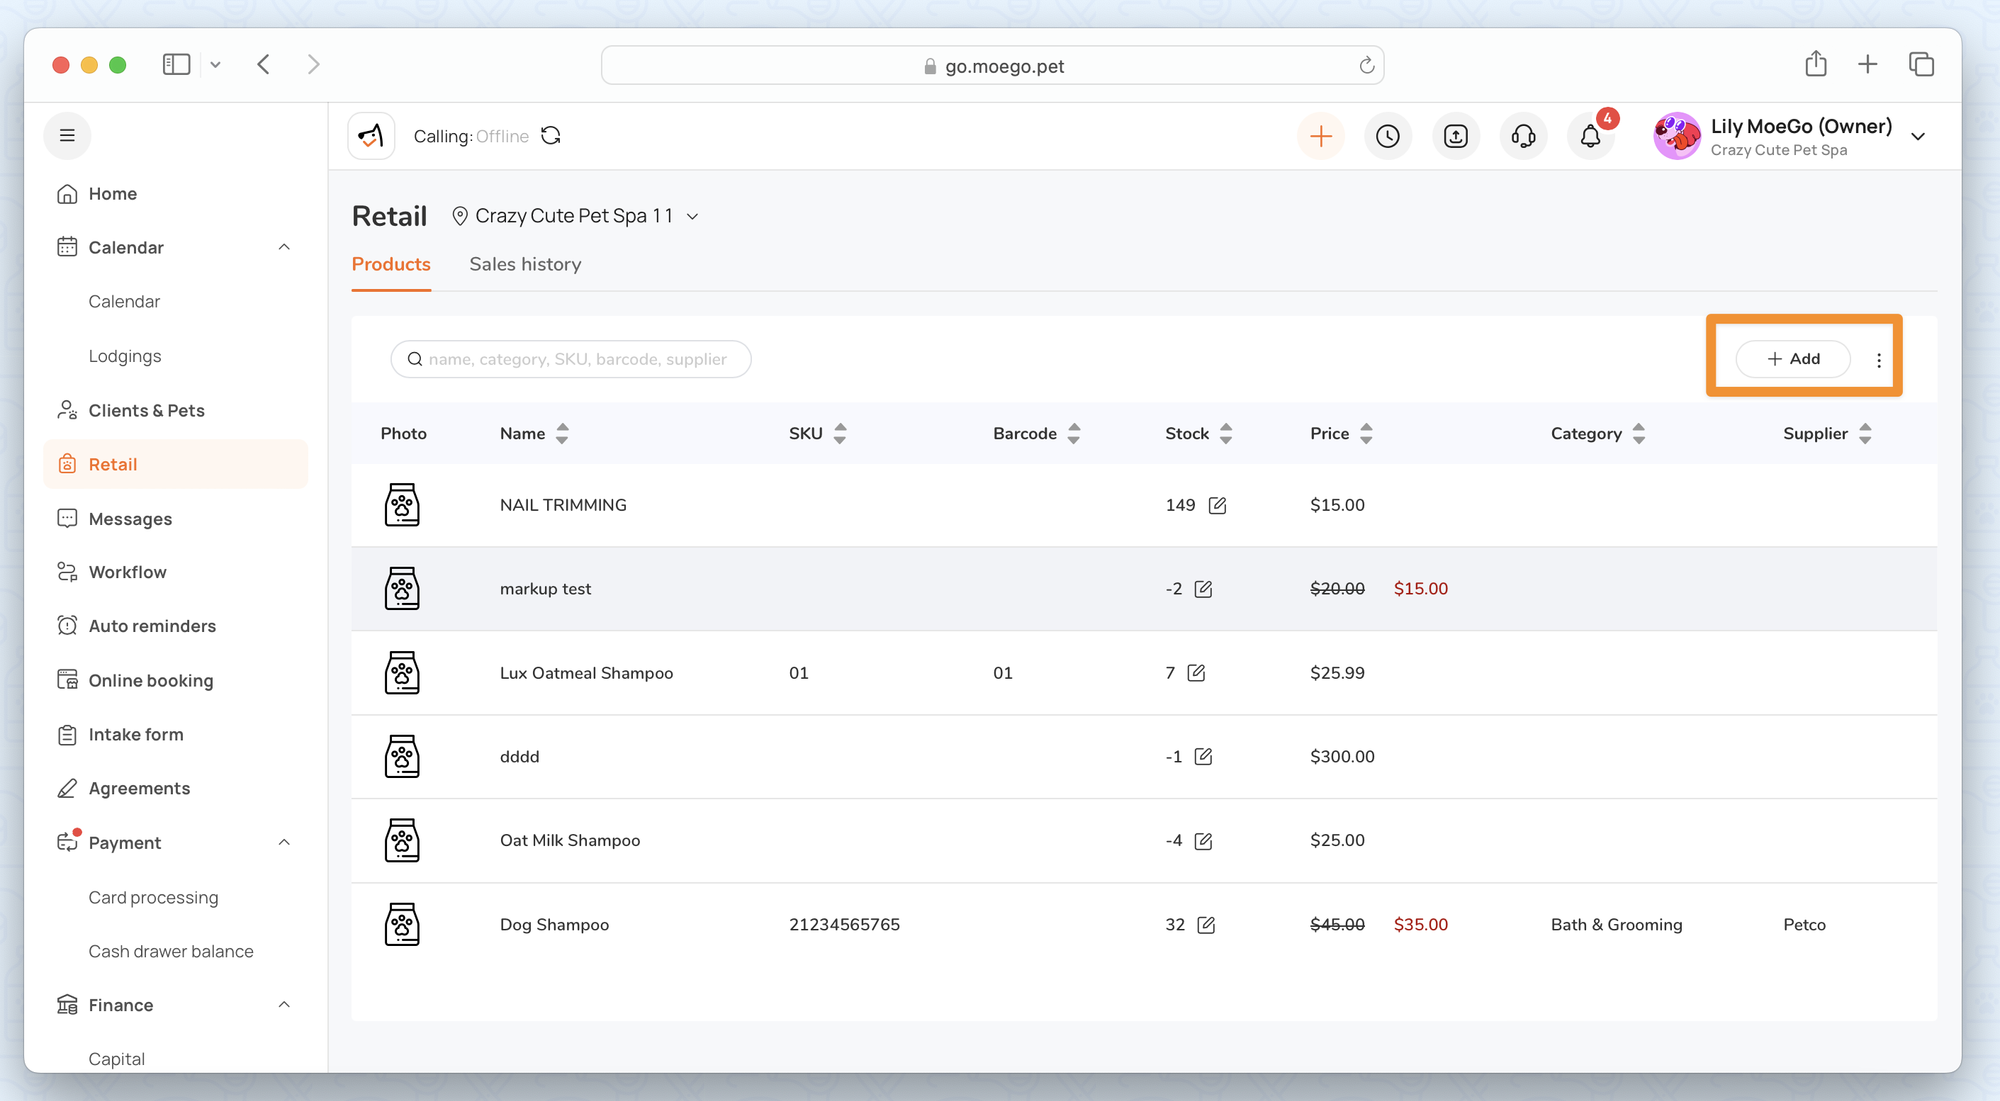
Step 2: Input the required info for the product
- Upload product image
- Enter the product name
- Set up retail price
Additionally, you can enter the optional info for records, including SKU, Barcode, Supply price, Supplier, Category, Tax rate, description, special price, and stock records.

The definitions for SKU, Handle, and Barcode for a product are as follows:
SKU (Stockkeeping unit): This is a unique product code you can come up with for you and your staff to track products within your business.
Barcode: Also known as the Universal Product Code(UPC), this is the barcode printed in each product which varies from one product variant to another and in most cases a unique code globally containing 8-14 digits. If any of your products don’t have a barcode printed on the packaging, you can leave the ‘Barcode' field empty. Once you fill in the barcode your product is ready for scanning while selling it.
Barcode field1.2 Edit/Delete a product
Simply clicking on a product record will take you to the editing page: check the < Delete > button at the end of the page.
1.3 Edit Category&Supplier
You can add/delete/update "Category" and "Supplier" freely in the retail section:
1.4 Edit the stock
The stock control section is on the bottom-left of the product detail page.
In addition to updating the stock number manually, the stock number will be updated automatically along with the following selling actions:
- Sell a product (single sell or sell in grooming ticket)
- Remove a product from the grooming ticket
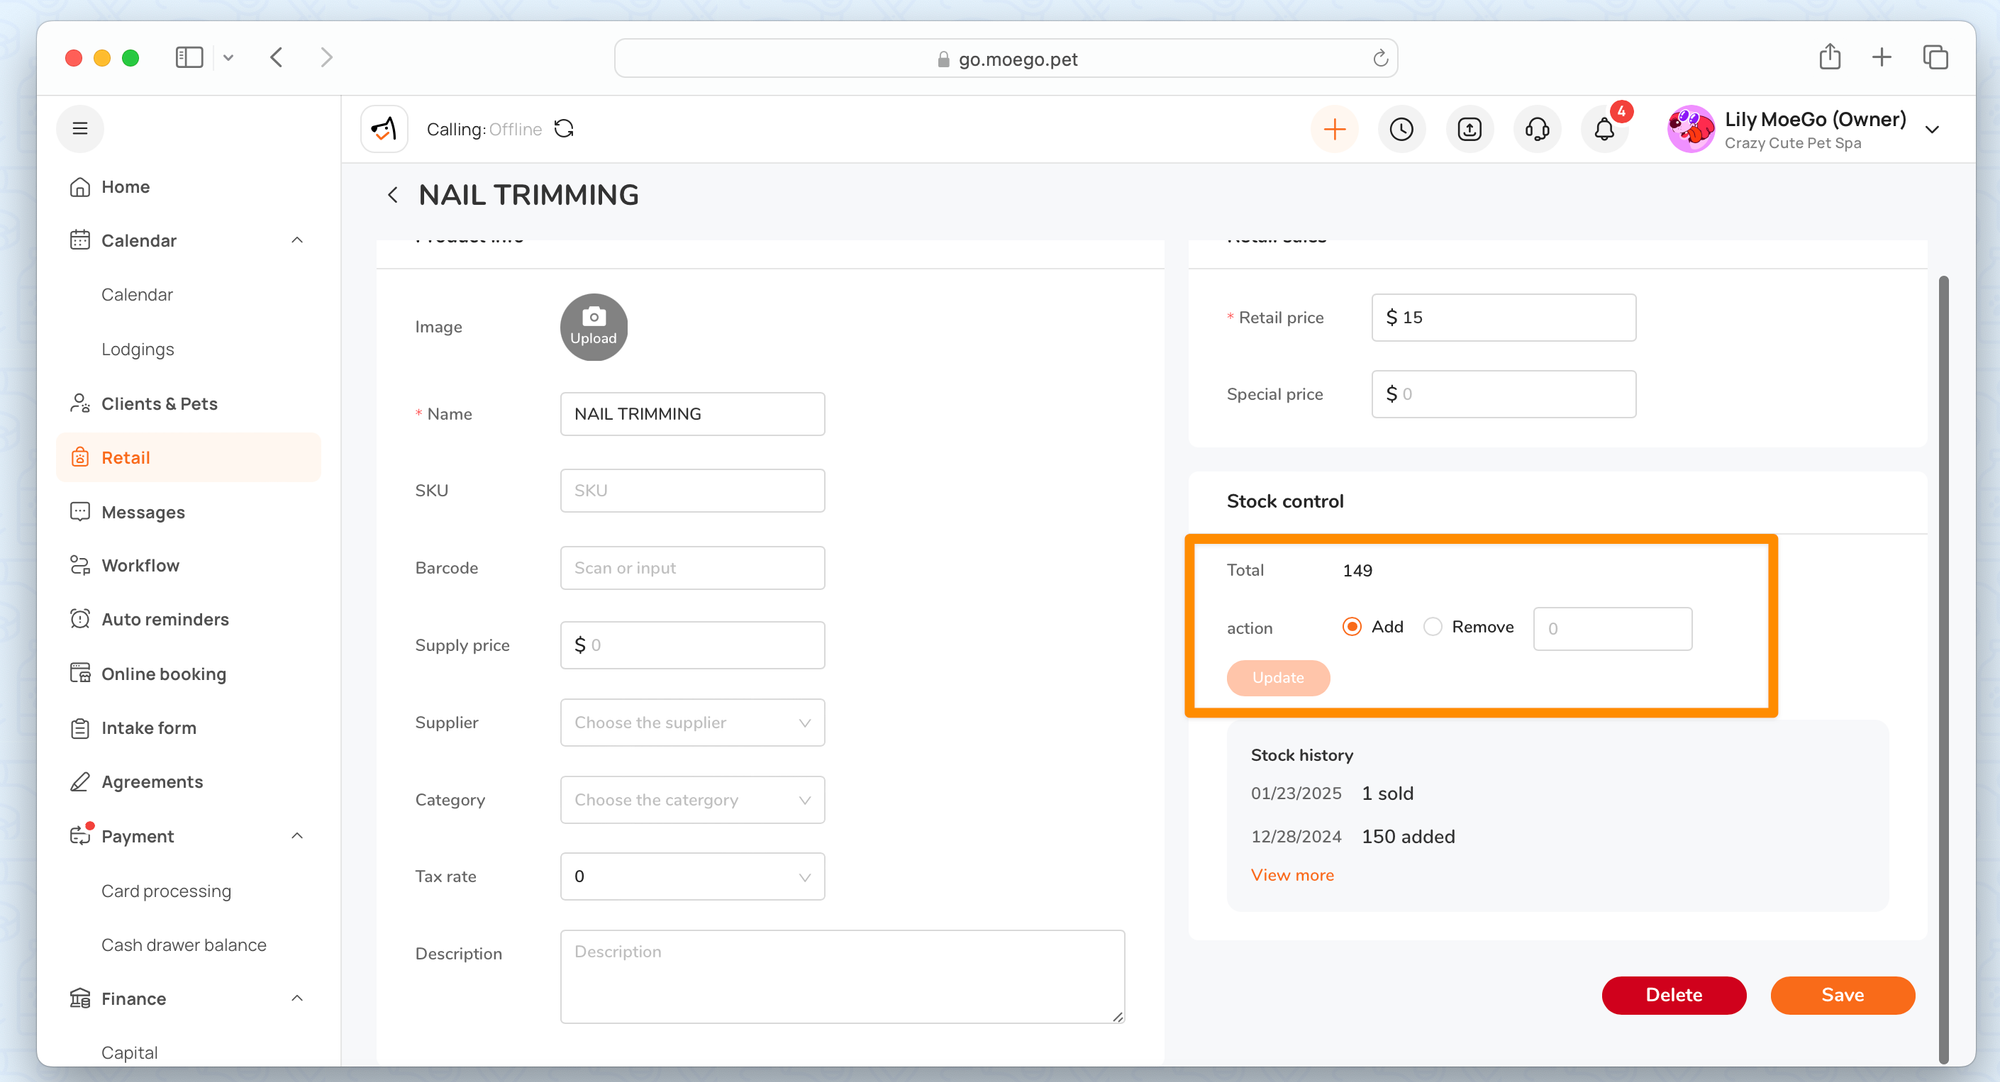
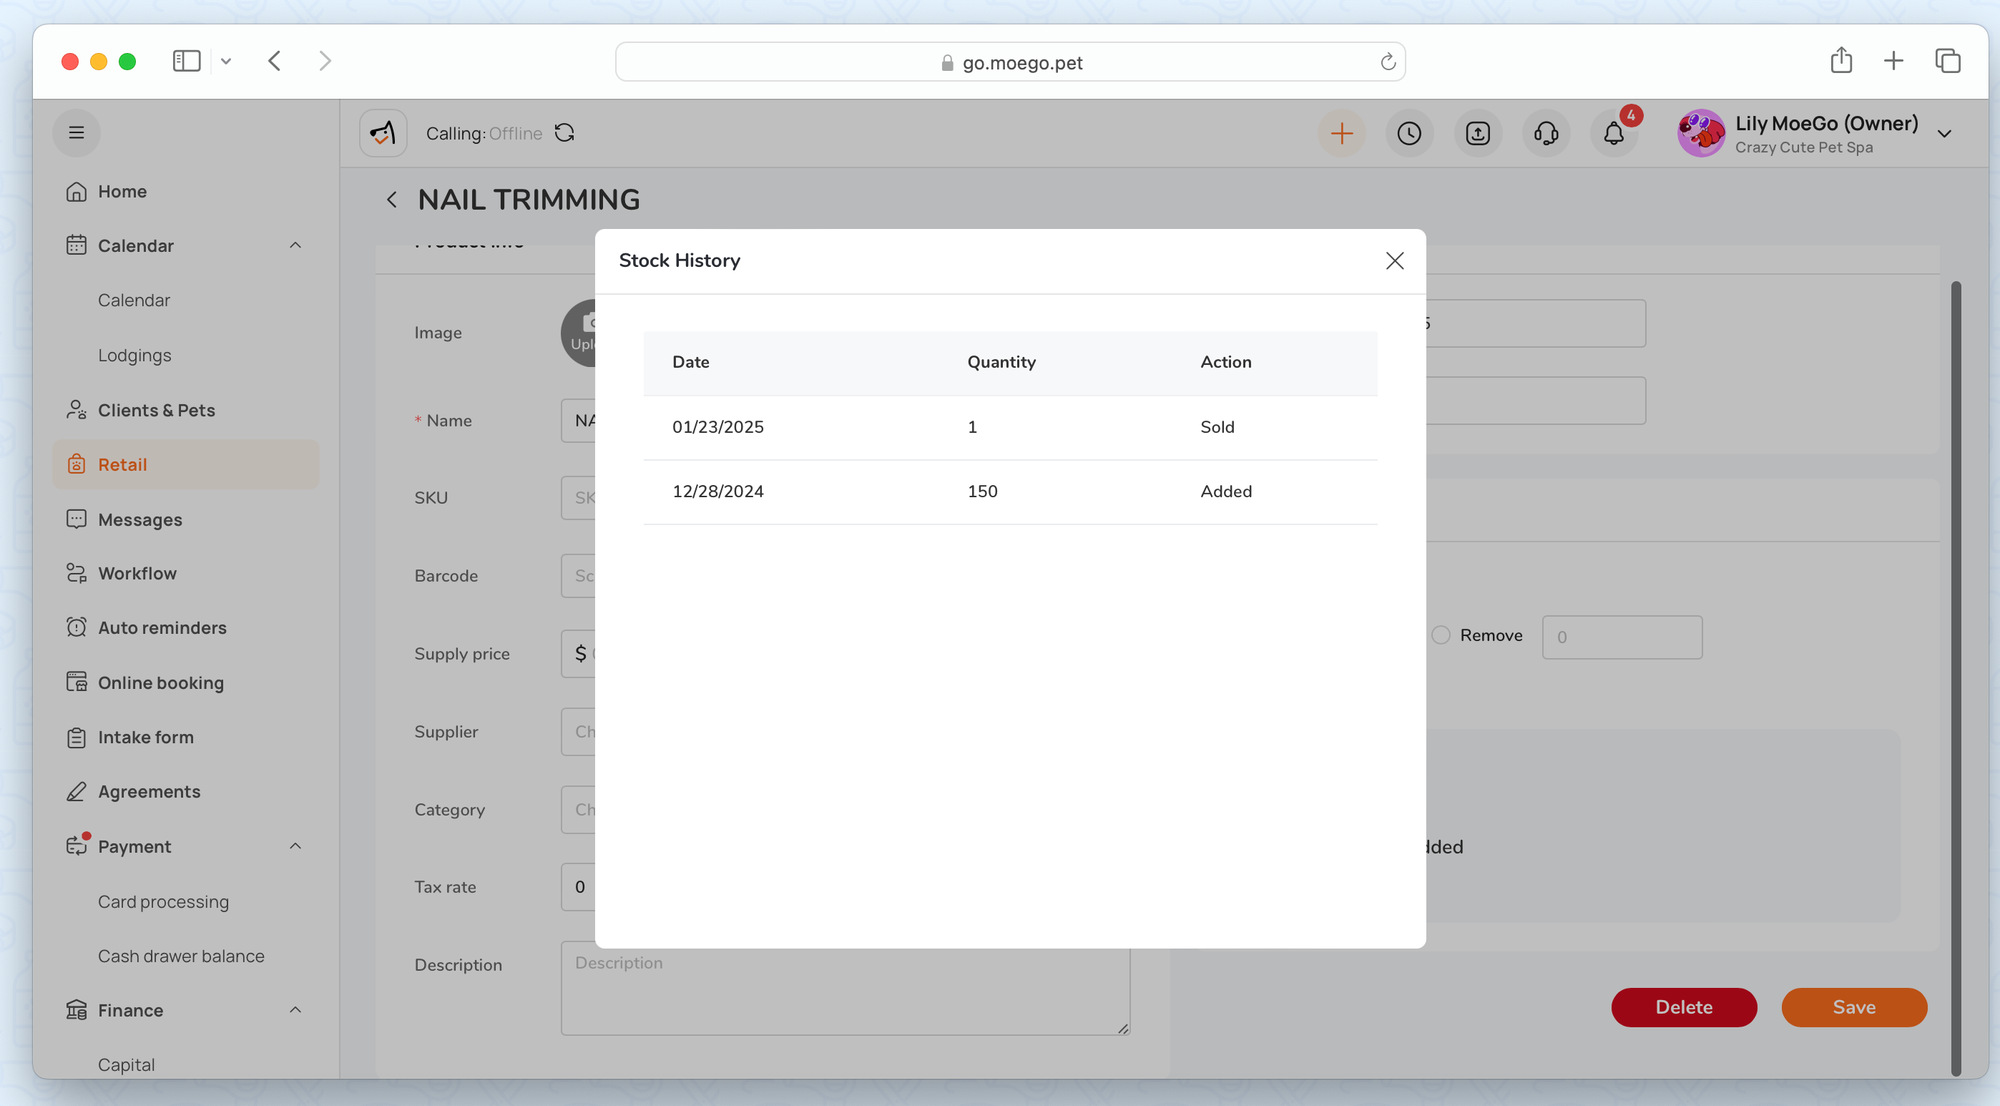
You can also check out the "Stock history" in this section to see why the stock number has been added or removed.
2.Check out for products
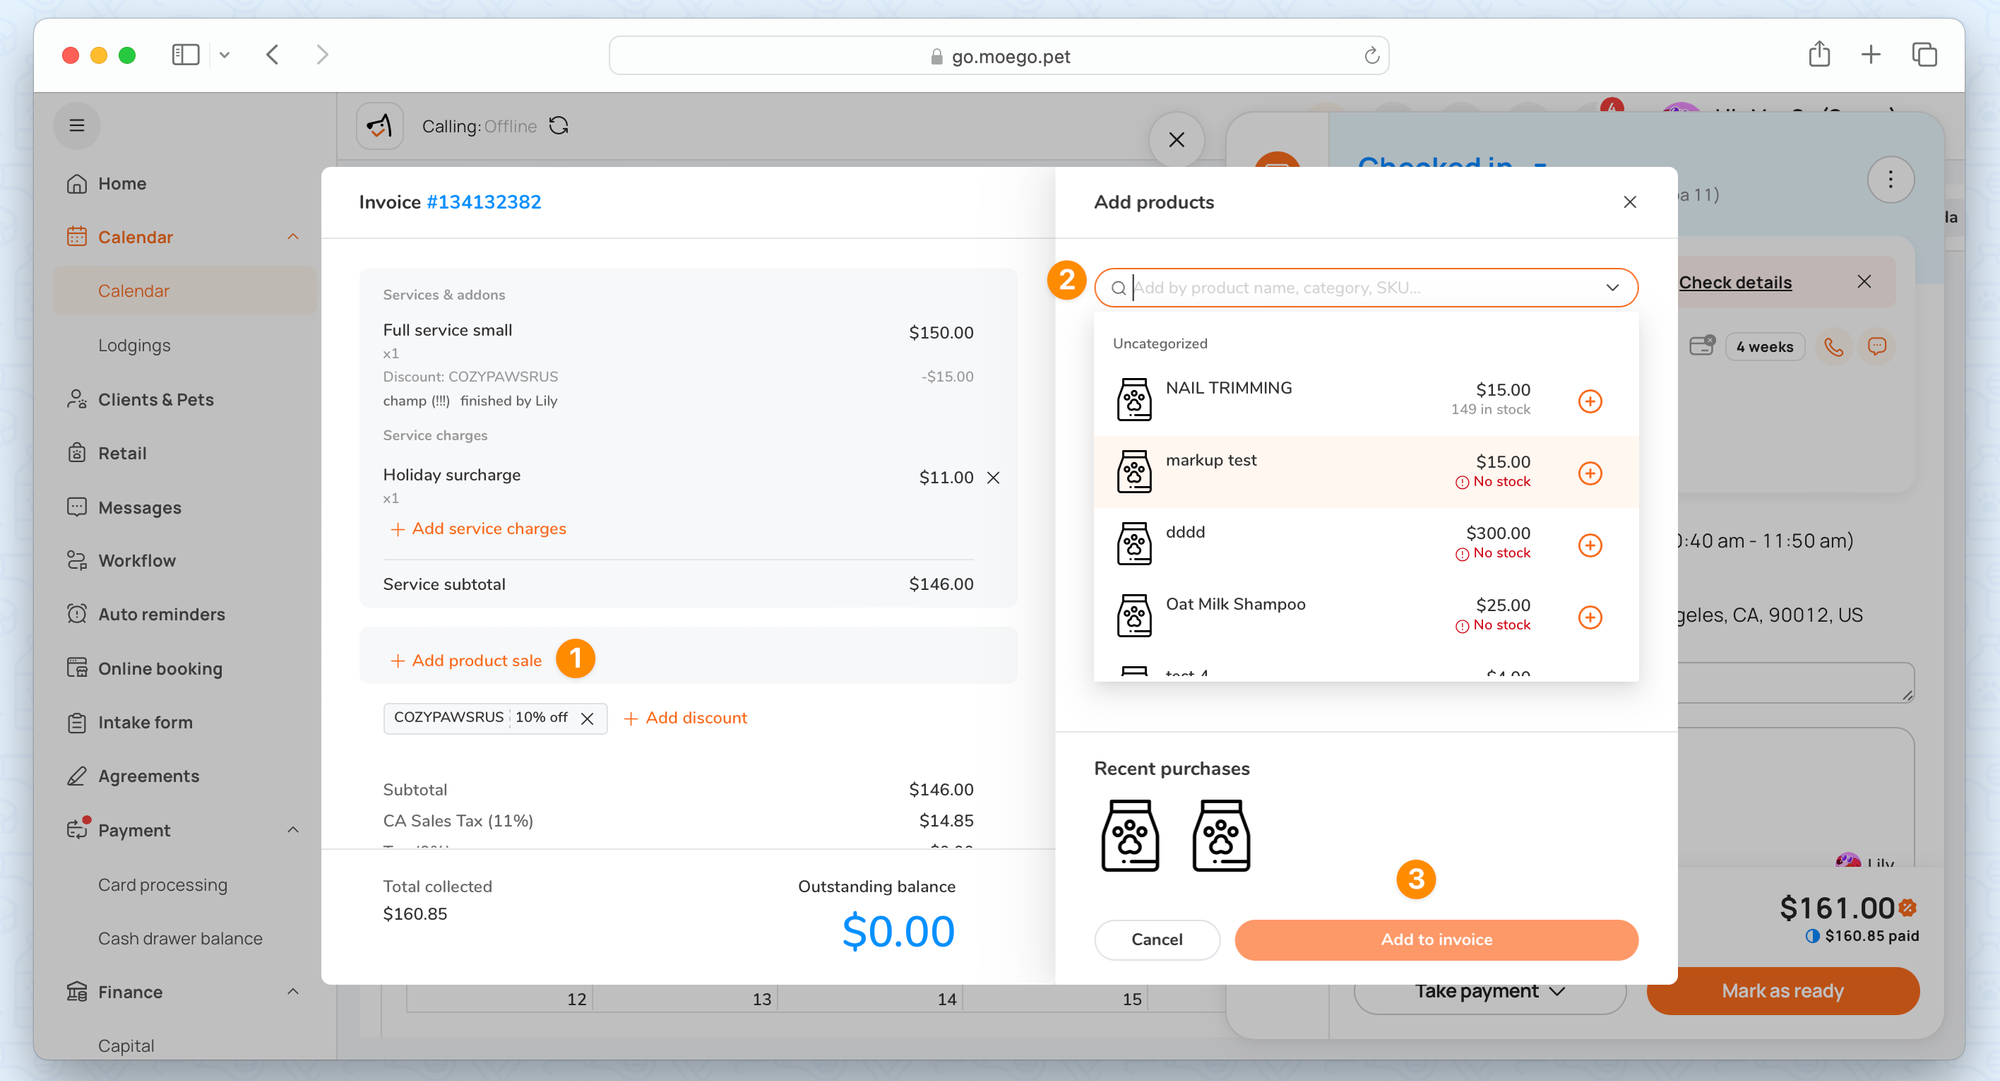
2.1 Sell products with a grooming ticket
You can add products to a grooming appointment during or before checkout:
- Click on an appointment to open the appointment detail modal
- Click on "Take payment" and click "Charge now" to open the invoice modal
- Click on "Add product sale" from the left side of the modal, it will open a product editing sidebar for you from the right side:
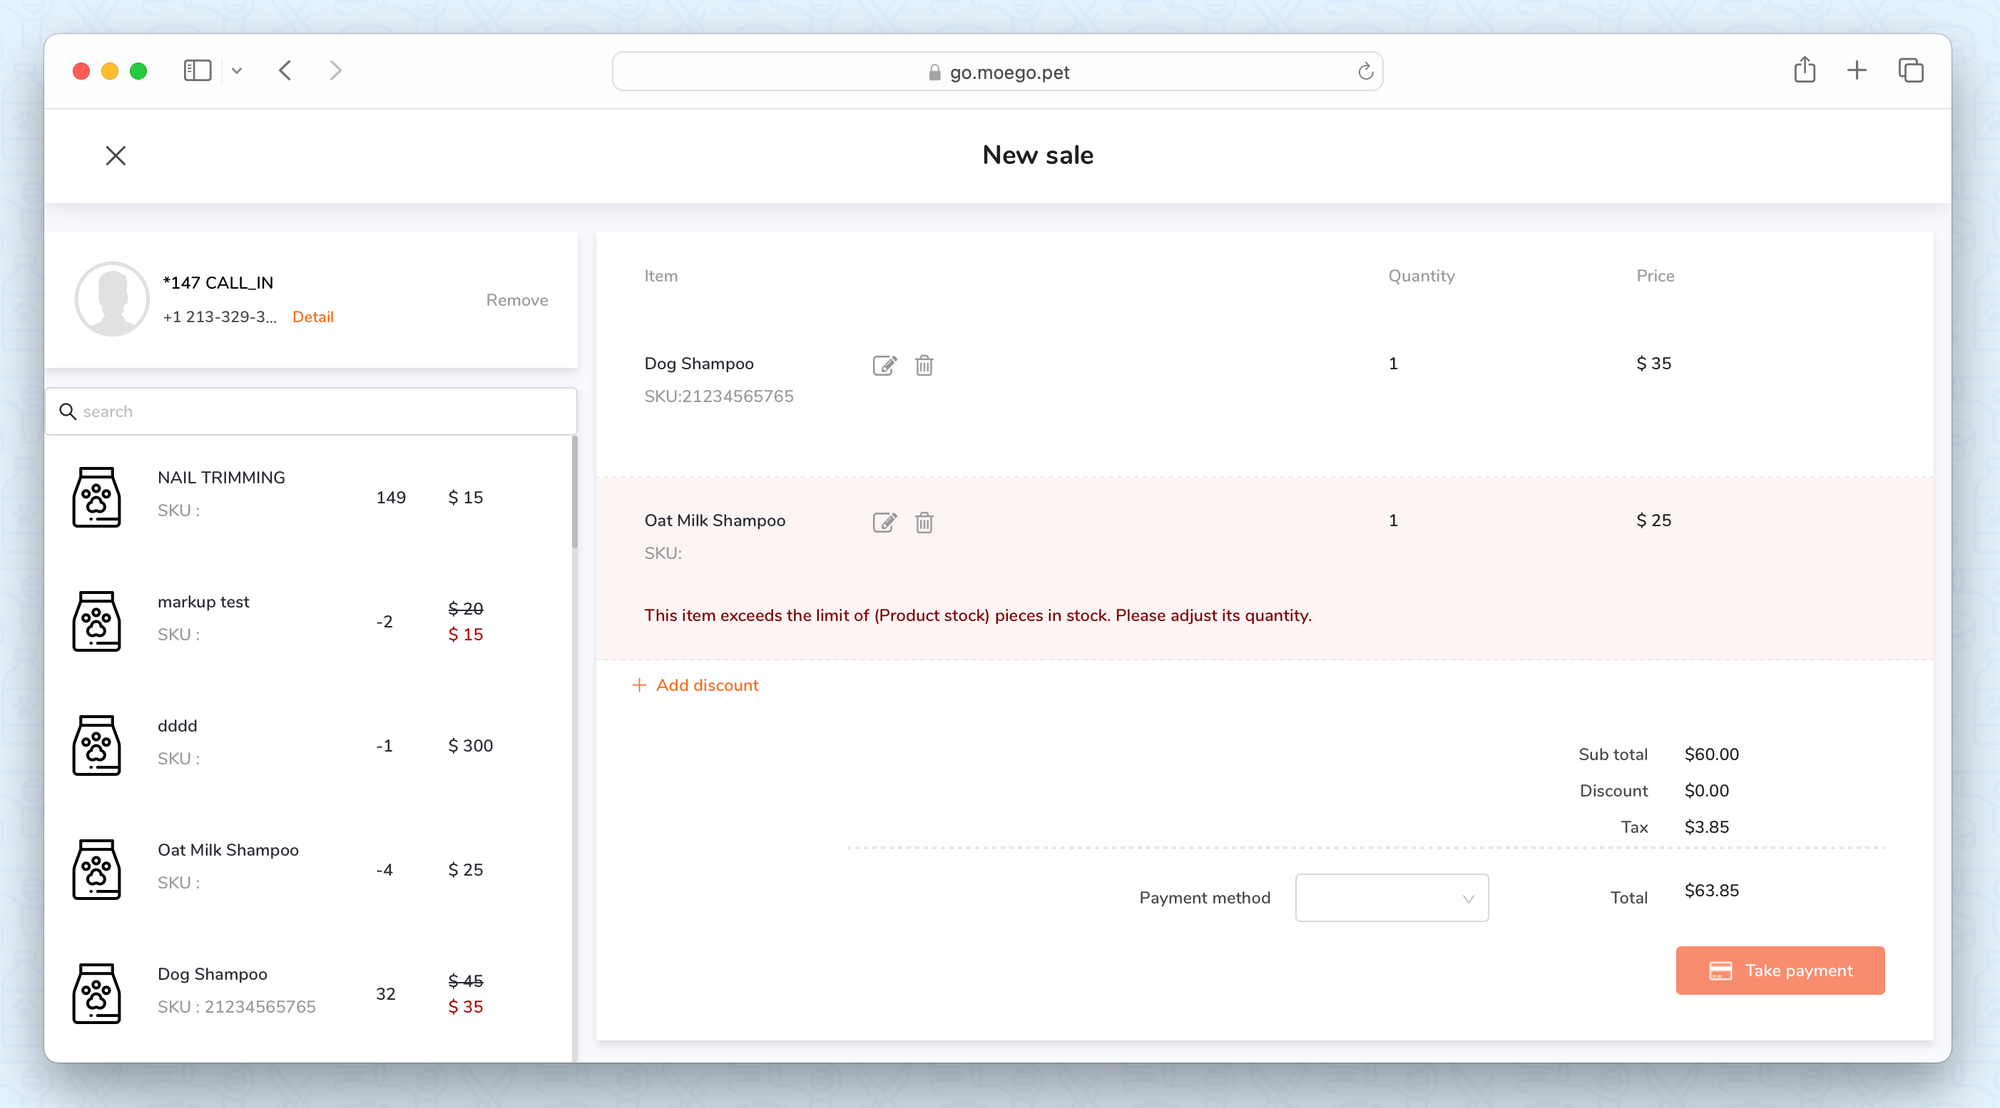
2.2 Sell products without a grooming ticket
Click on the general < Add > button on the header nav bar, and click < Sell products > will take you to a page to sell products on their own:
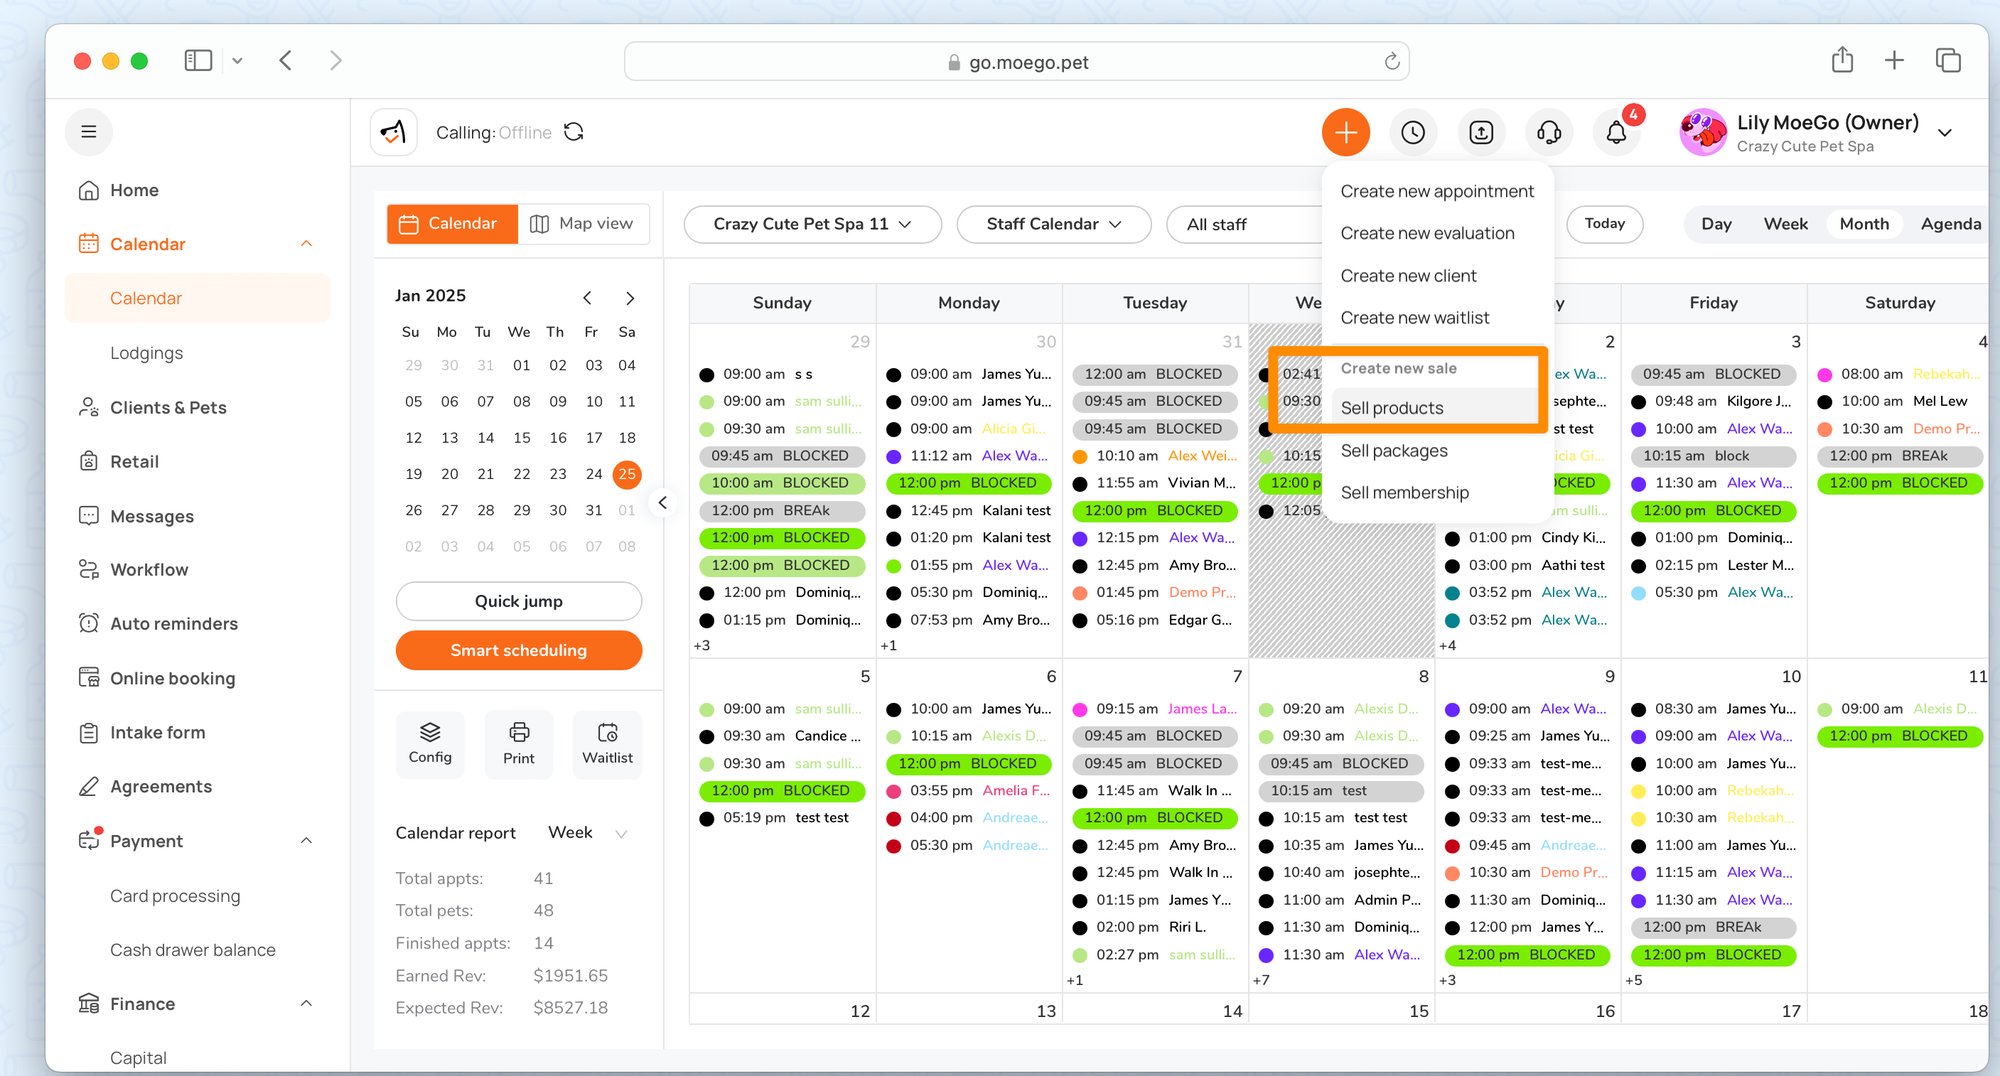
This flow is similar to creating a grooming appointment flow:
- Select a client to sell the product to
- Select products
- Edit Quantity, price, or add discount in the sell:
Track product sales
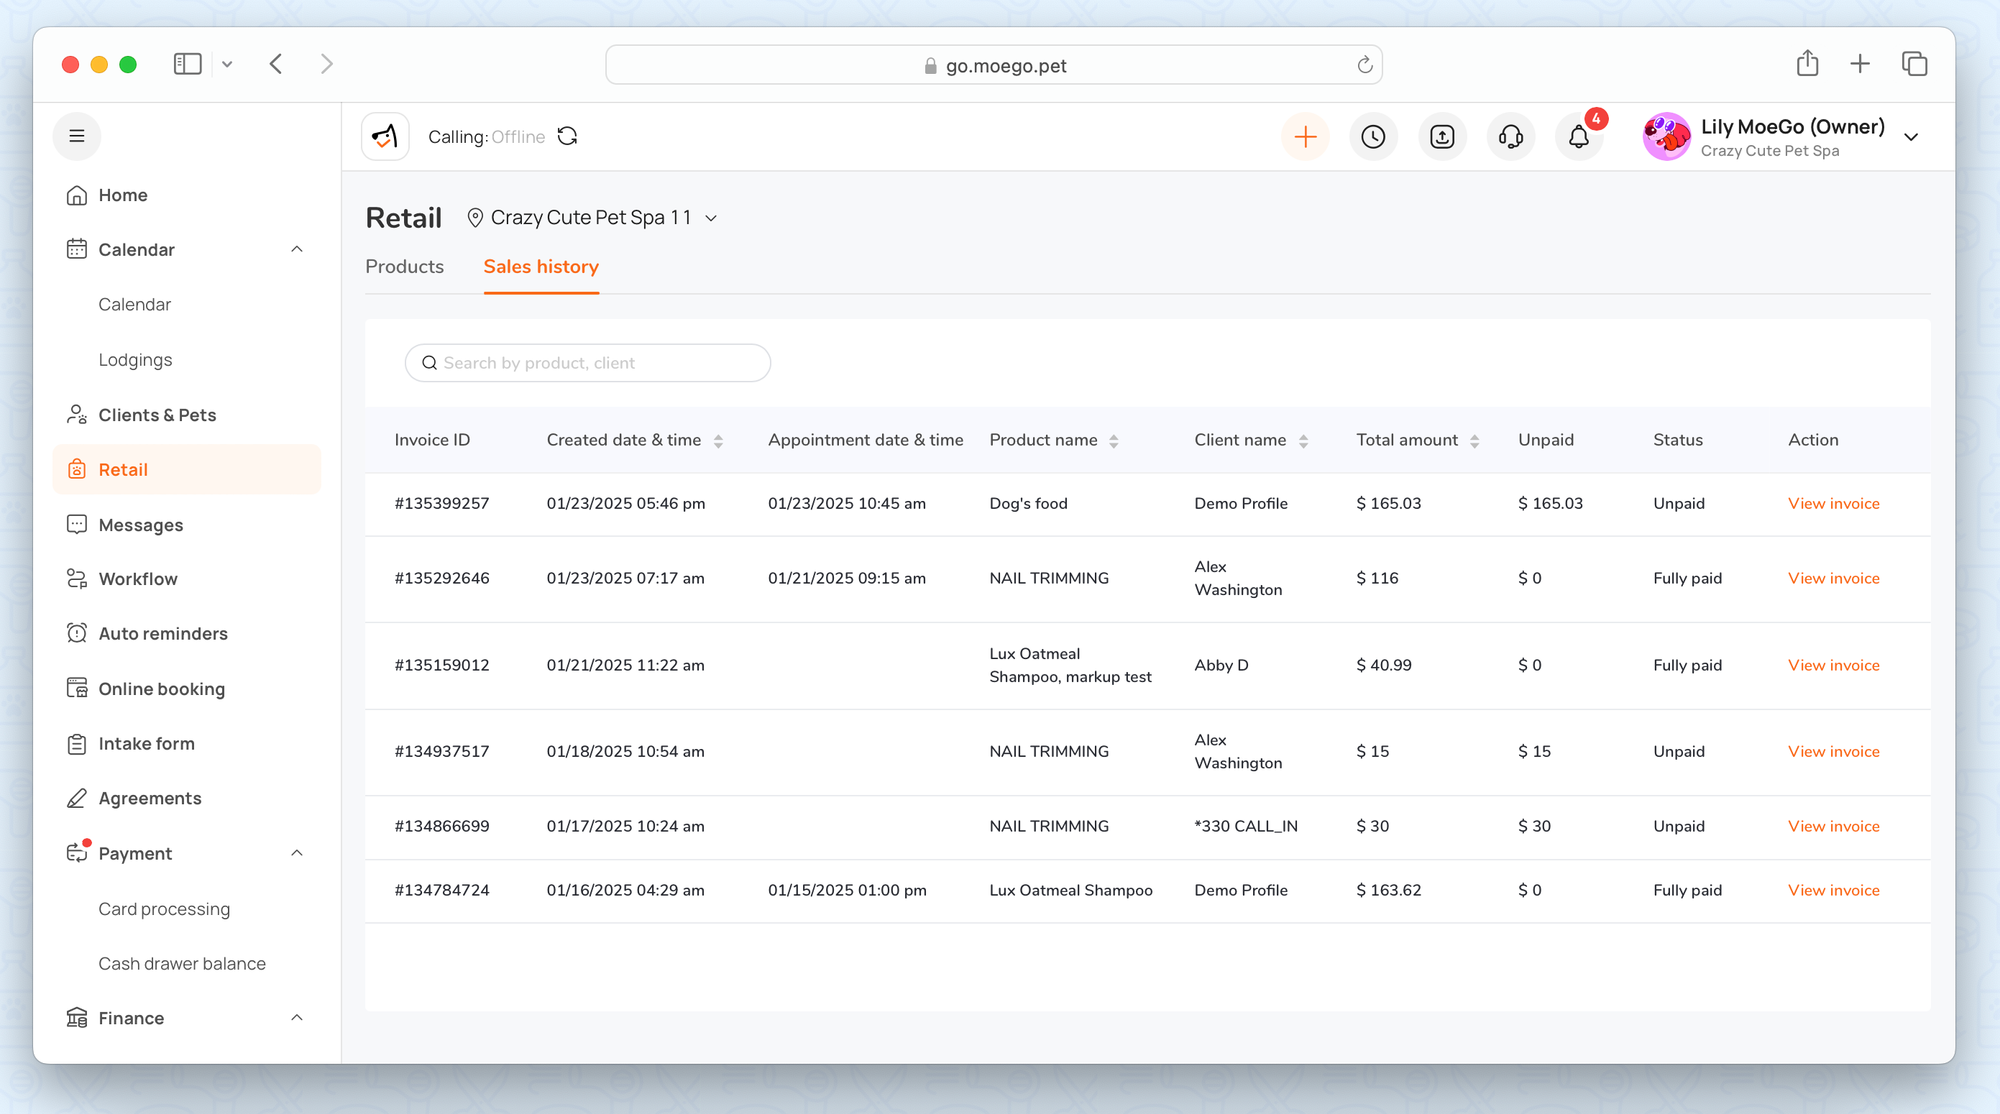
3.1 View sales history
You can find any invoice that includes product sales in the Retails section under the Sales History.
3.2 View product report
We offer two kinds of product reports at this point.

Product sales report:
It will show you what product has been sold in a specific time period, including fields:
- Quantity sold
- Supplier cost
- Total cost = Supplier cost x Quantity sold
- Gross profit
- Net profit
Product by stock report:
It will show you what’s the current stock number of each product in a specific time period.