
Exclusive to the Ultimate Plan: Custom lead fields & Kanban Vivew, Google Advertisement & Report (Alpha).
Leads Management in MoeGo helps you organize, track, and follow up with potential customers before they become official clients. It gives your team a structured workflow to manage inquiries from first contact to first appointment.
This page provides a detailed introduction on what a lead is, how Leads Management works in MoeGo, and why it matters for your business.
Leads Management Overview
What is a Lead?
A lead is a potential customer who has shown interest in your business but has not yet booked an appointment or made a purchase.
Leads can come from many sources, such as:
- Abandoned Online Booking
- Intake form submissions
- Phone calls or voicemails
- Text messages
- Walk-in or manual entries created by staff
Unlike full clients, leads may still be gathering information, comparing providers, asking questions, or waiting for follow‑up.
Why Use Leads Management?
Before Leads Management | After Leads Management |
|
|
Who is eligible?
- All MoeGo plans include the basic Leads Management features.
- The following advanced features are available on the Ultimate Plan: 🌟 :
- Custom lead fields
- Kanban view
- Google Ads integration & reporting
Set Up Leads Management
Step 1: Enable Leads Management
Leads Management can be turned on or off based on your business workflow. To access the setting: Client Management > Leads > Settings
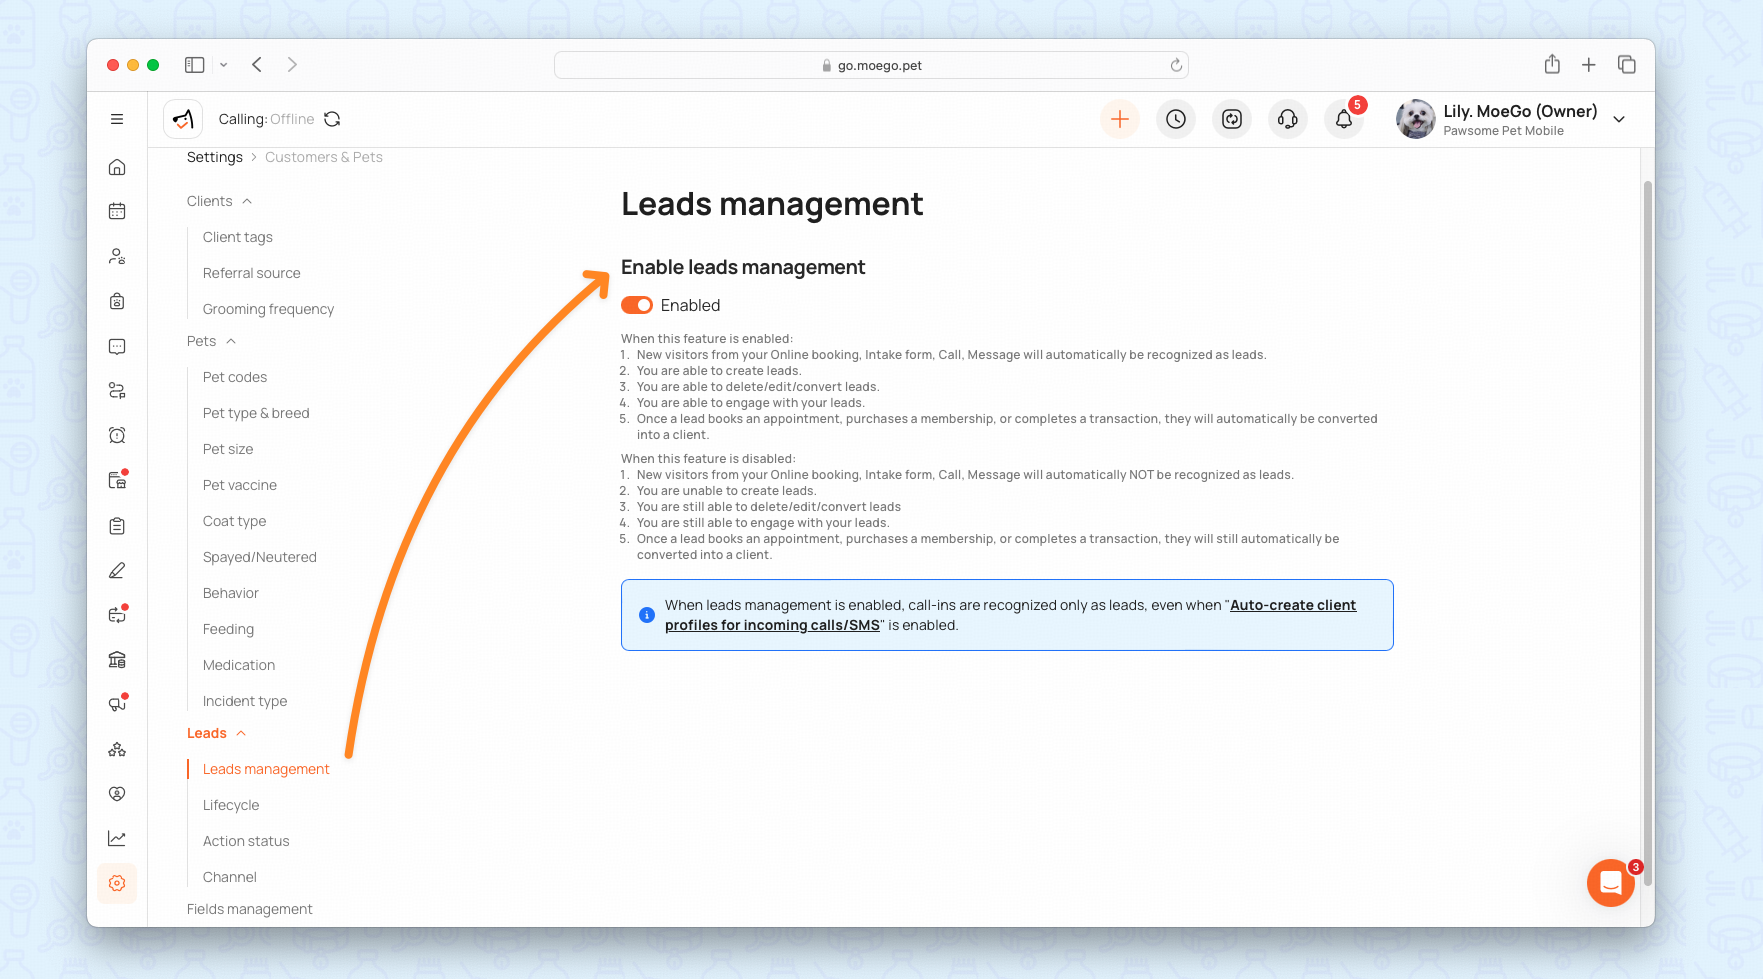
When Enabled | When Disabled |
|
|
Step 2: Review Role Permissions
Permissions determine which staff can access and manage leads.
Navigate to: Settings > Staff & Permissions > Leads Management

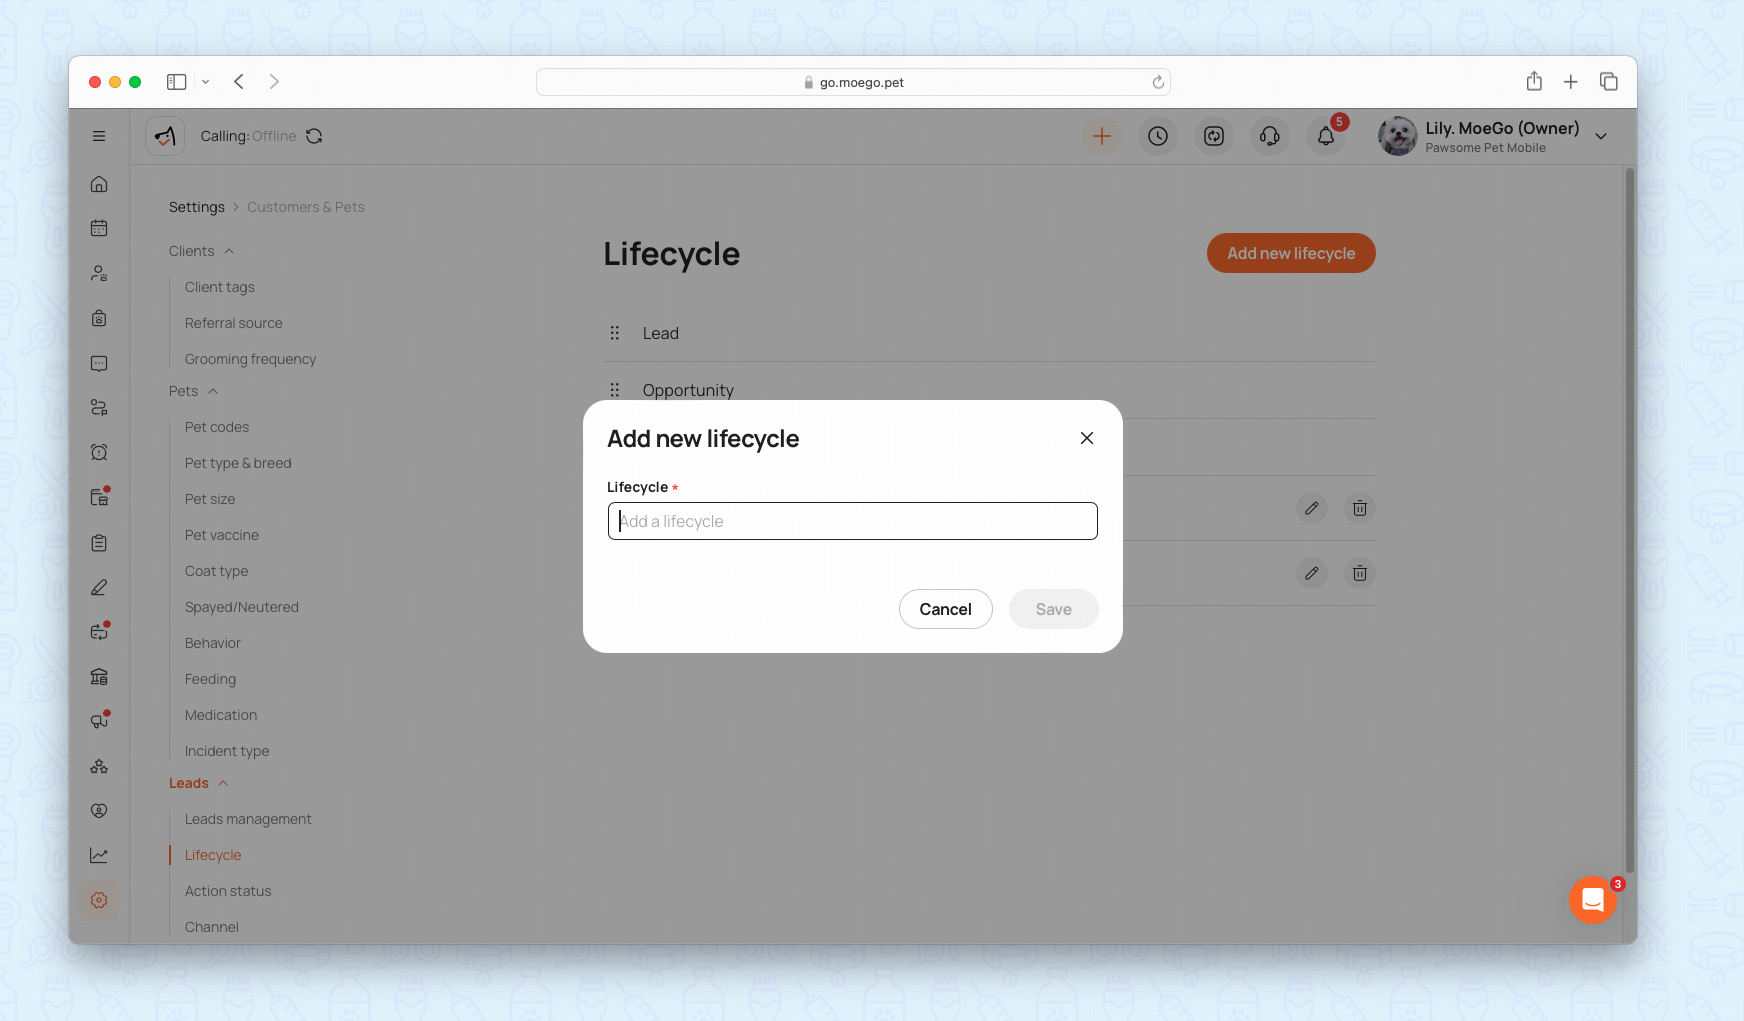
Step 3: Customize Lifecycle/Action Status/Channel
- Lifecycle stages define the journey a lead goes through.Go to: Settings > Customers & Pets > Leads > Lifecycle > Create new.
- Statuses describe what you’ve done or what needs to happen next. Go to: Settings > Customers & Pets > Leads > Action Status > Create new.
- Custom channels allow you to add and track your own lead sources. You can see exactly where each lead is coming from. Go to: Settings > Customers & Pets > Leads > Channel > Create new.
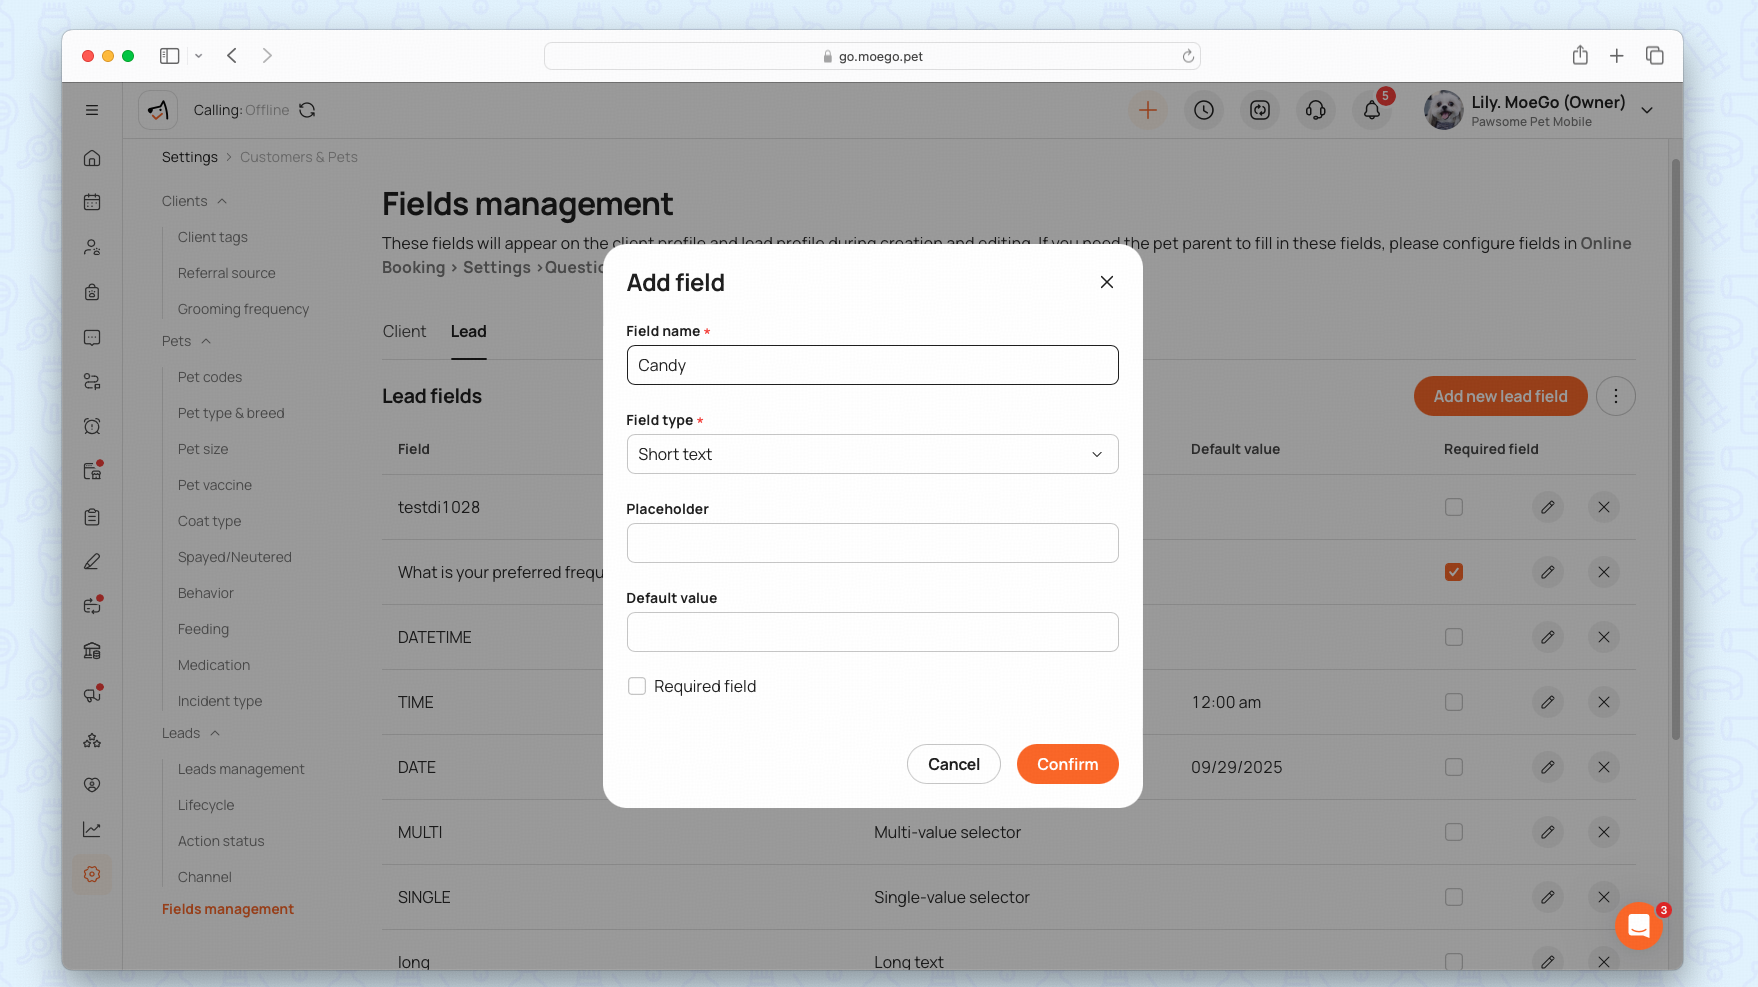
Step 4: Custom Lead Fields (Ultimate Plan🌟 )
If you’re on the Ultimate Plan, you can create additional fields tailored to your business. Custom fields appear in the Lead Details panel and can be used for filtering in the dashboard.
Find them under: Settings > Customers & Pets > Fields Management.
Add new to fill out the field details:
- Field name
- Property type — Short text, Long text, Single-select dropdown, Multi-select dropdown, Date & Time
- Required — choose to force staff to complete this field
- Placeholder — guide your staff with hints
- Default value — pre-filled answer option
Step 5: Set up Staff Permission

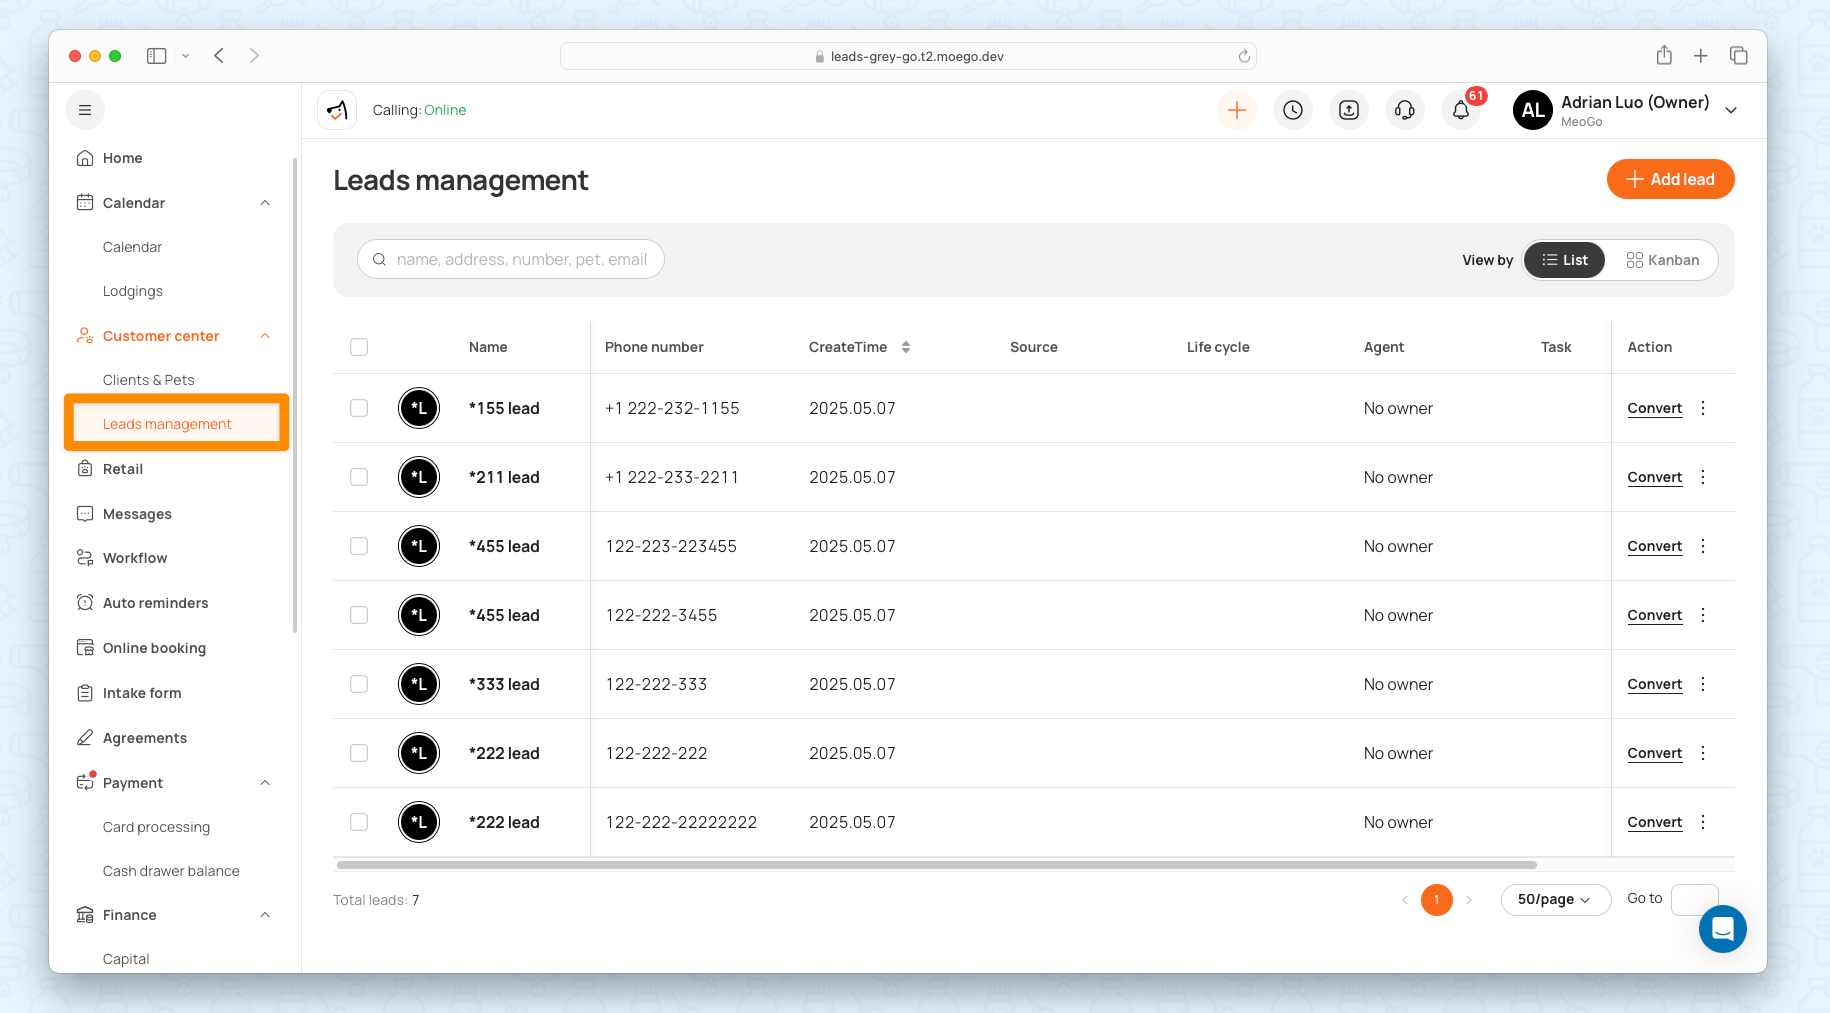
Use the Leads Dashboard
The Leads Dashboard provides a complete picture of all your leads. Access the dashboard via Main menu > Customer center > Leads Management.
Filters
Filters help you narrow down the leads you want to focus on. You can filter by:
Filter Category | Description |
Referral Source | The referral source where the lead was captured (e.g., Google Ads, Meta Ads, ect). |
Channel | The channel where the lead was captured (e.g., Call in, Online Booking, Intake Form, Text in, Customized channels). |
Lifecycle | Filter by lead lifecycle stage (e.g., Lead, Opportunity, Closed, Trash). |
Action Status | Filter by engagement status, such as Connected, Unanswered, or Pending Follow-up. |
Created Date | Filter by when the lead was created. |
Agent | Filter by the team member assigned to the lead. |
Tasks | Filter based on task status: • Pending tasks > 0 – leads that have at least one open task. • Pending tasks = 0 – leads with all tasks completed. |
Custom Fields | Filter using any custom fields created by the business. |
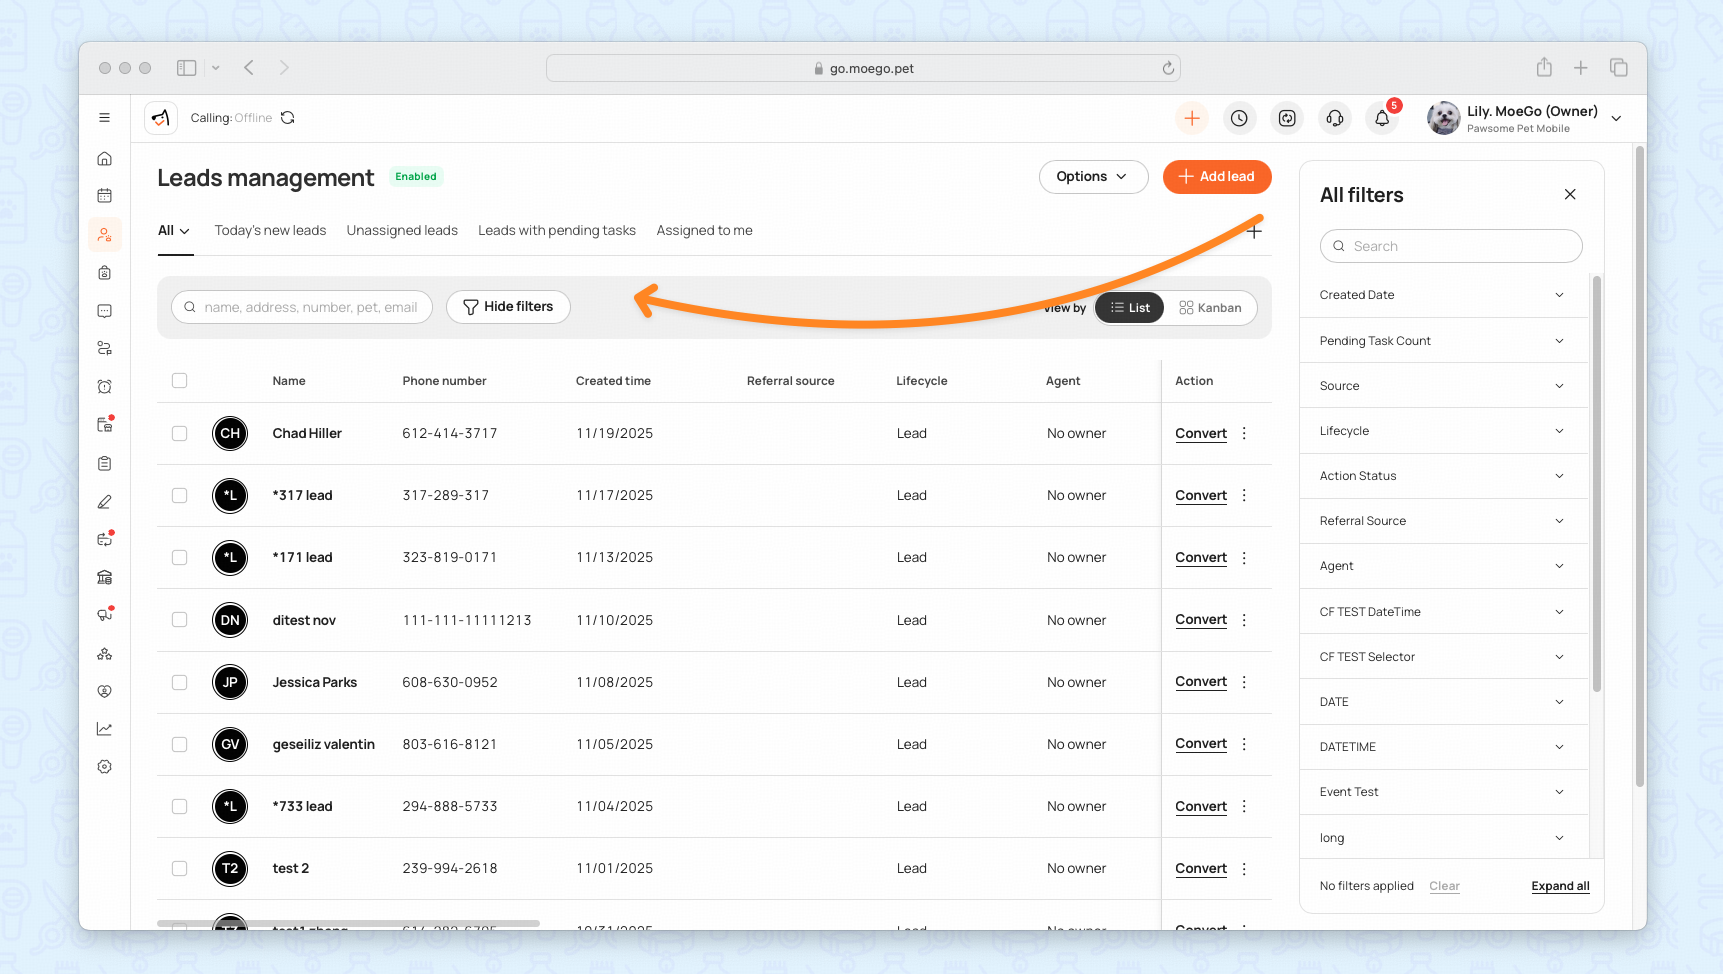
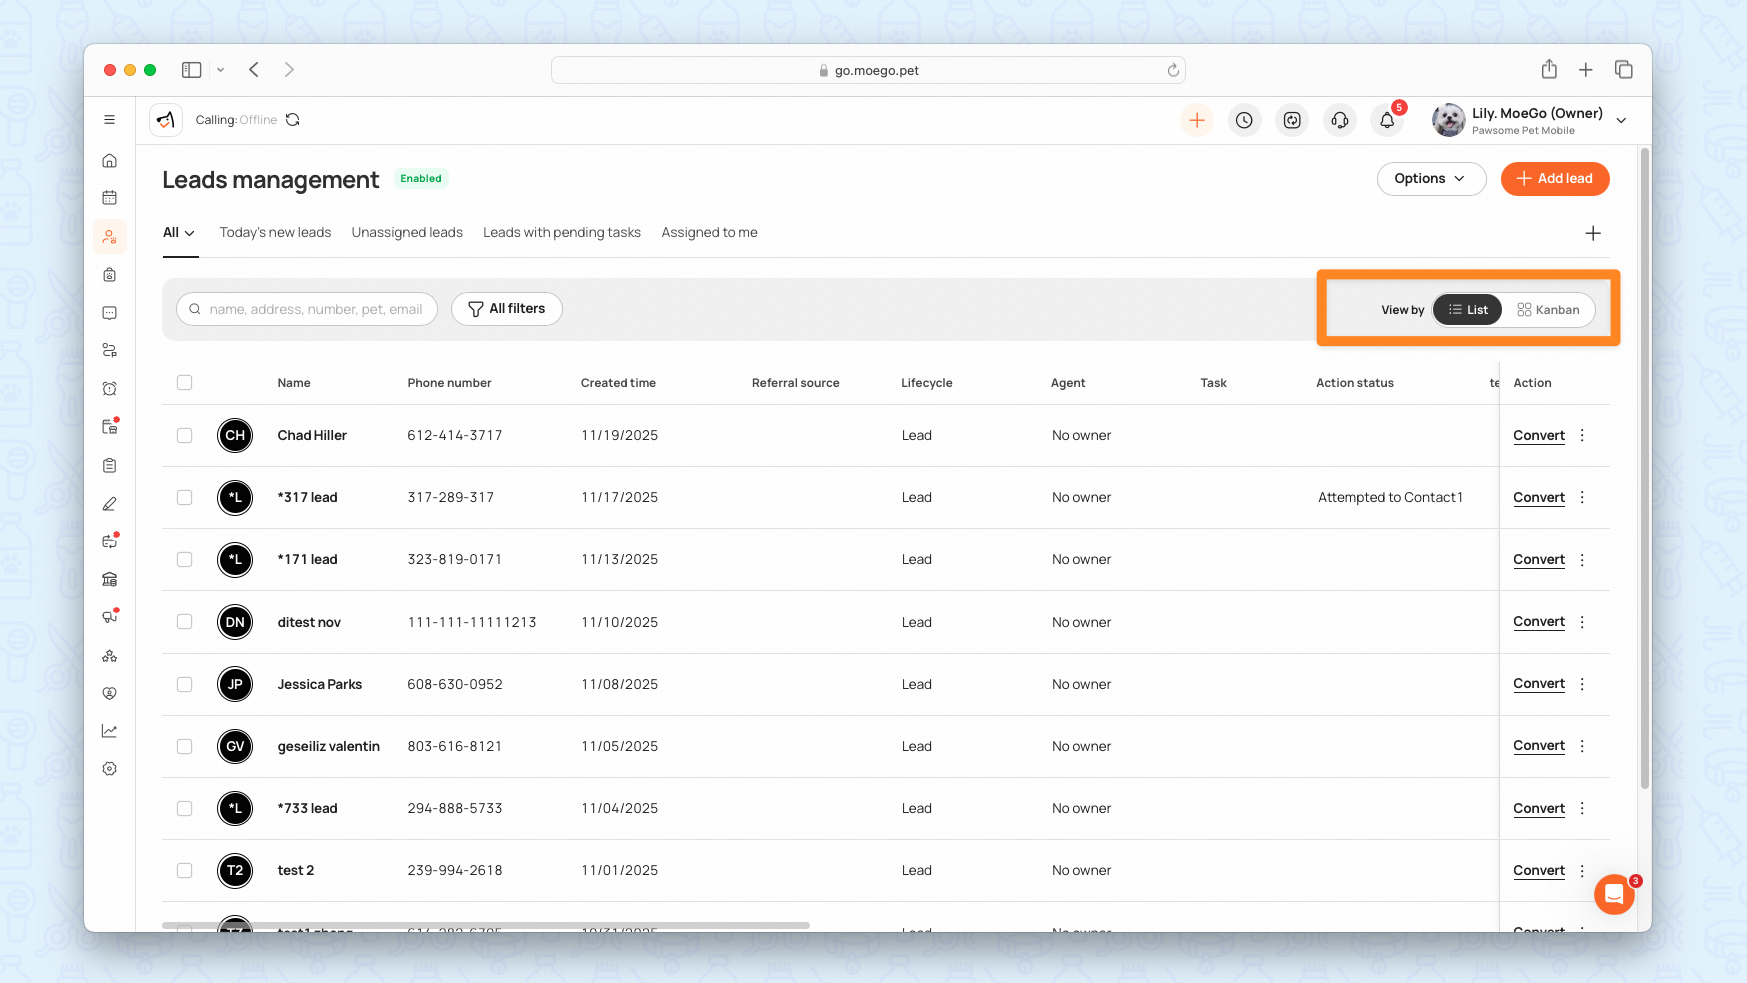
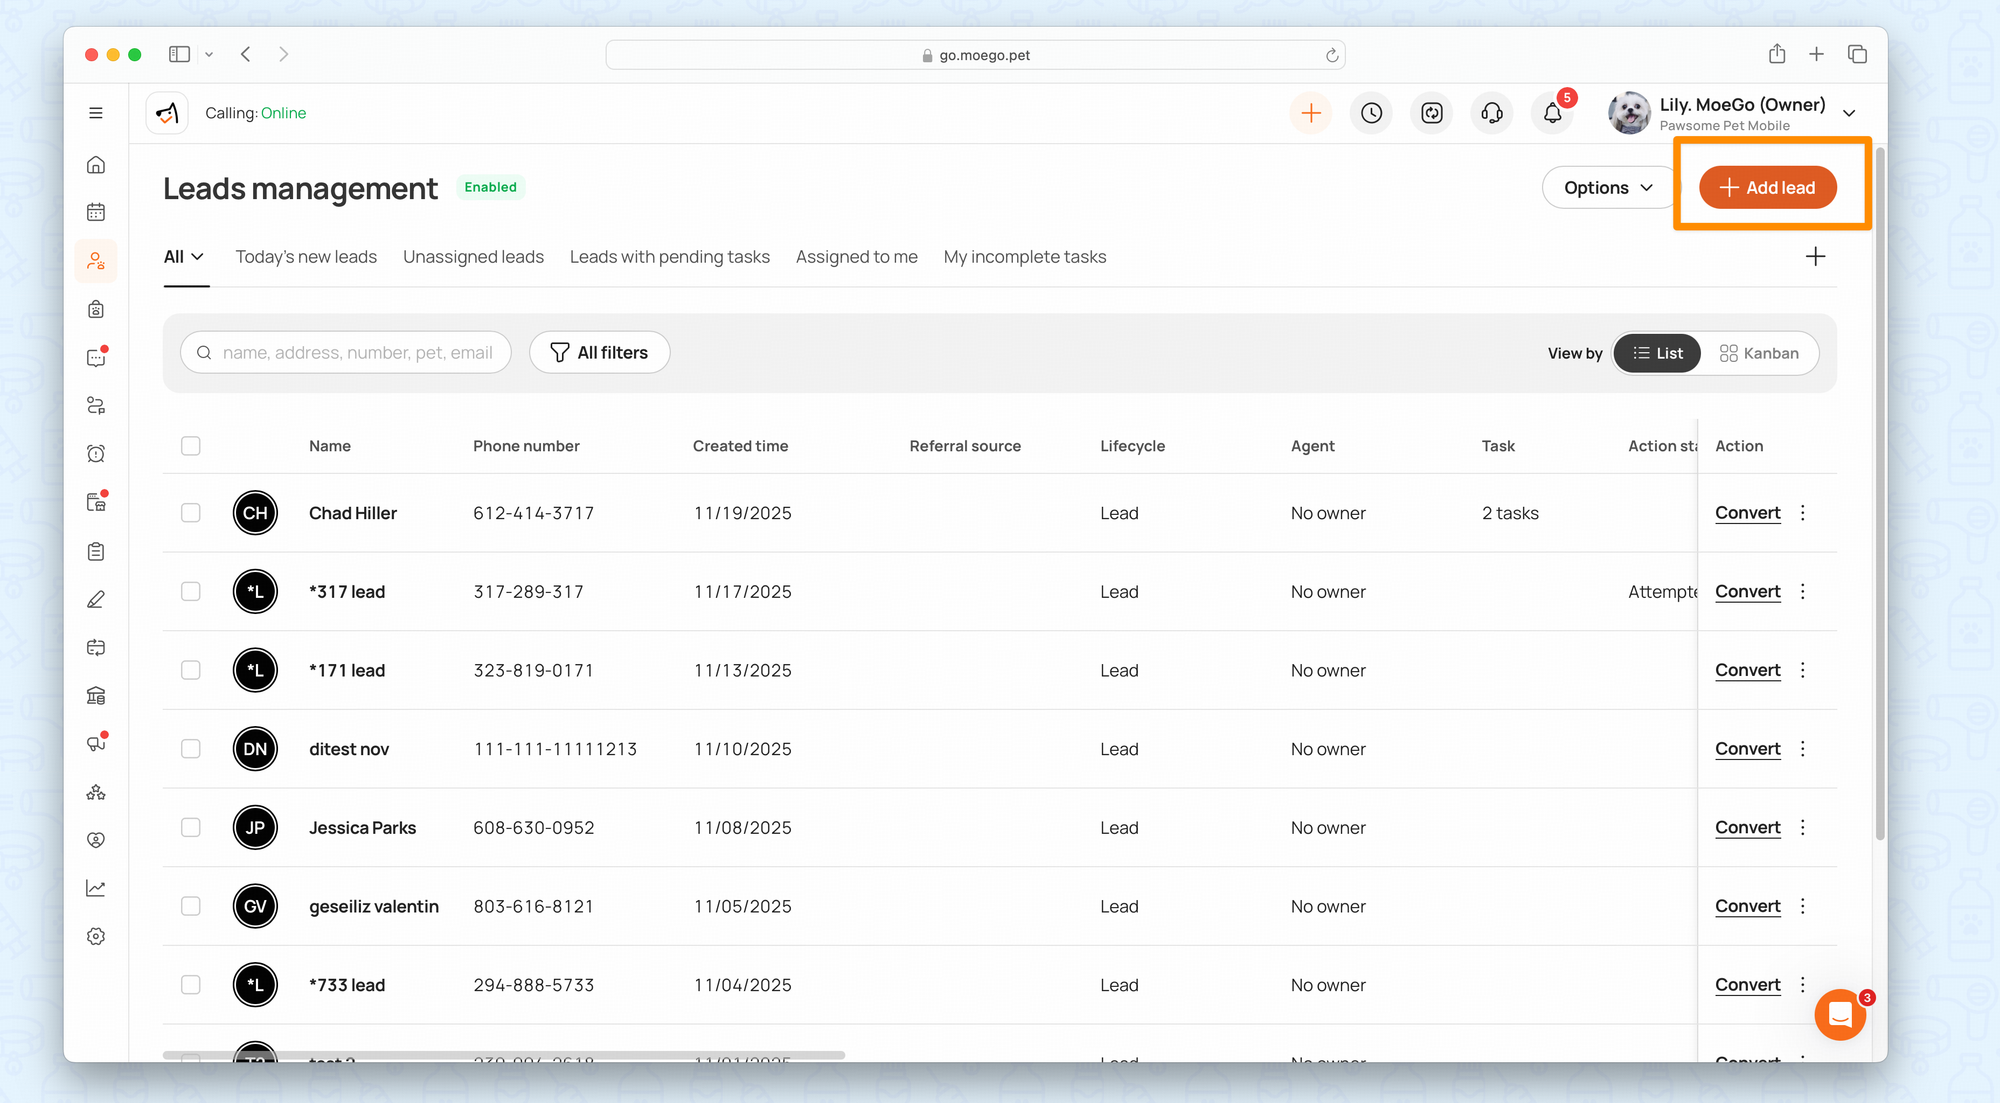
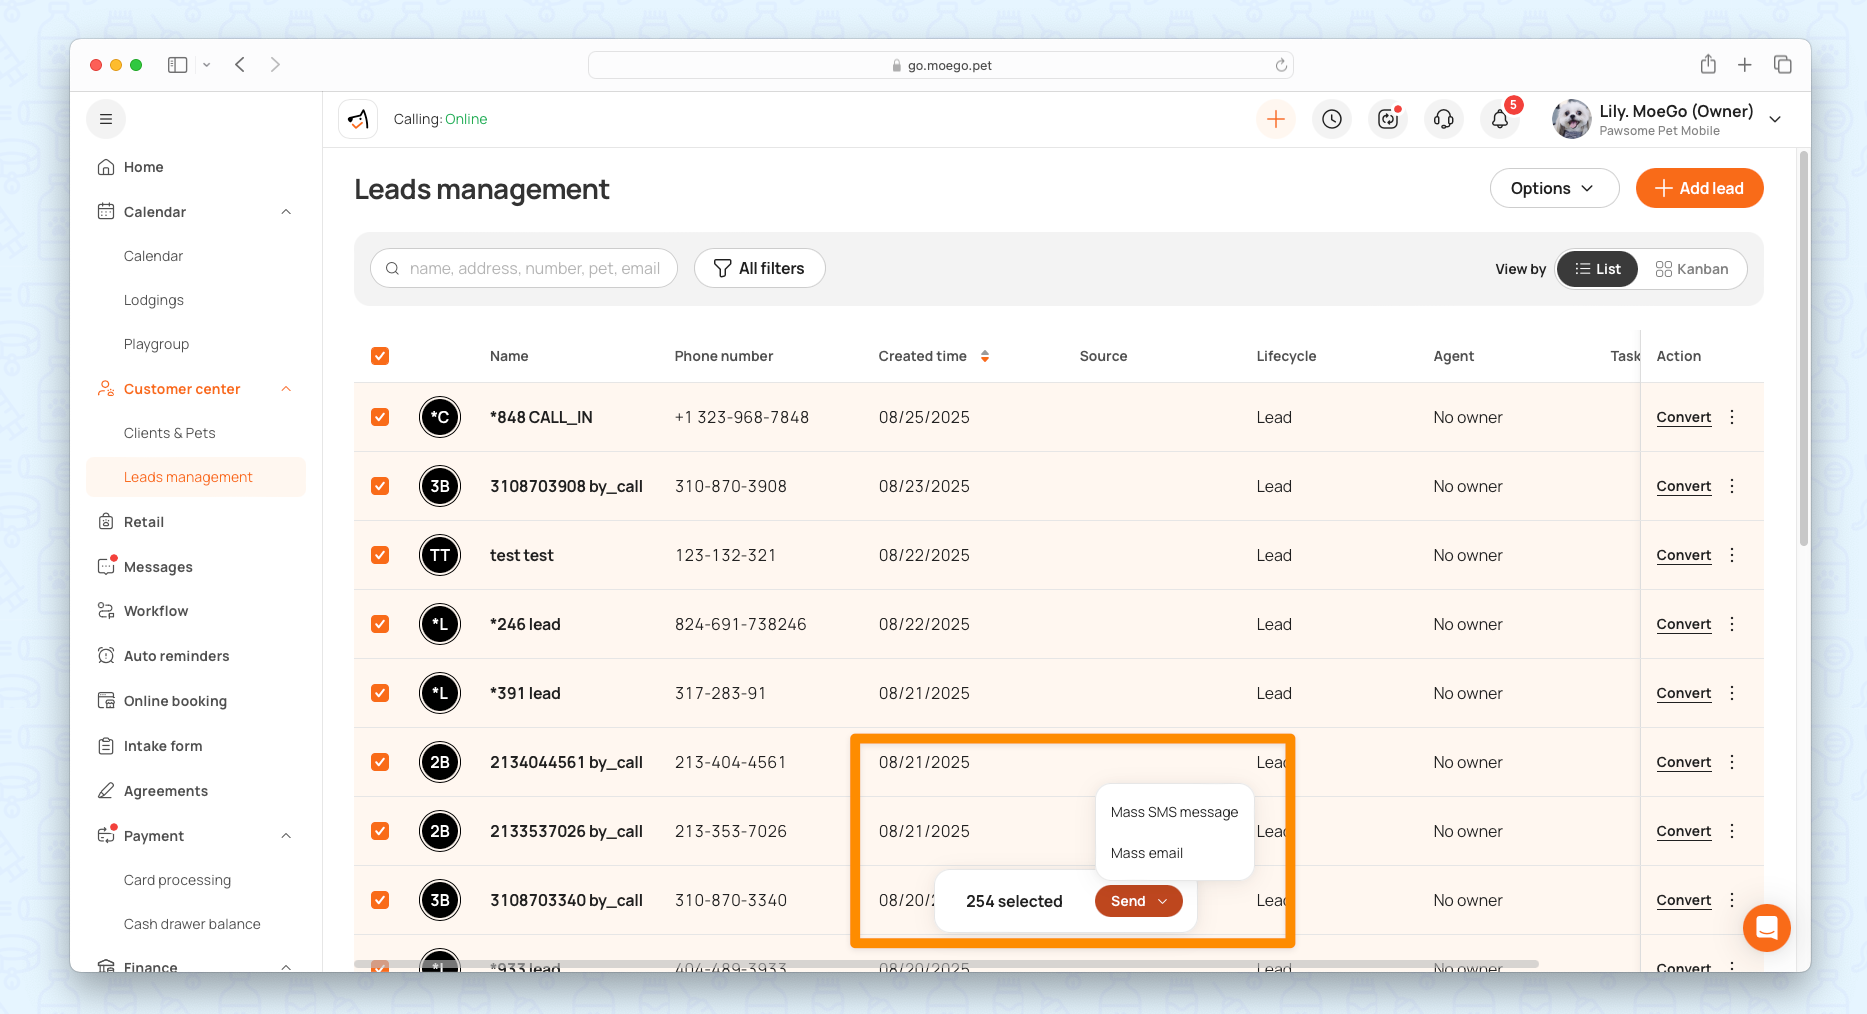
List View
The List provides a clear, tabular overview of all leads, making it easy to scan key details quickly.
- Source: Customize referral sources under Settings > Clients & Pets > Referral Source.
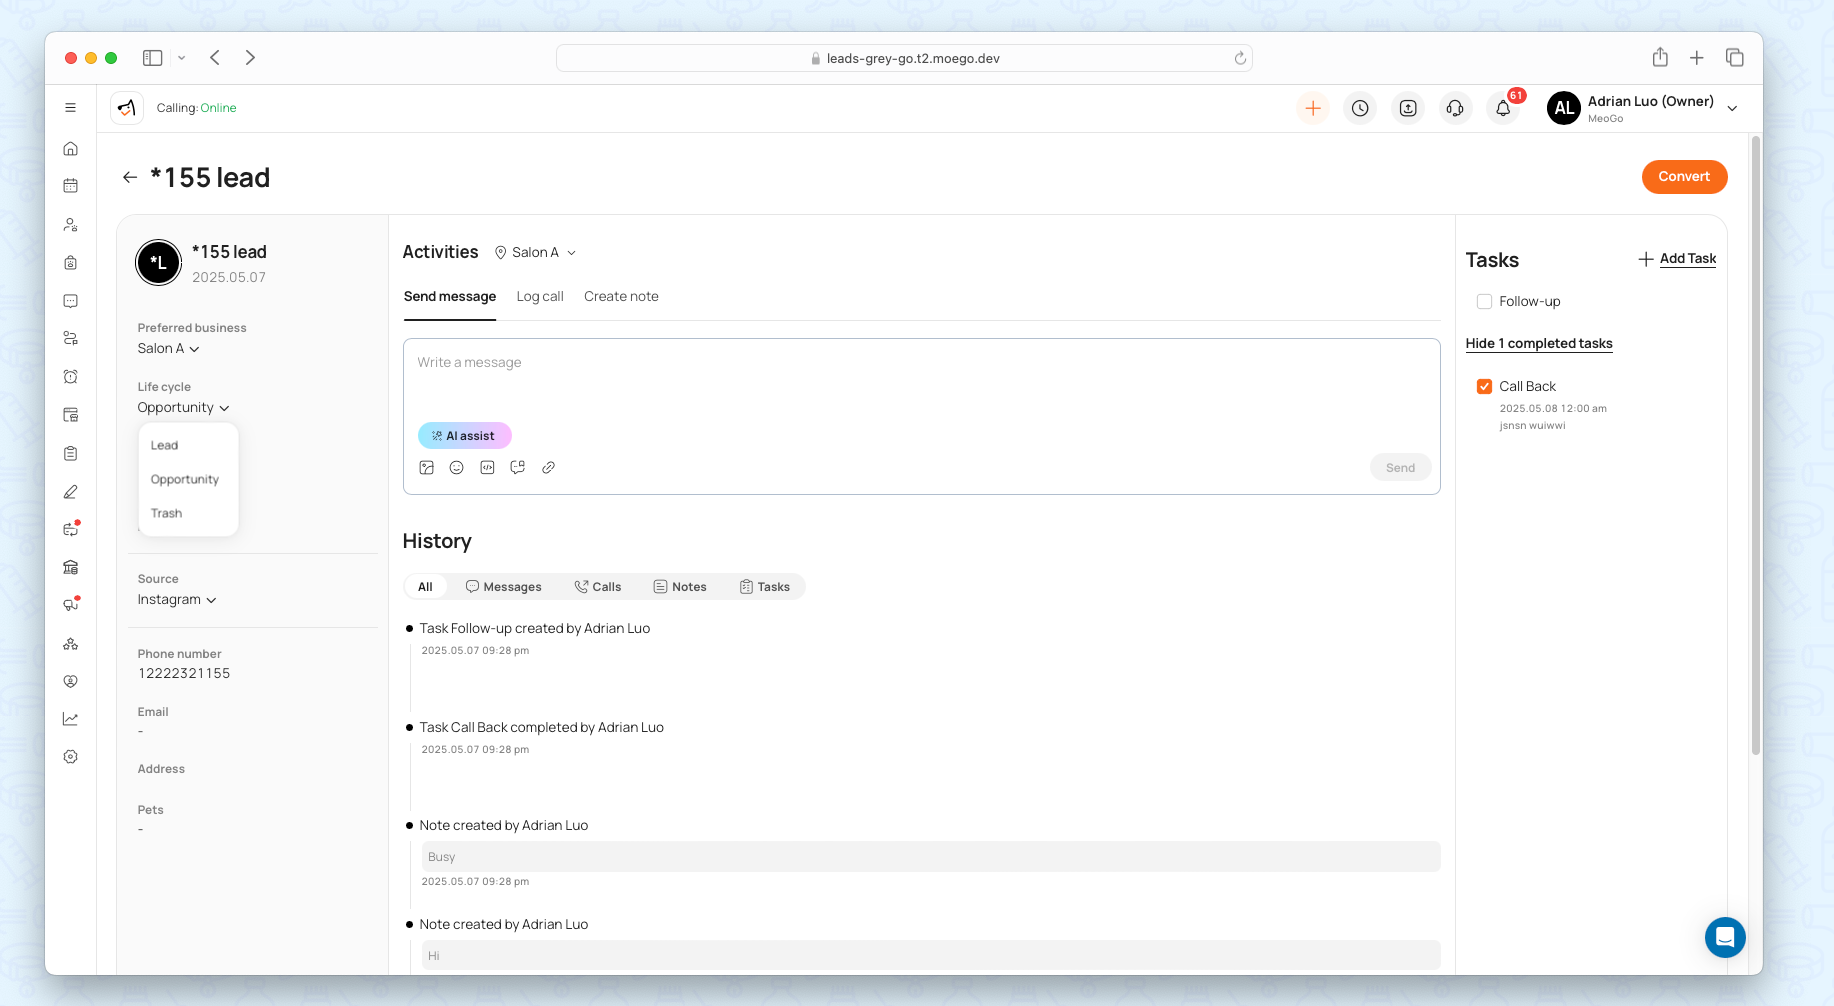
- Life cycle:
- Lead: New contact (has phone number but no appointment).
- Opportunity: High-potential lead likely to convert.
- Trash: Inactive or disqualified leads.
- Action Status: Tracks the outcome of interactions (e.g., First Reservation, Tour completed, CSR Follow-up).
Default Views
Each view combines selected filters for easy access to frequently used data sets.
View Name | Filter Criteria |
Today’s New Leads | Created Date = Today |
Unassigned Leads | Agent = Empty |
Leads with Pending Tasks | Task ≠ Empty |
Assigned to Me | Agent = Current Account |
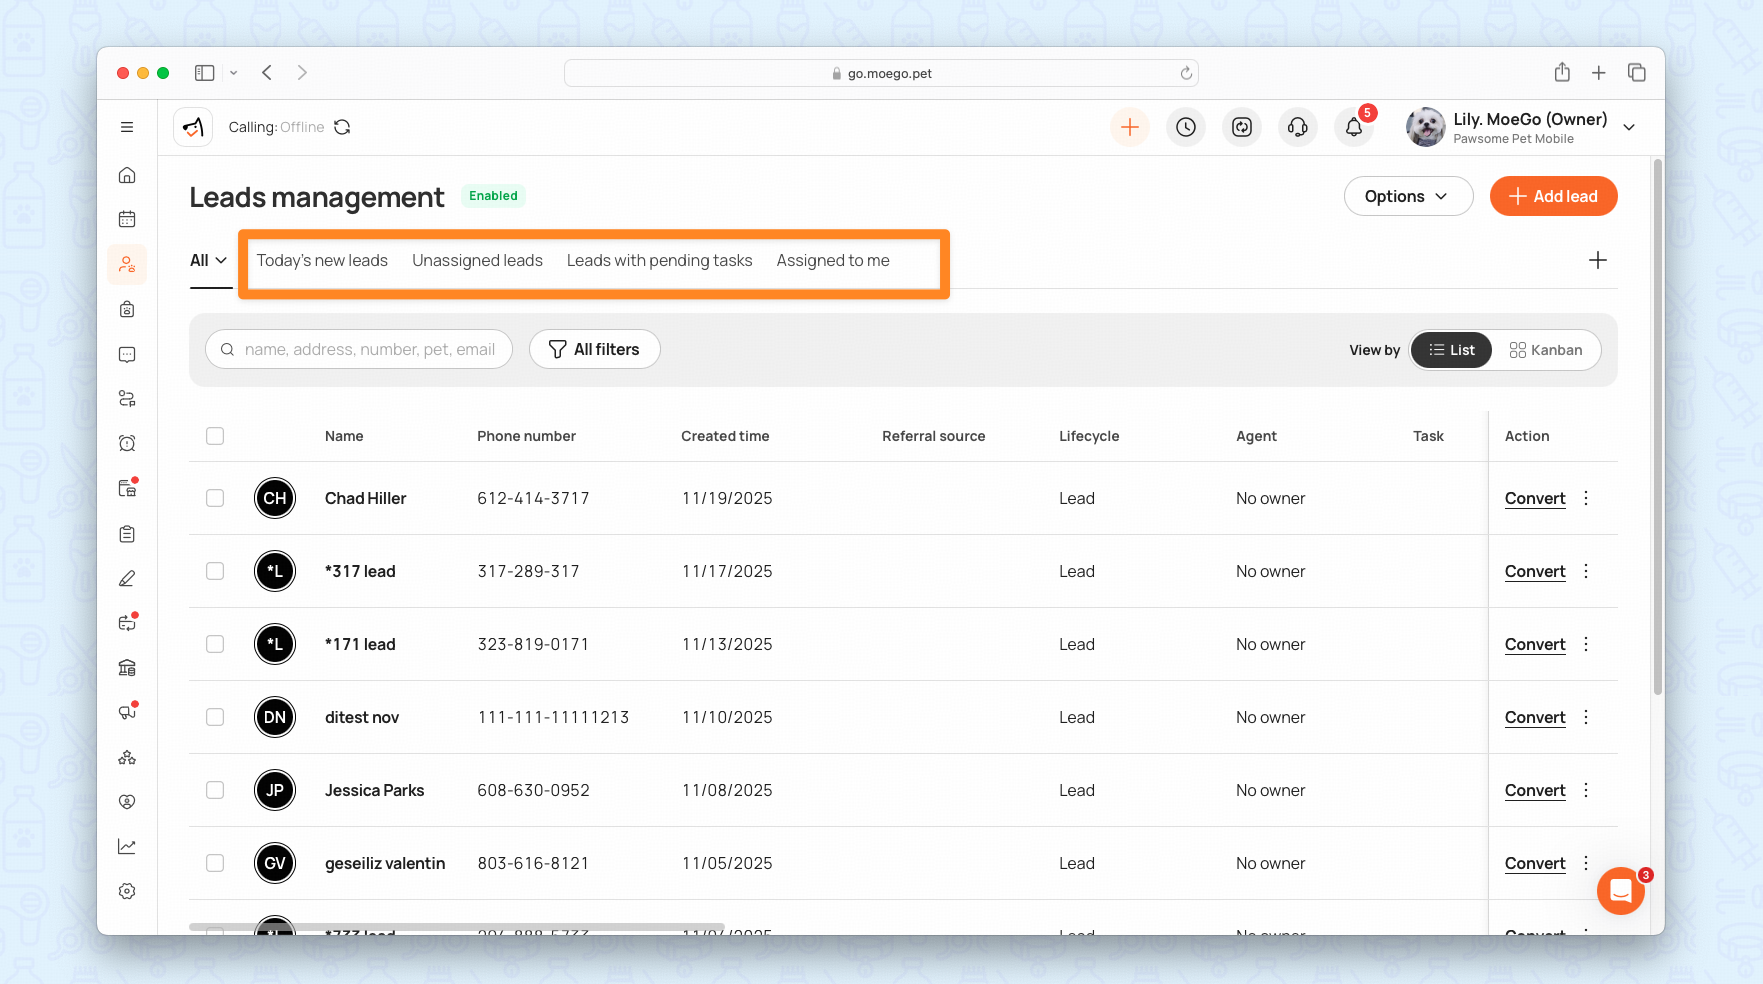
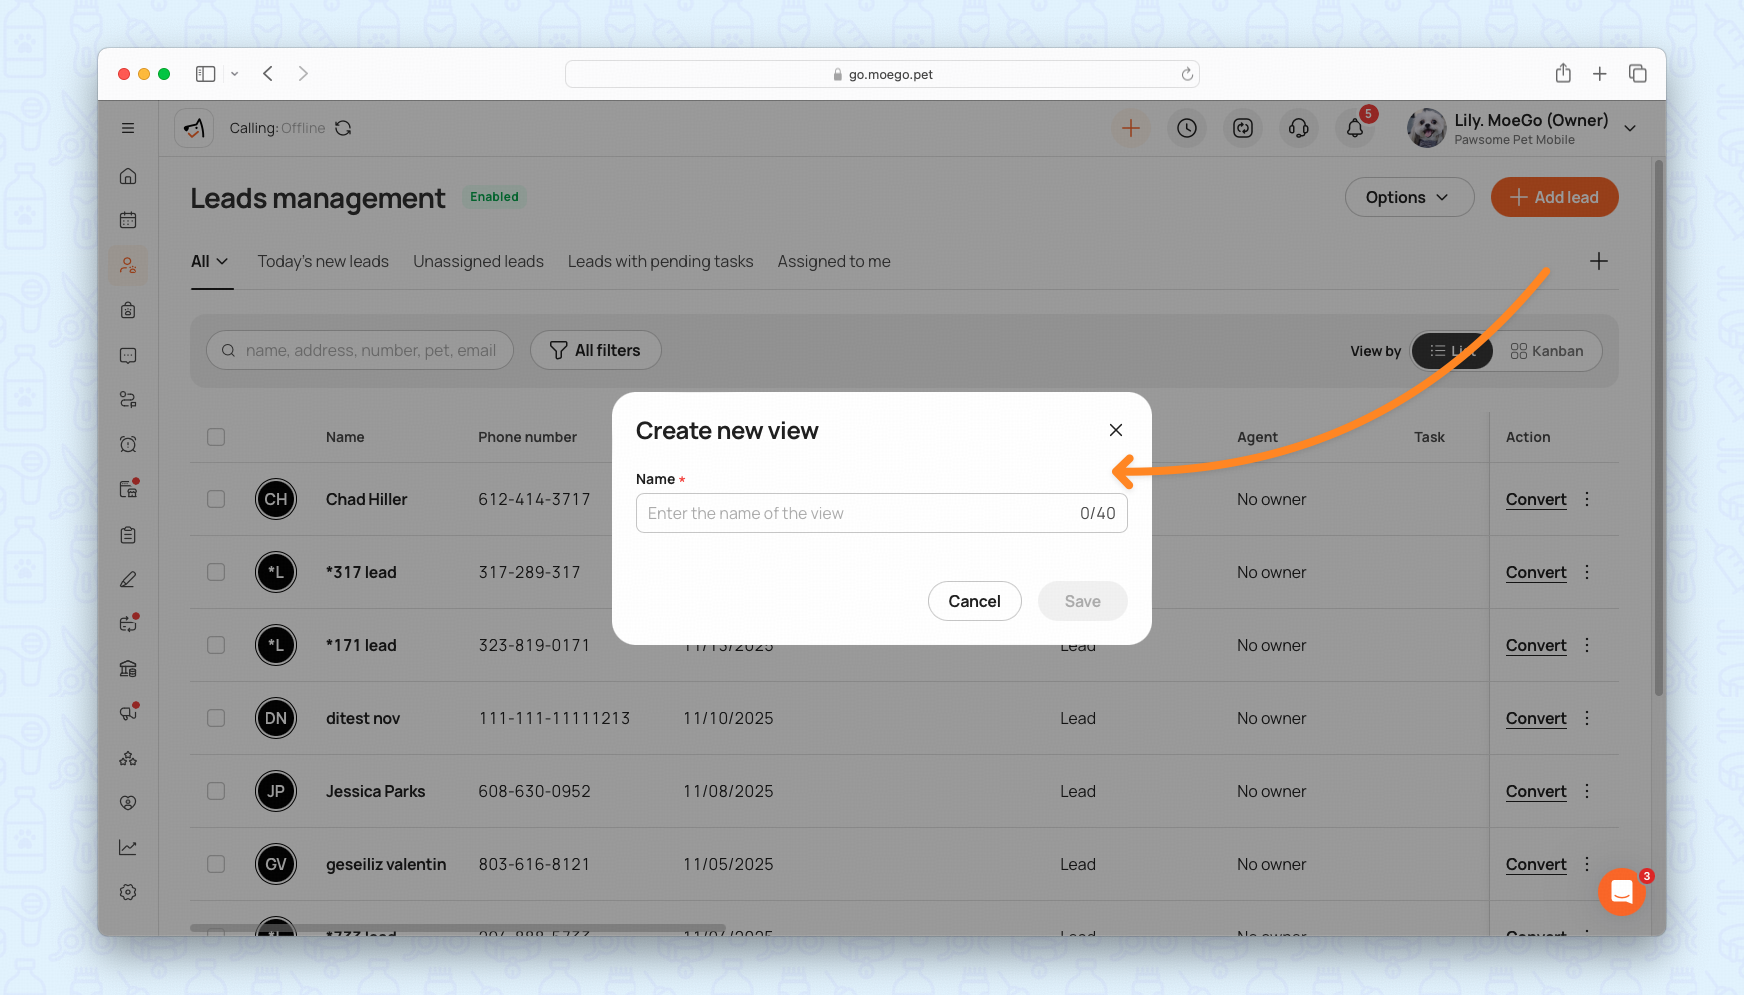
Custom Views
You can also create and save personalized views using your own filter combinations. Click on the + button to create your own views.
Kanban View (Ultimate Plan🌟 )
The Kanban View visually categorizes leads by Action Status for better pipeline management. It improves the flow efficiency by providing a clear visual representation of lead progression.
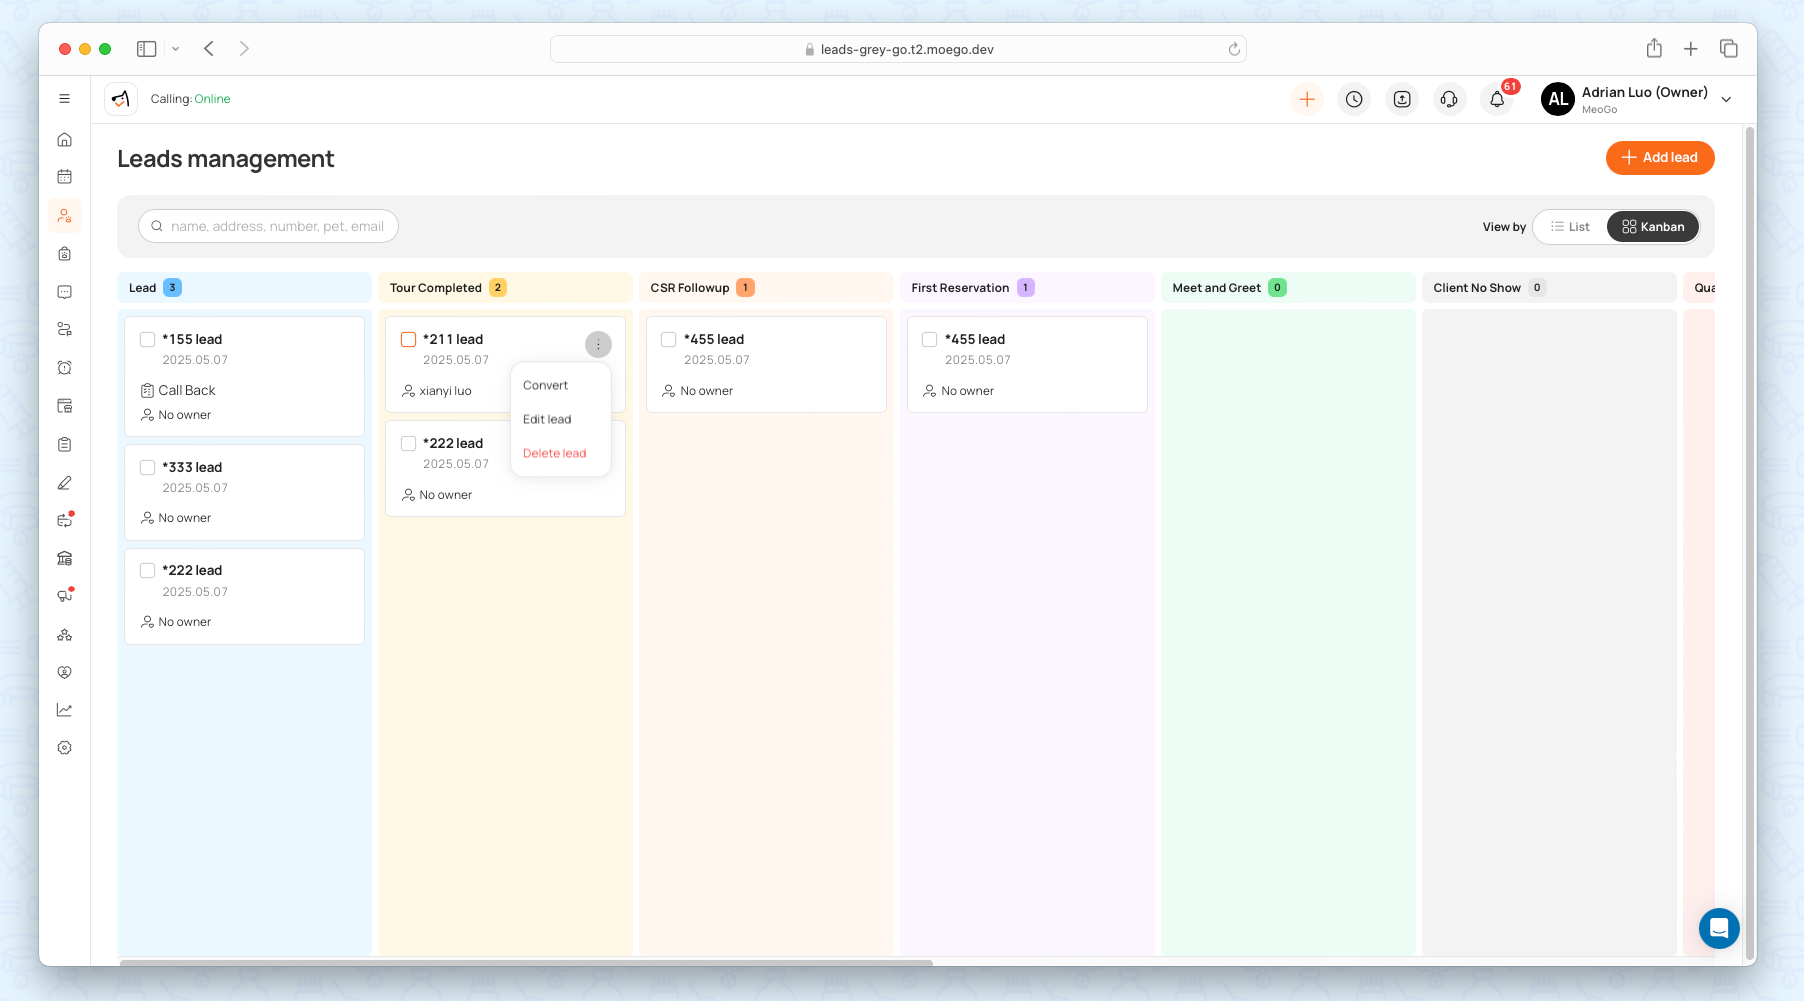
- Go to Leads management to view by Kanban.
- Each column represents a lifecycle stage
- Each card represents a lead.
- Drag a card from one column to another to update its lifecycle stage.
Create & Convert Leads
Leads can be added to MoeGo in several ways, depending on your workflow.
Automatically from supported channels
Automatic creation helps reduce manual work and ensures every inquiry is captured. MoeGo can automatically create a lead when someone contacts you from:
- Abandoned Online Booking: who visited your booking site but failed to submit booking requests
- Intake Forms: new submissions
- Phone calls
- Text messages (SMS)
- Custom channels — You can add and track your own lead sources, such as website widgets, social media links, or promotional campaigns, to understand exactly where each lead came from.
🔍 Note: Behavior may vary depending on your Leads Management settings. If Leads is disabled, some channels may still create client profiles instead.
Manually Add Lead
It ensures all potential customers are captured, even from offline interactions. You or your staff can add a new lead directly.
Go to Customer Center > Leads Management > Add lead.
What you must enter when creating a lead:
- Phone number
- Lifecycle
- Preferred business
- Any other custom fields required
Duplicate number check
This helps prevent accidental duplicate profiles. If a phone number already exists in MoeGo:
- The system will alert you
- You can review existing leads/clients
- You can choose to continue or open the existing profile
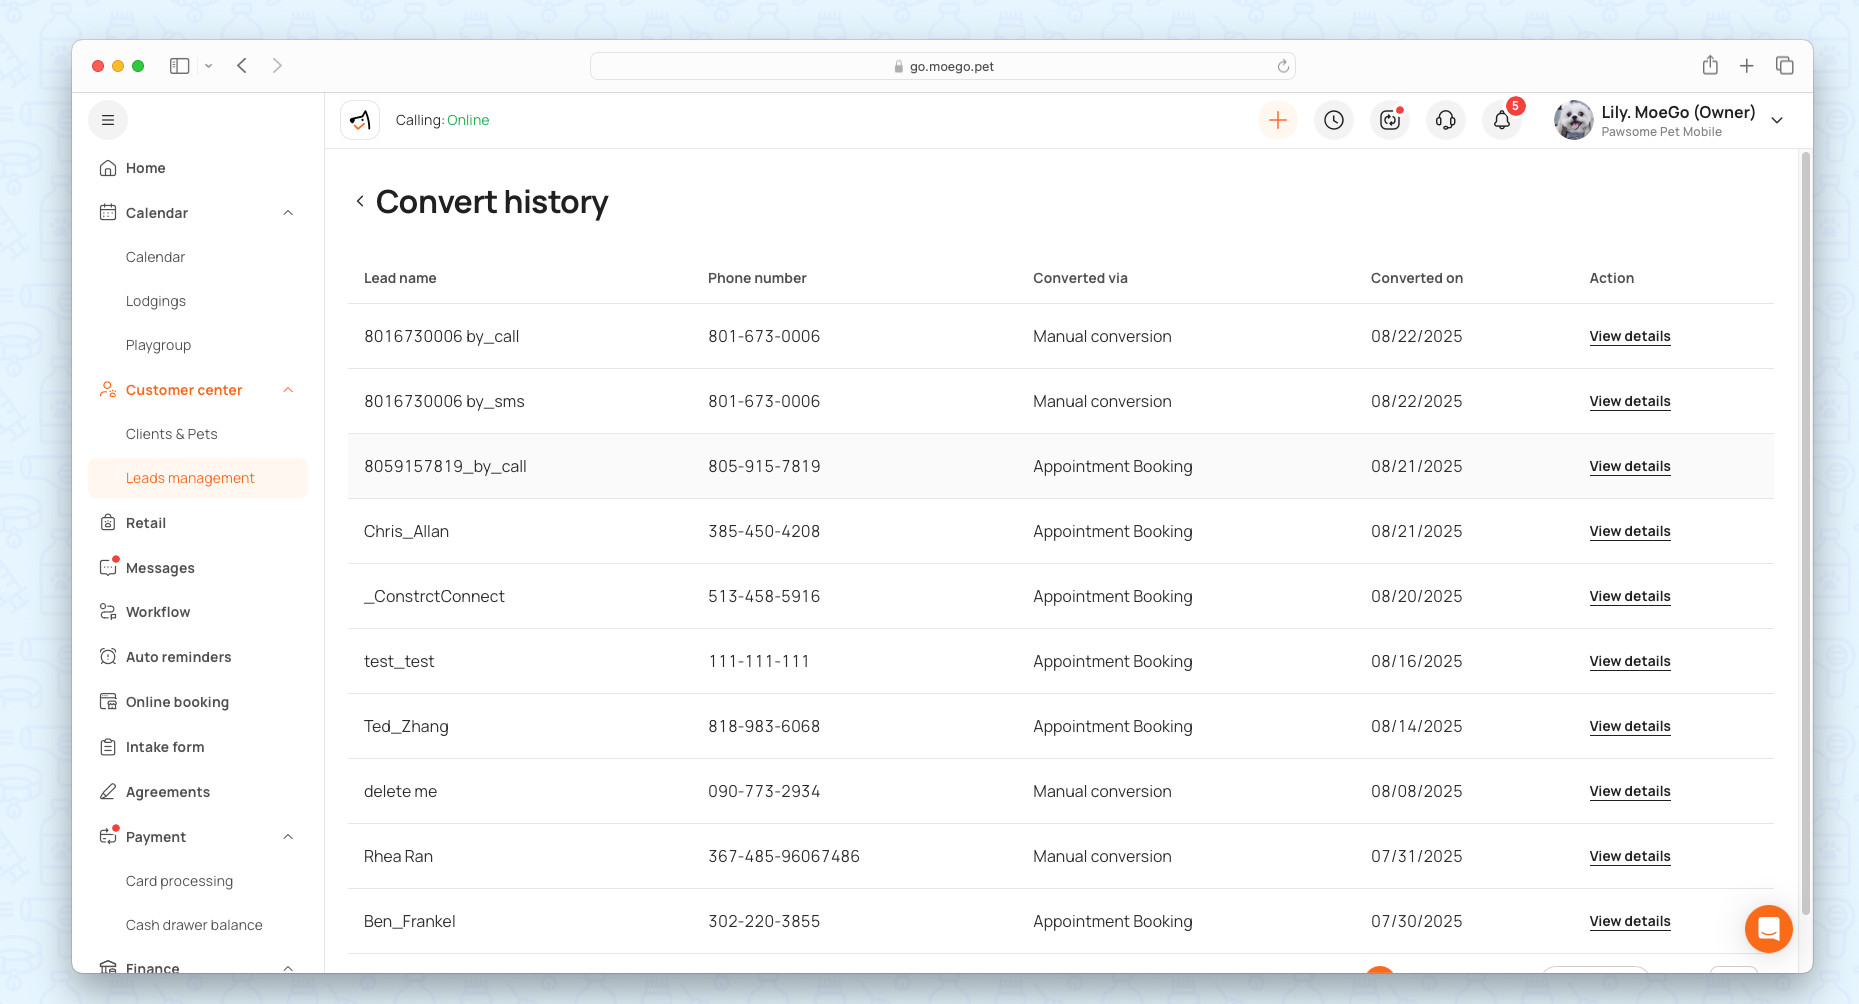
Convert Leads To Clients
A lead becomes a client when they meaningfully engage with your business.
Automatic Conversion:
MoeGo automatically prompts you when a lead should convert. Leads convert when they:
- Book their first appointment
- Purchase a package or membership
- Complete a transaction
Manual Conversion:
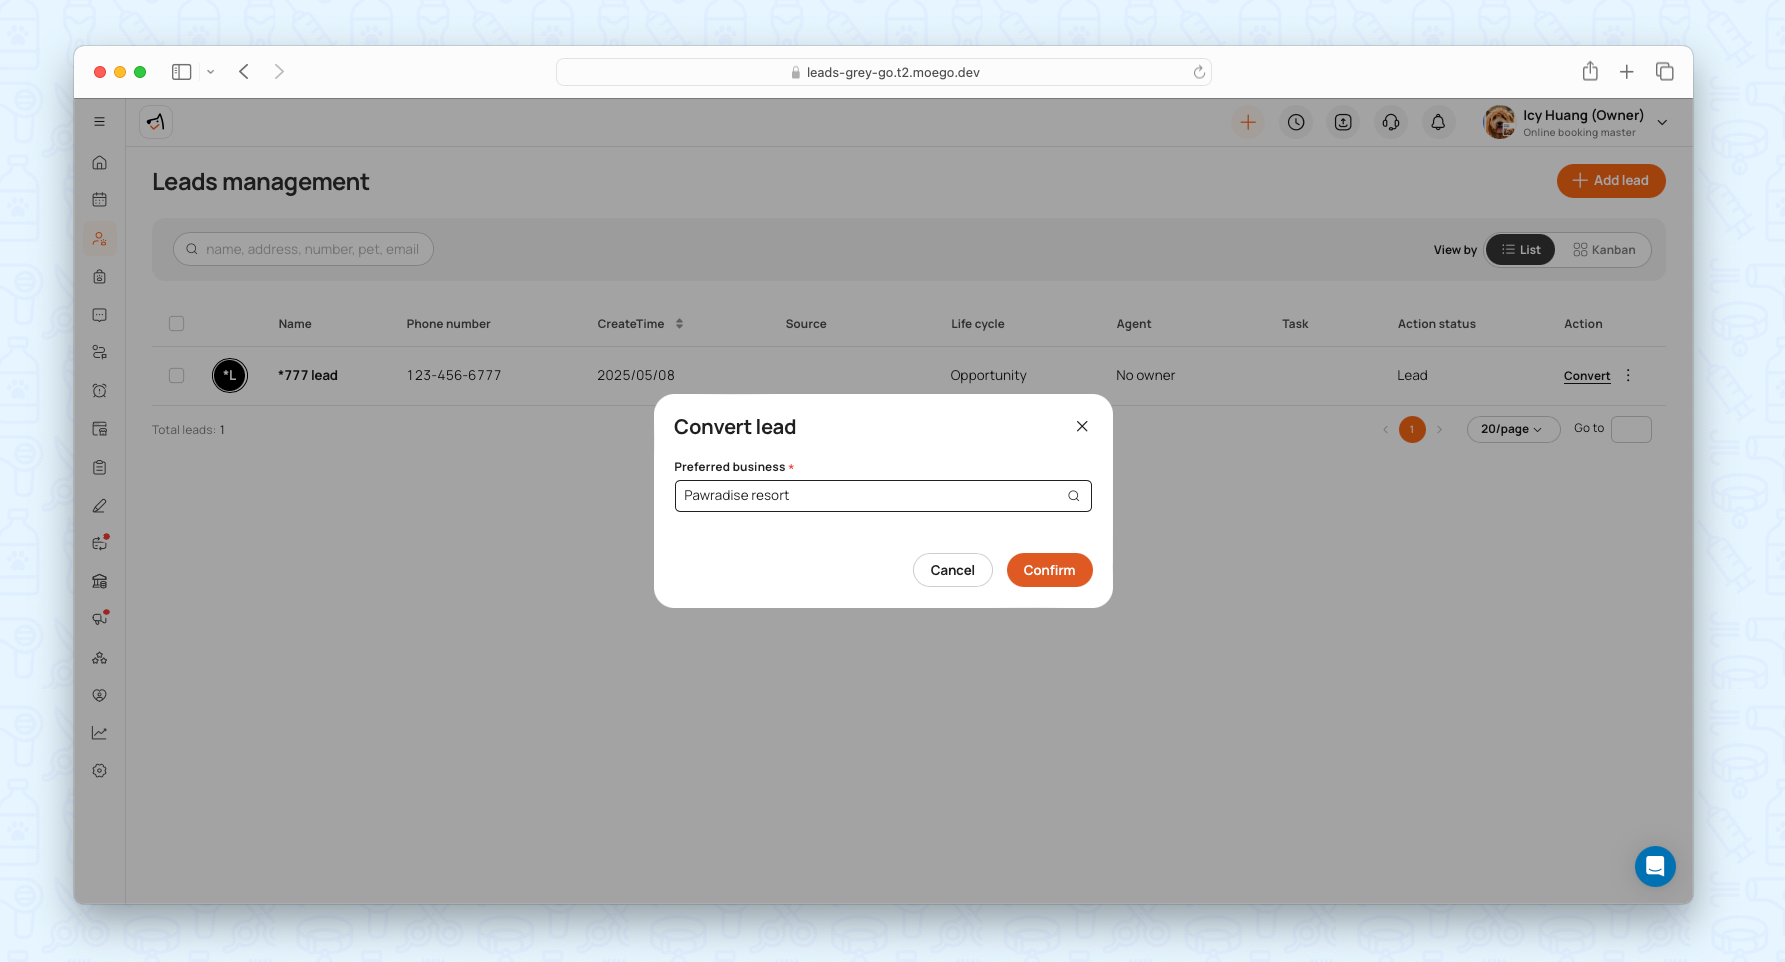
Go to the leads dashboard and turn a lead into a client with one click.
- Click < Convert > and assign a Preferred Business (mandatory field).
- Converted leads move to the Clients & Pets list and are removed from the Leads Dashboard.
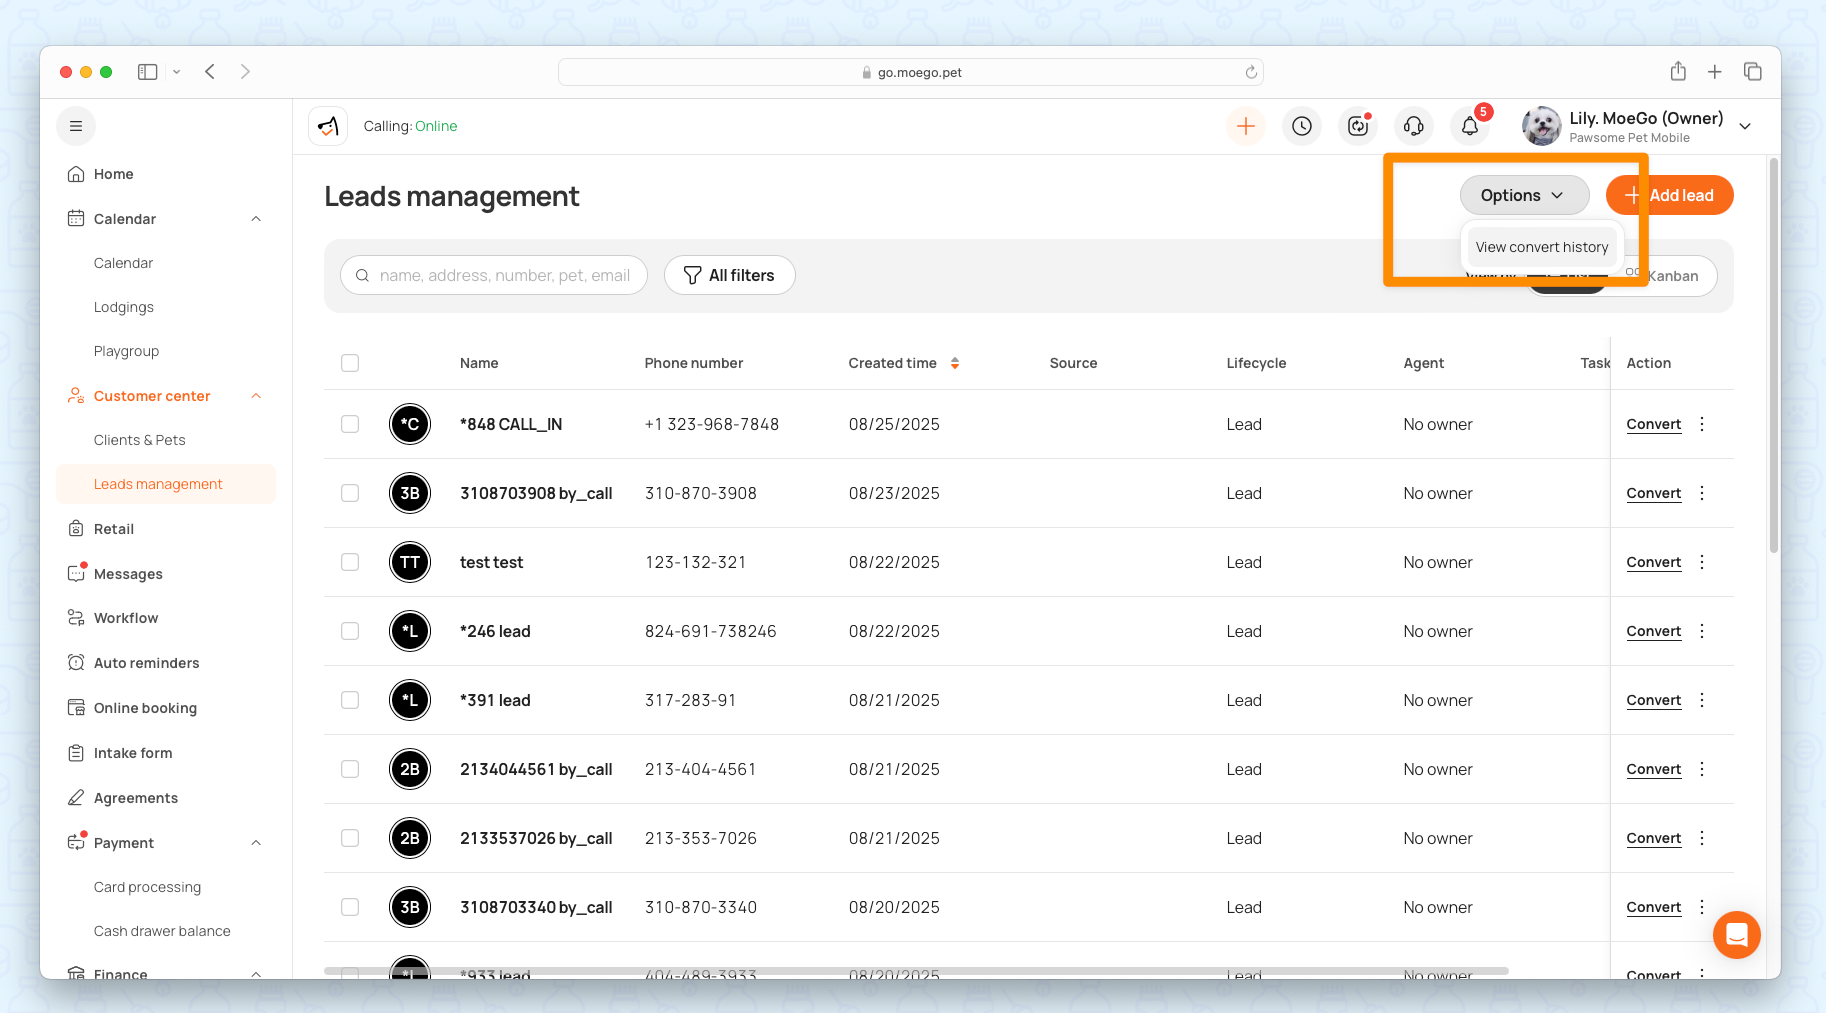
💡 Note: Click on < Options > to review convert history!
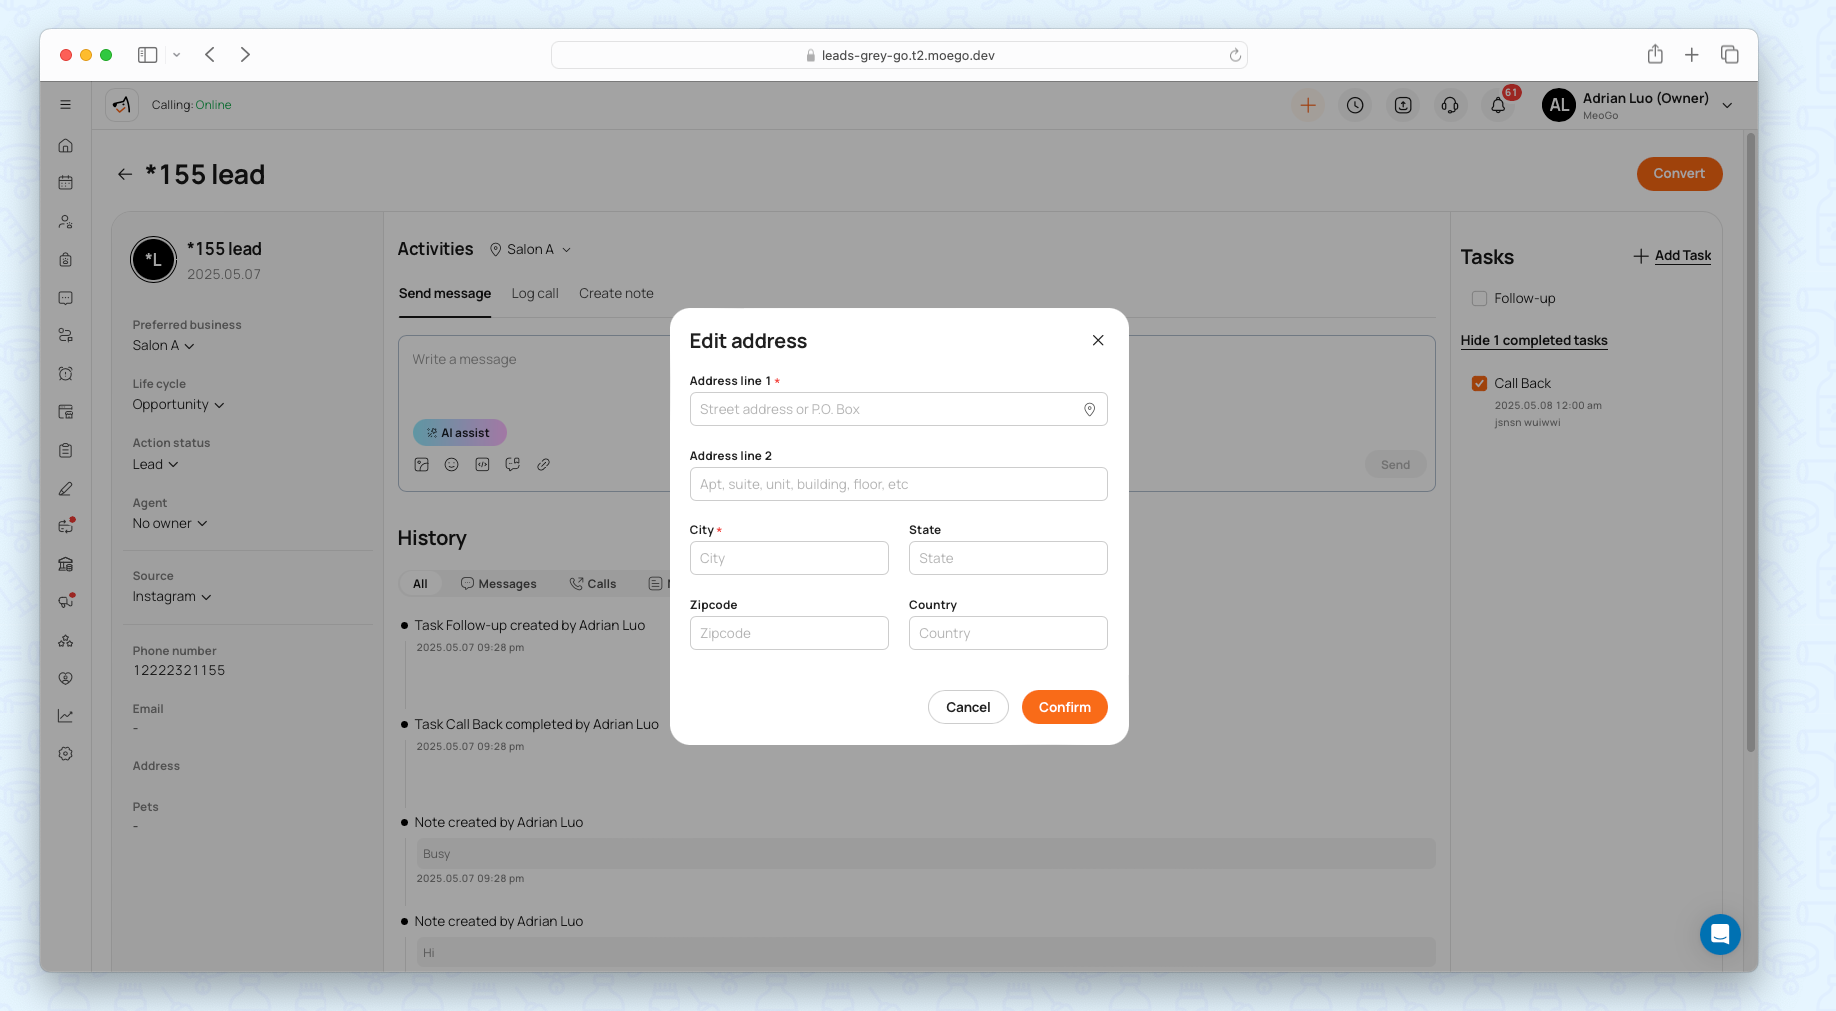
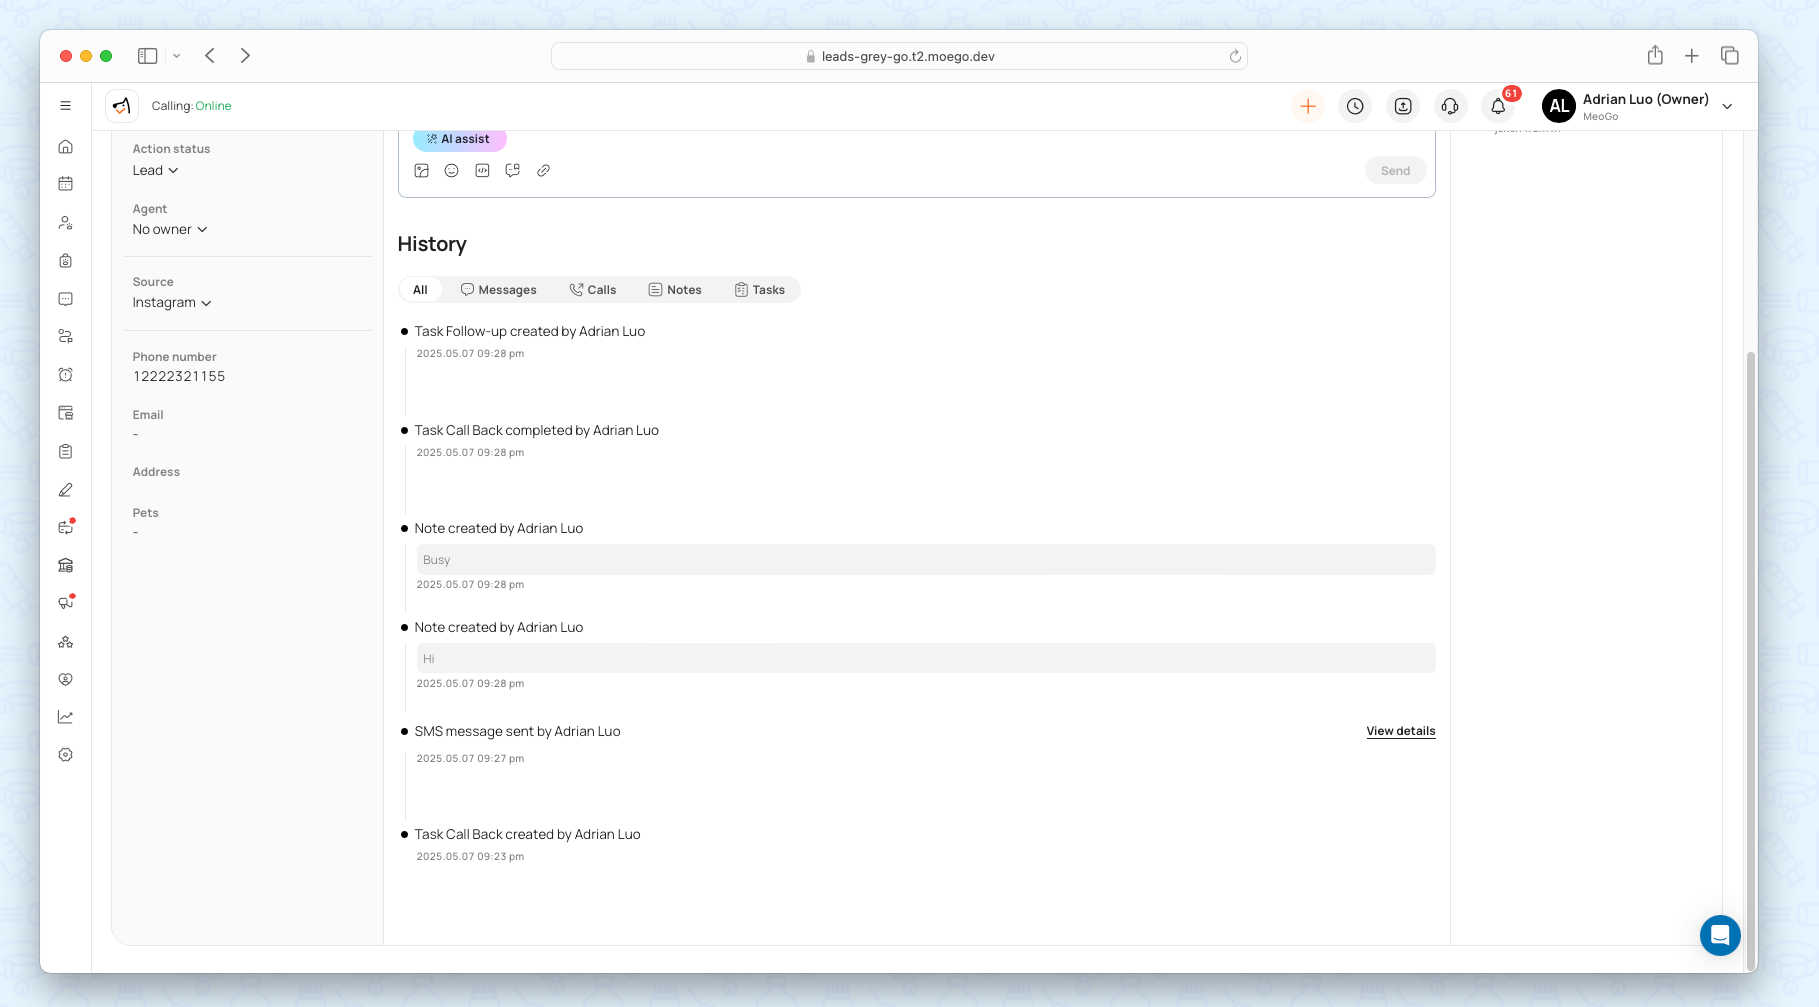
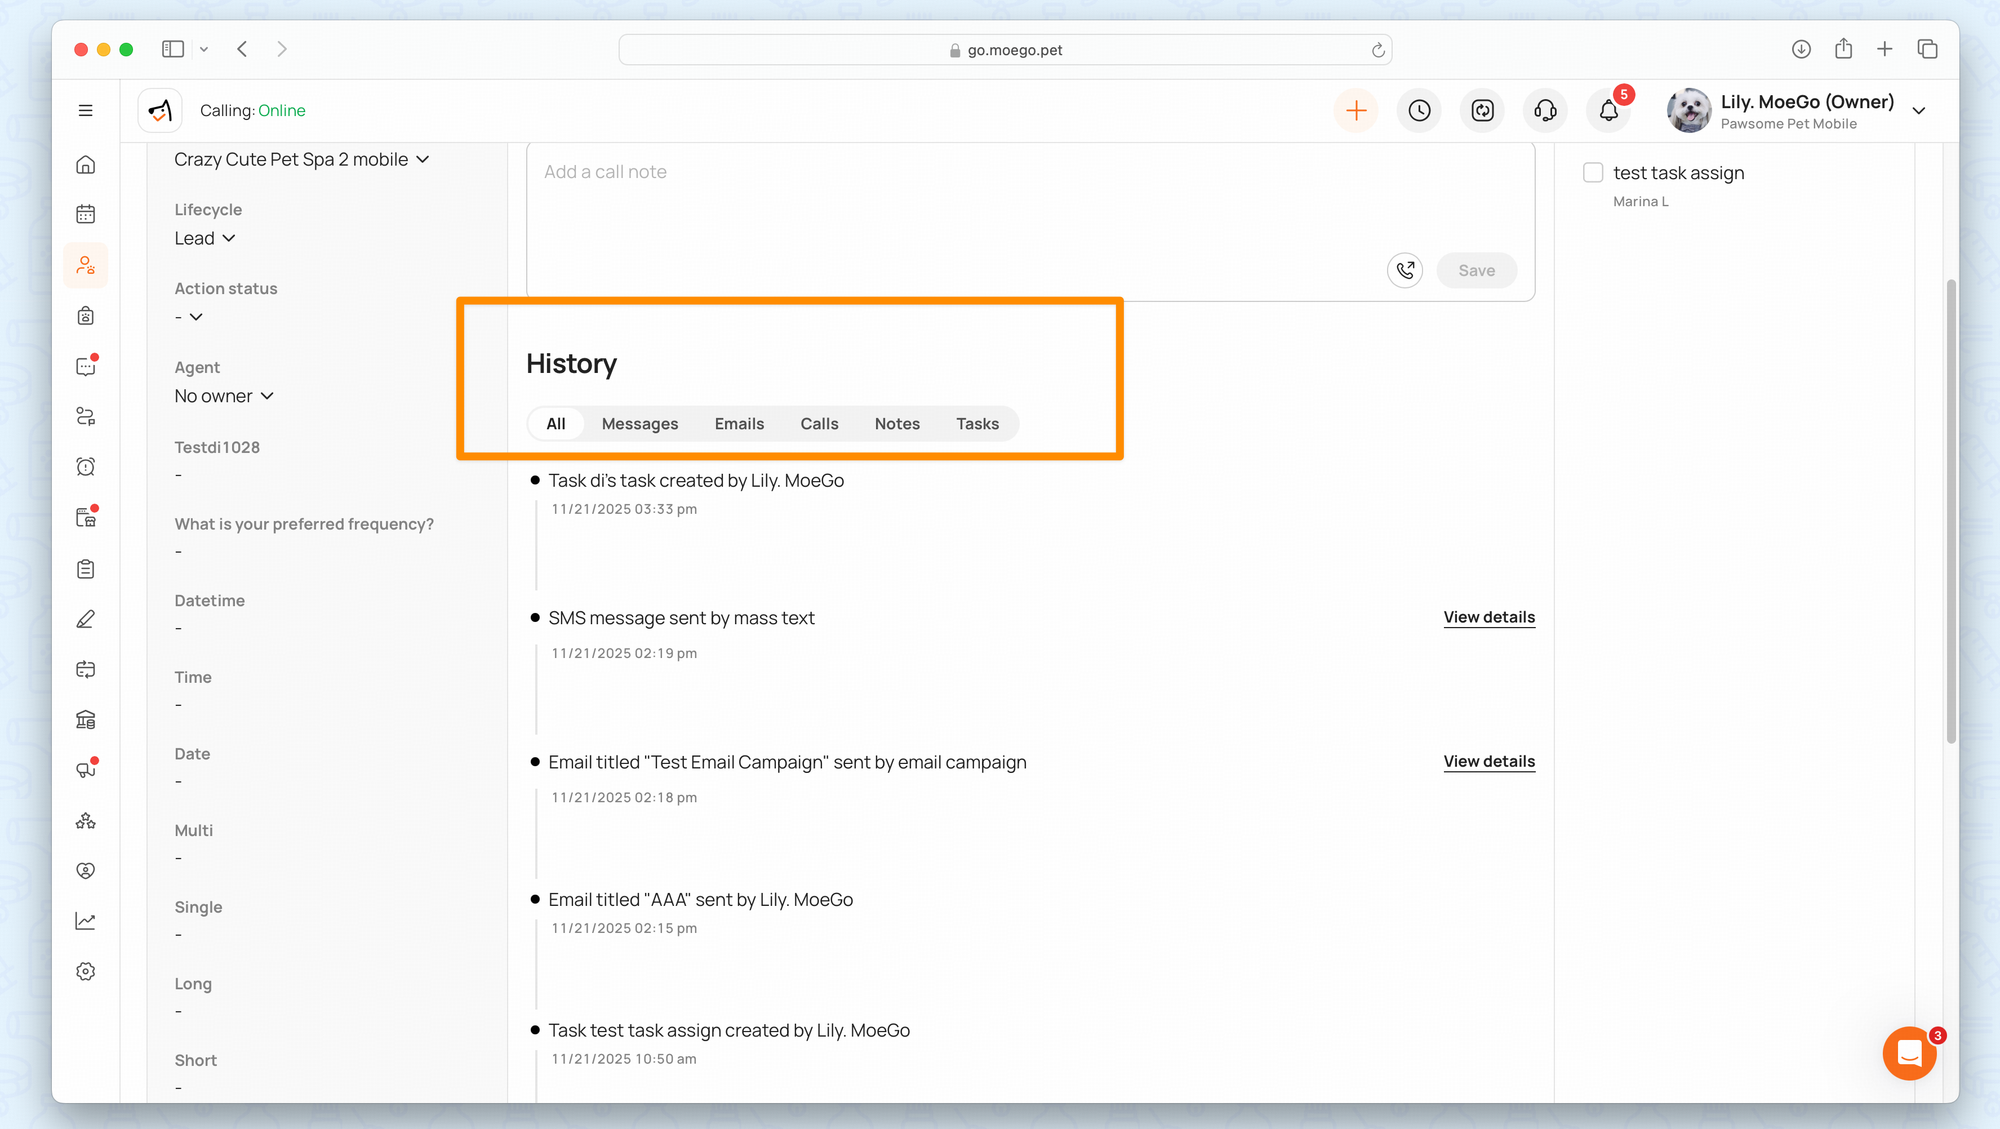
Lead Interaction Panel (Details, Tasks & Interactions)
This is where you can centralize communication history, improving follow-up accuracy and customer service.
Click any lead record to open the Interaction Panel, which tracks all engagements chronologically.
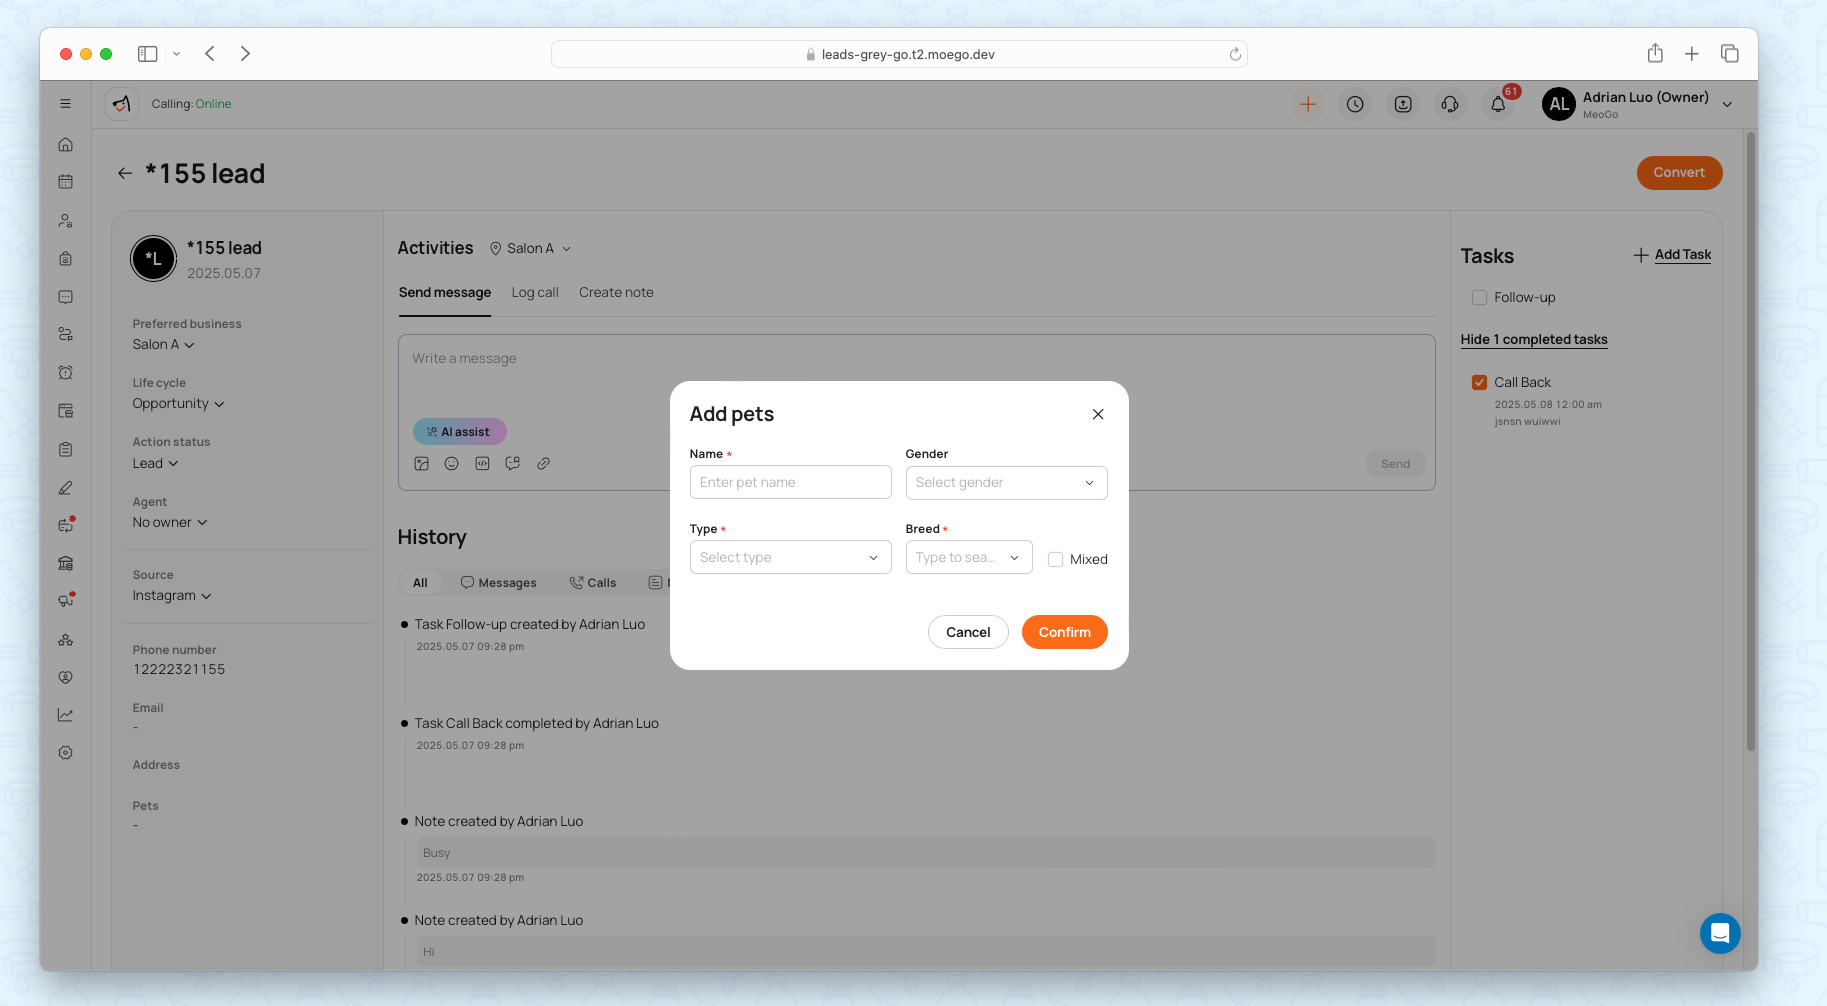
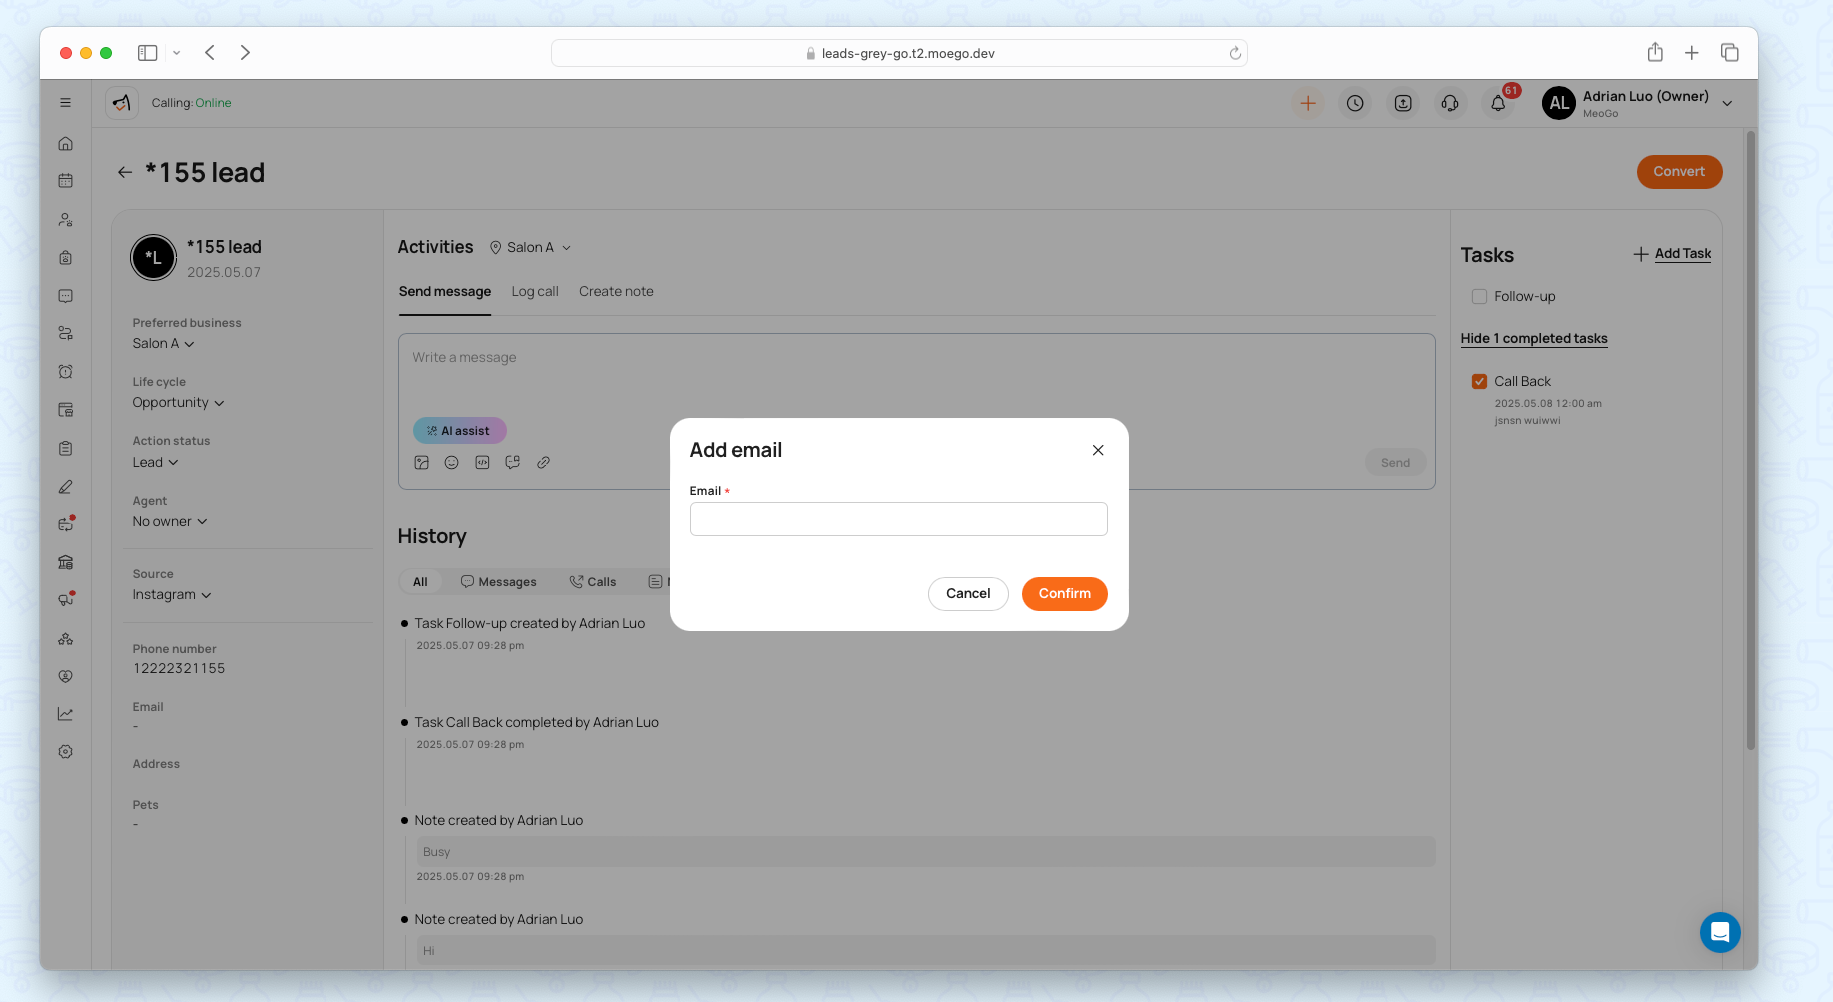
Lead Information
- Log calls, send SMS, create notes, and assign tasks.
- View and update lead details (contact info, pets, lifecycle, status).
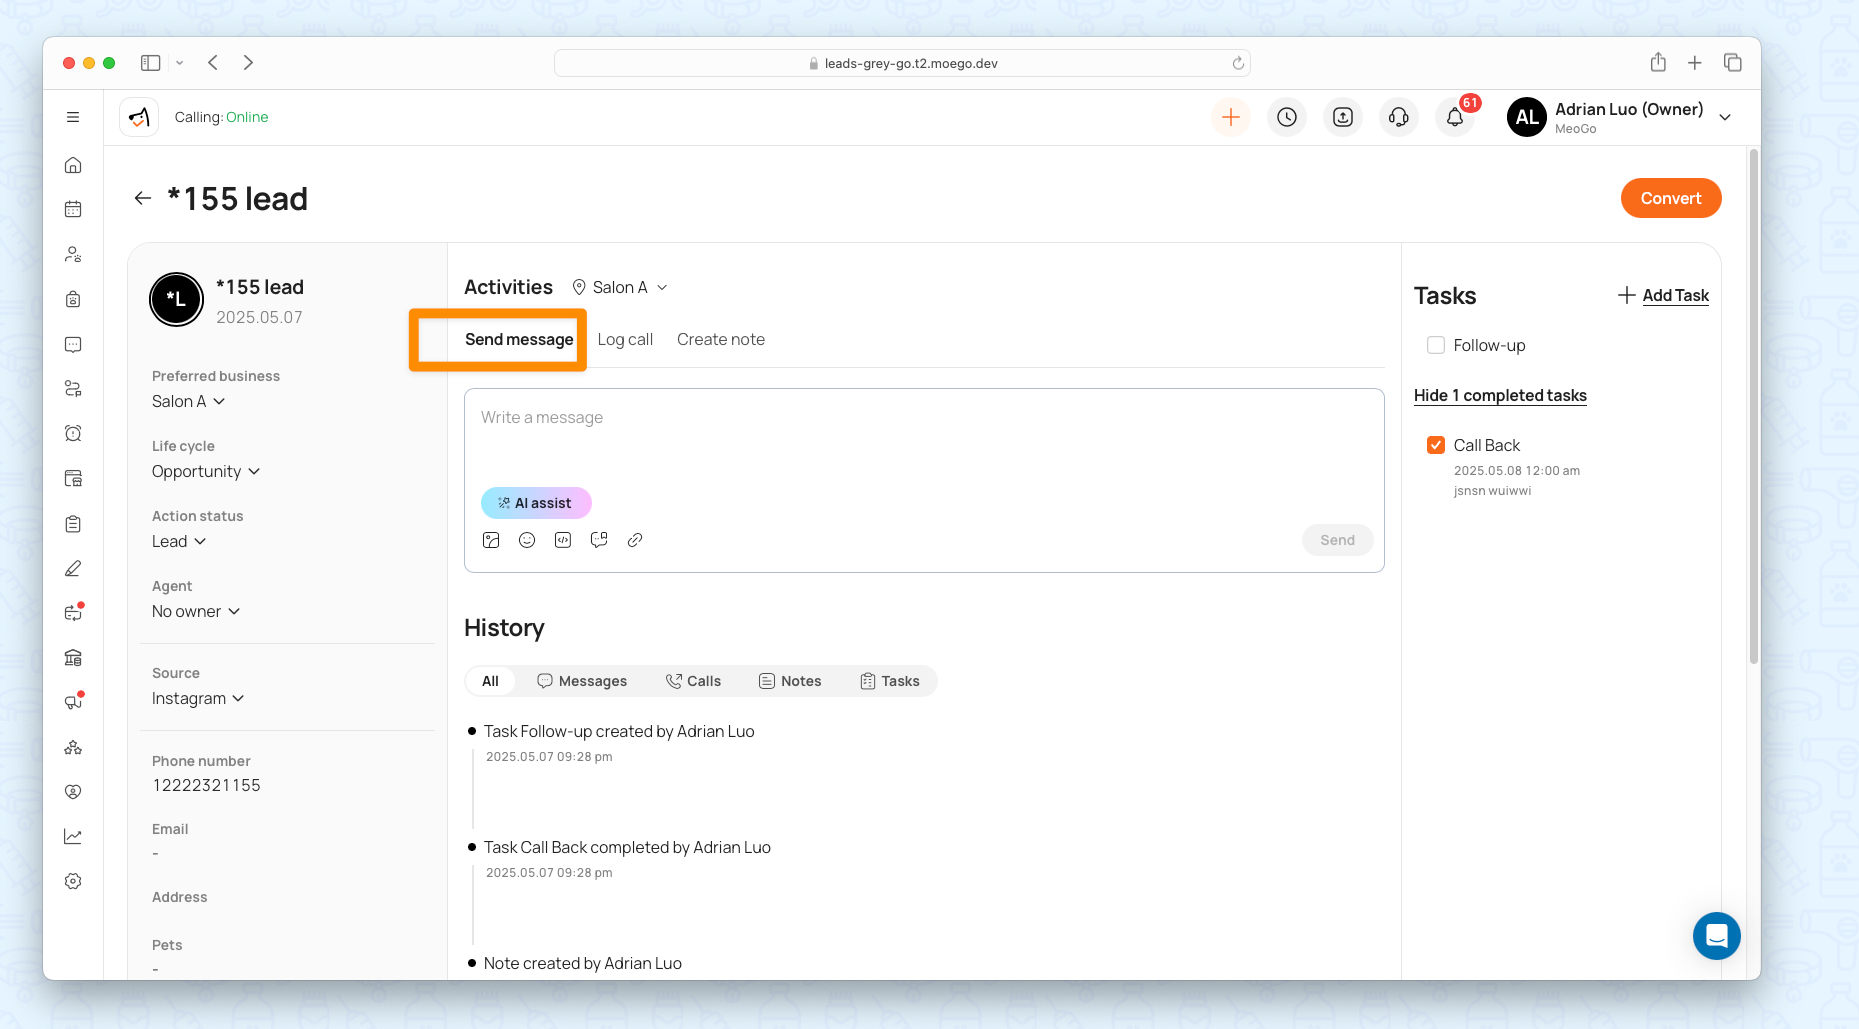
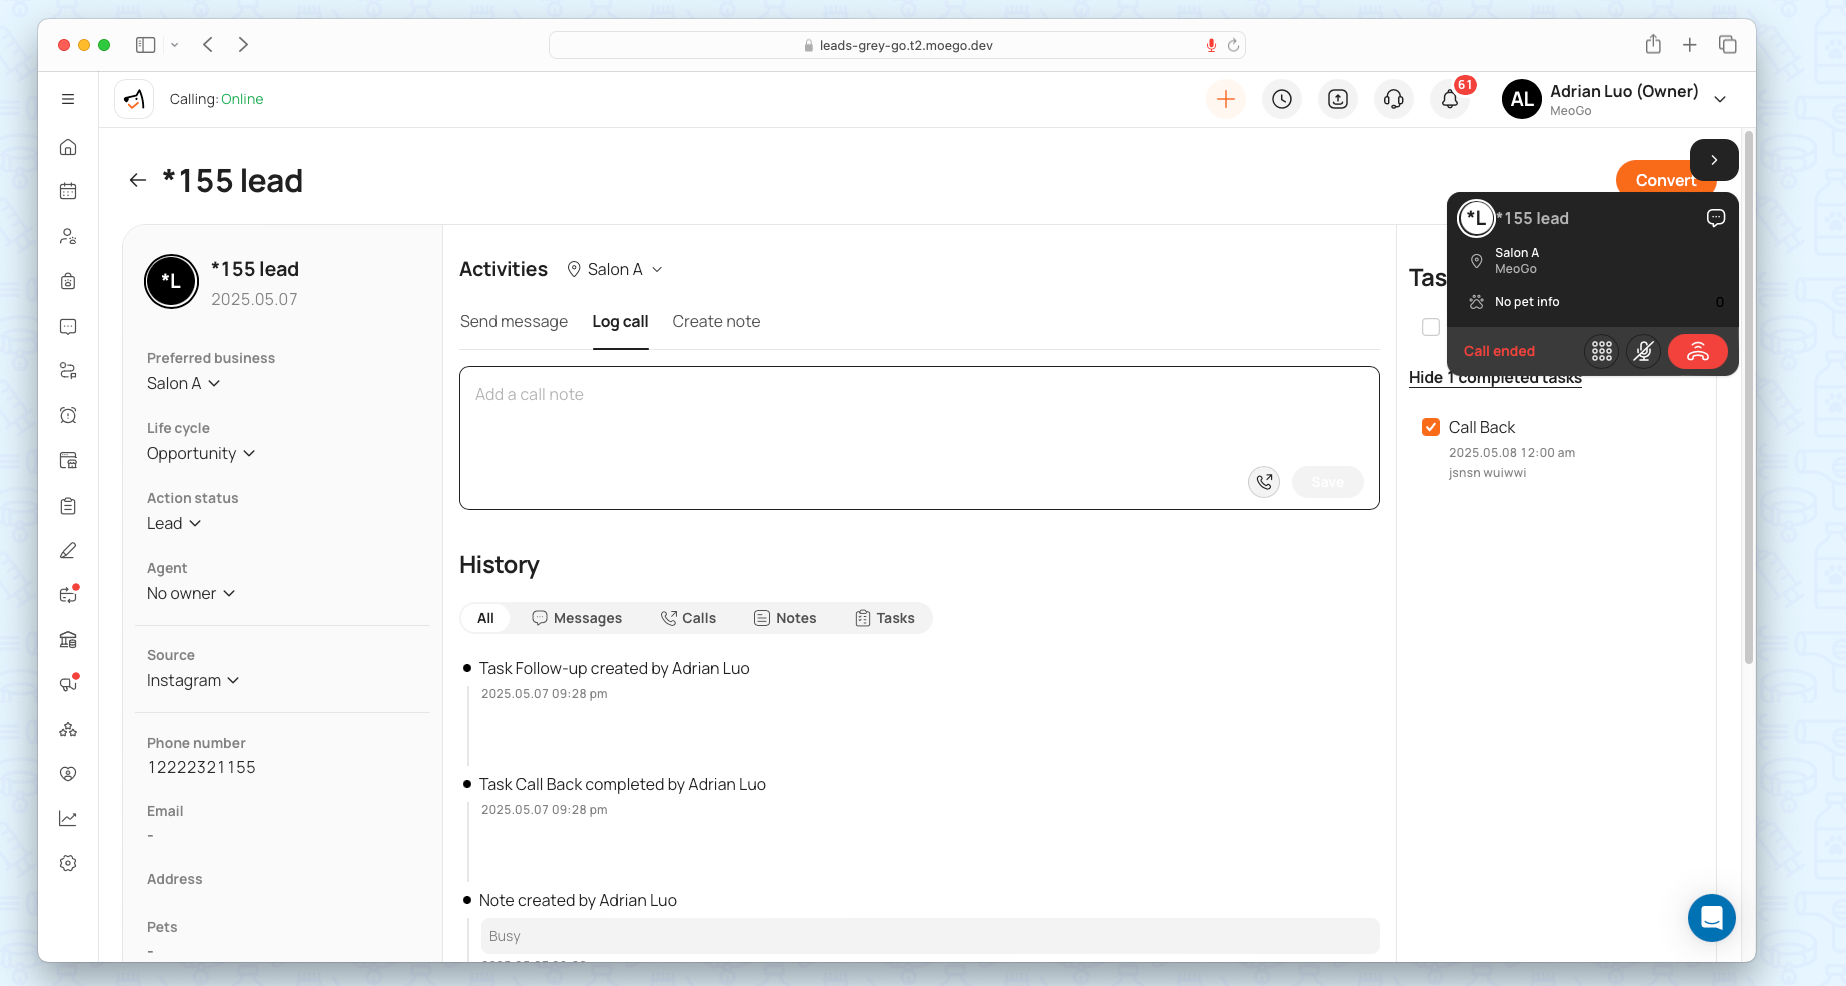
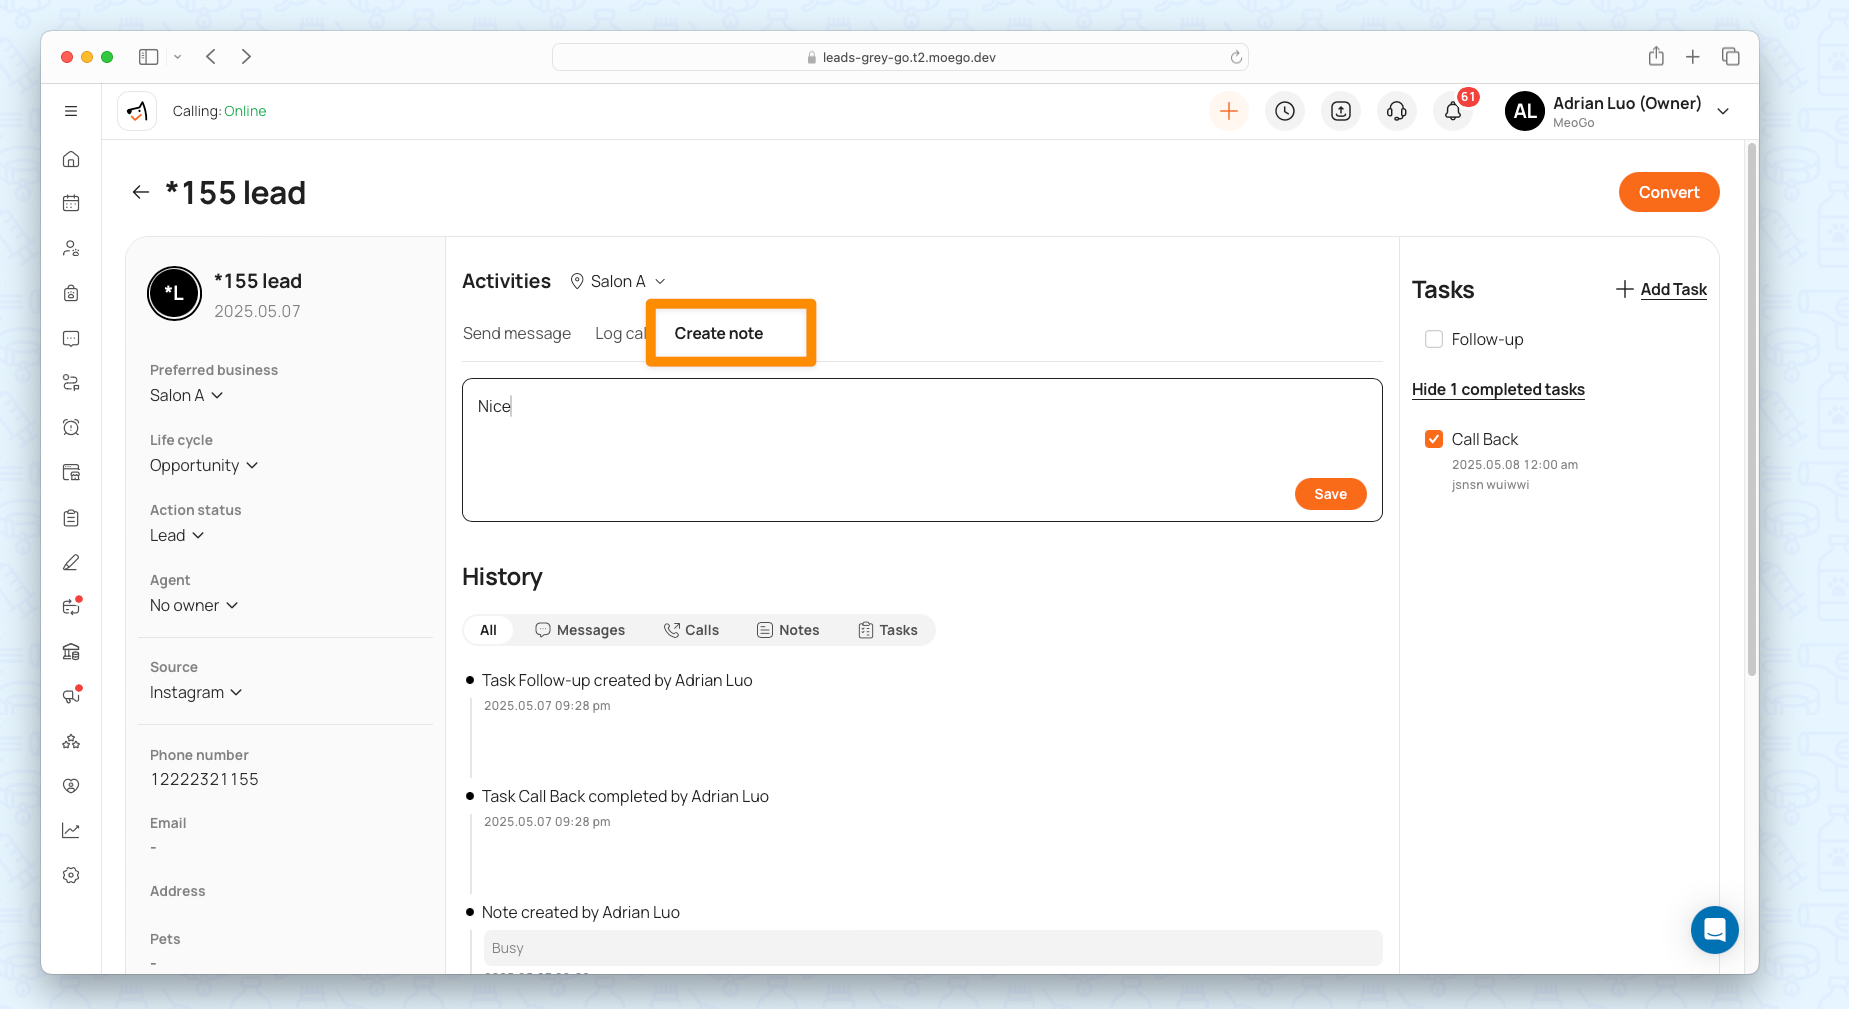
Activities & History
It provides full context on lead engagement, helping staff personalize follow-ups. Switch between tabs to:
- Send individual messages
- Log calls
- Add notes
- Review historical interactions
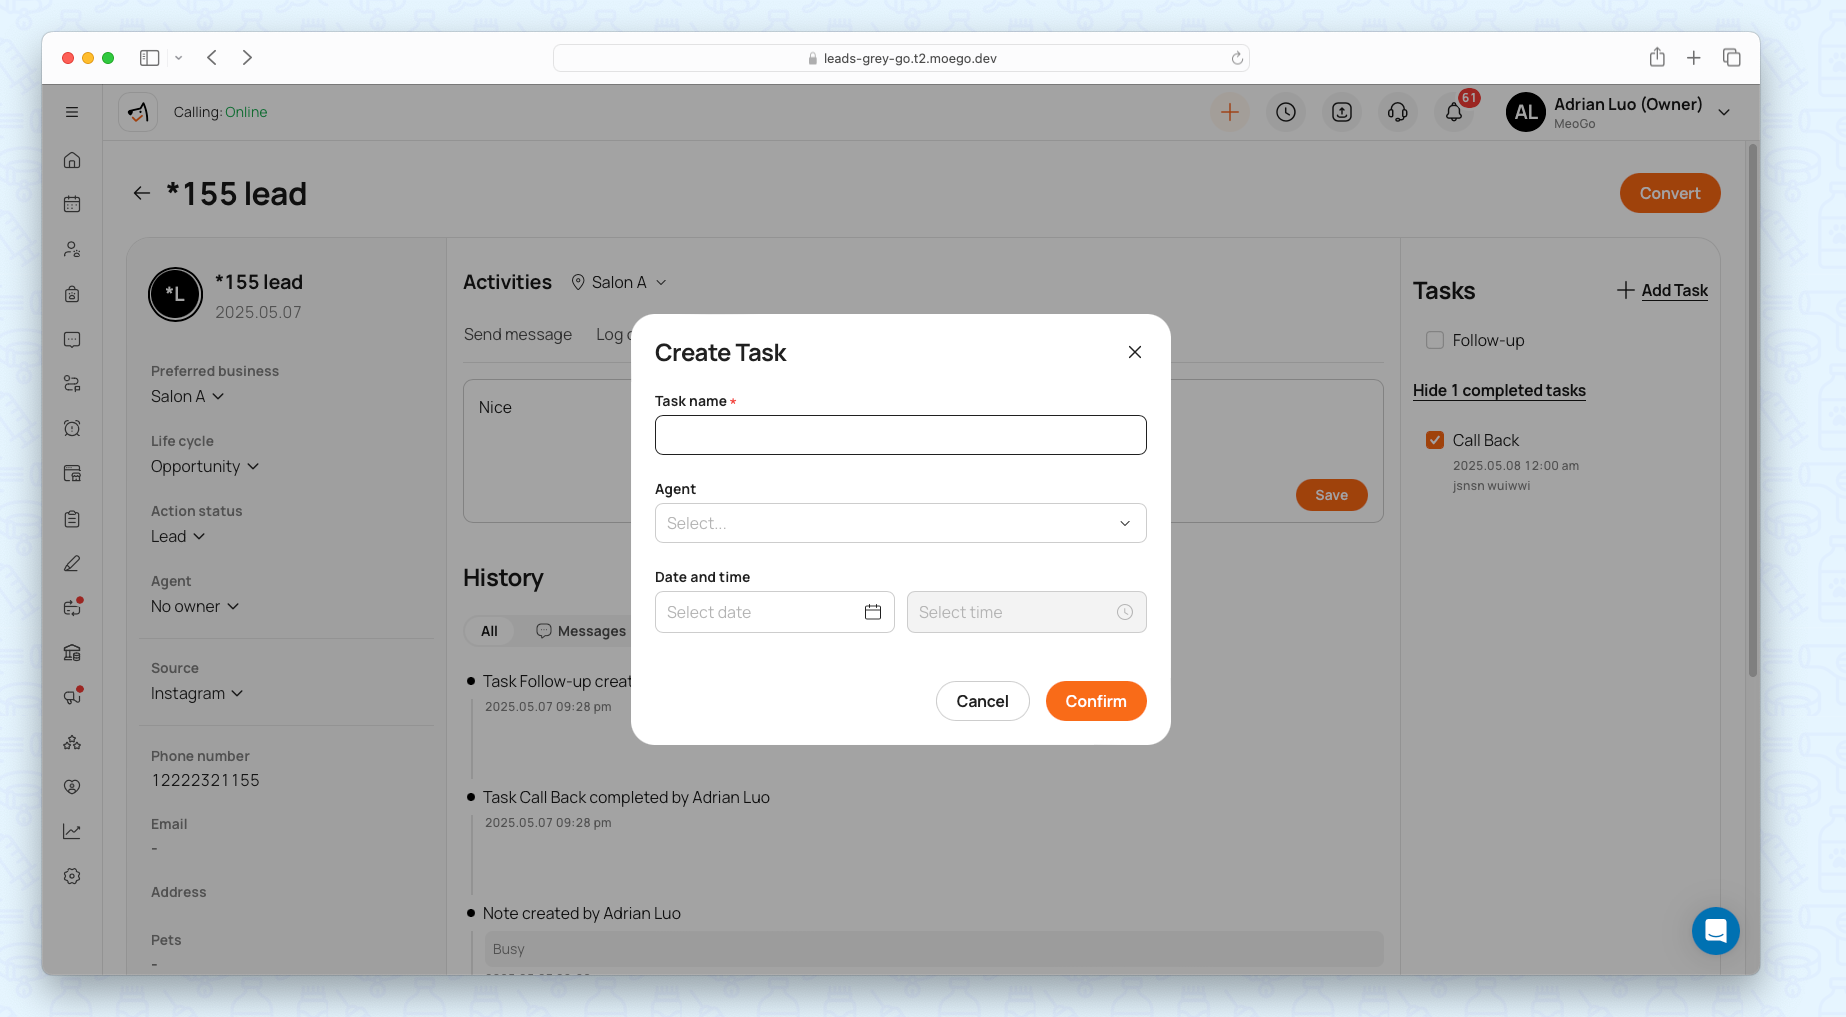
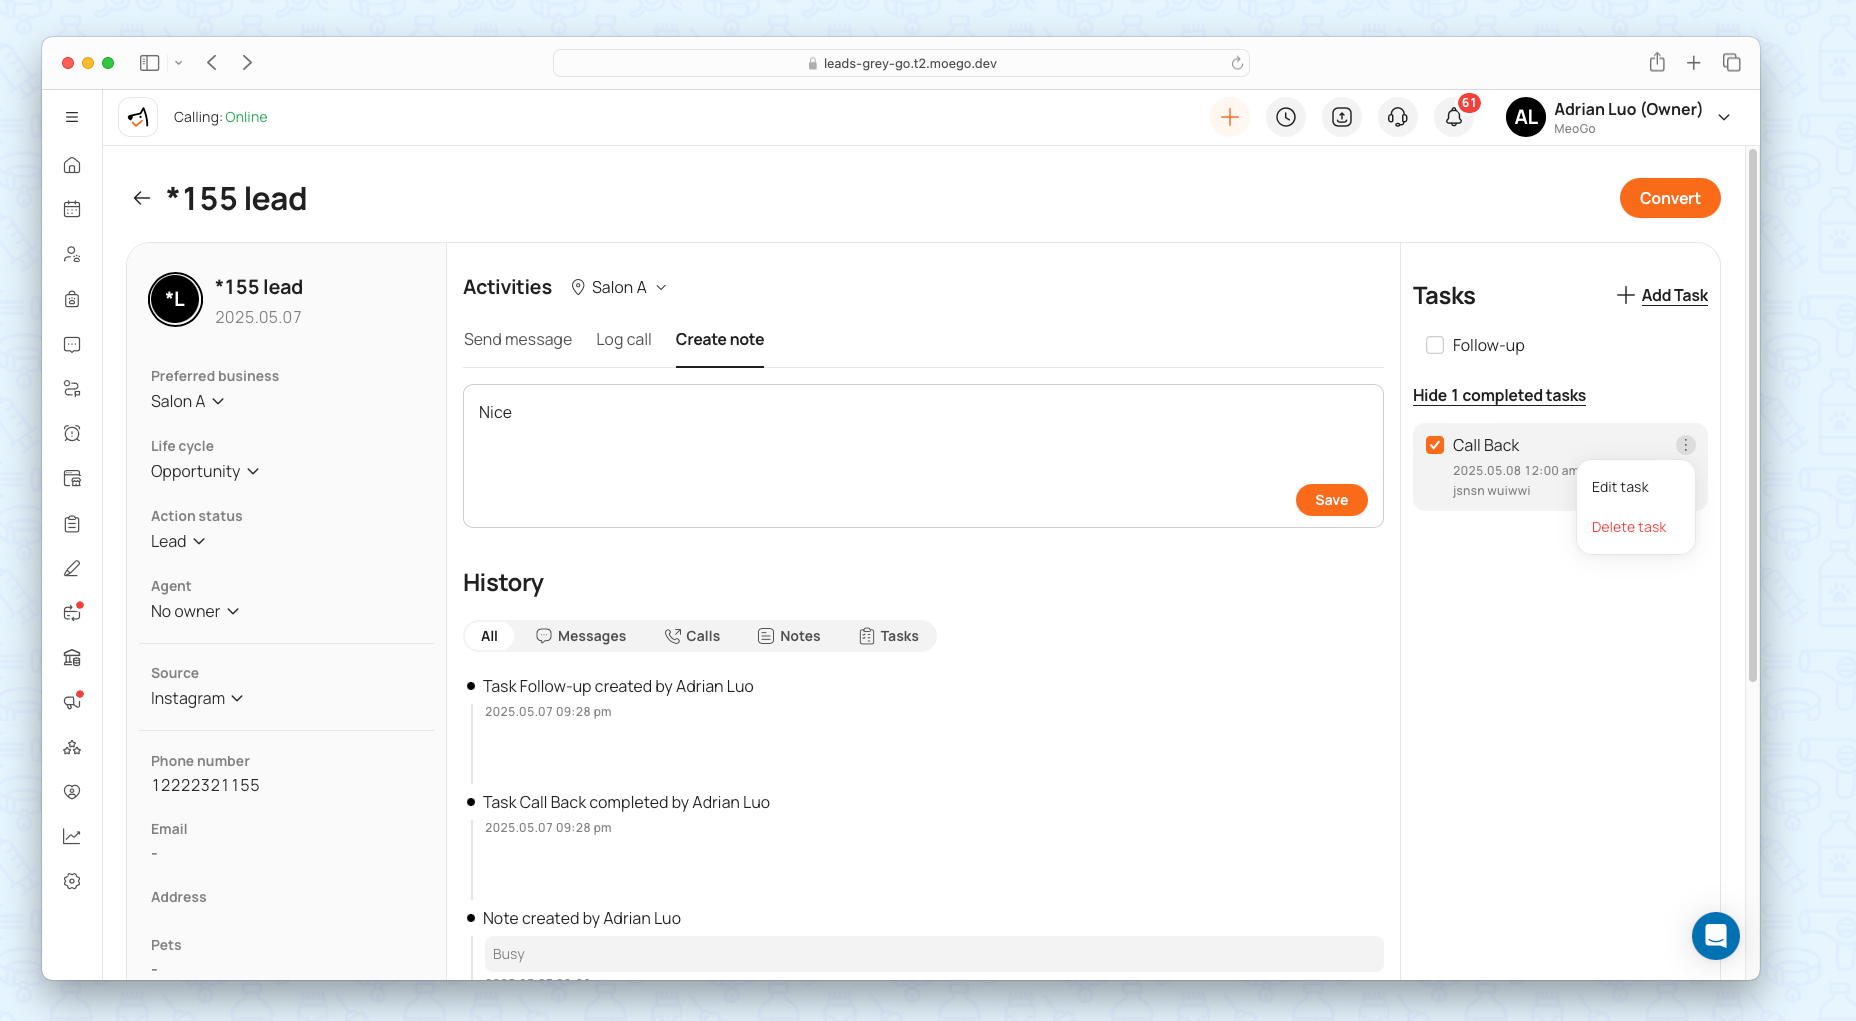
Task Management
It ensures no lead is forgotten, improving team accountability and conversion rates.
- Add Task: Assign tasks (e.g., follow-up call) with due dates and responsible agents.
- Complete Task: Mark tasks as done; completed tasks are logged in history.
Leads Communication
Send mass email/sms to leads
You can also send mass emails or mass messages to leads. Simply checking on leads' names to see the floating button and send!
Send Individual Messages/Emails
You can send an SMS or email directly from any lead’s profile.
Go to Customer Center > Leads management > Leads > Open a lead > Message/ email.
Make Phone Call
You can also make a phone call to the lead and log calling notes.
Go to Customer Center > Leads management > Leads > Open a lead > Log call.
Activity Timeline Logging
Every message (inbound or outbound) appears in the lead’s activity timeline.
Google Ads Integration & Reporting (Ultimate Plan🌟 )
With this integration, you can:
- Connect your Google Ads account to MoeGo in just a few clicks.
- Track ad performance metrics—such as impressions, clicks, leads, and conversions—directly in your Leads Dashboard.
- Attribute bookings and revenue back to ads using Google’s Click Identifier (GCLID). This means you can finally measure which ads drive real appointments and sales.
During the alpha phase, access is limited to selected users with specific use cases. If you’d like to learn more or request participation, please reach out to your Account Manager.
Frequently Asked Questions
Q: Can I import existing leads?
A: No. Currently, manual entry is required. Bulk import is a planned feature.
Q: What number is used for SMS/calls to leads?
A: Your MoeGo business number (same as regular messaging).
Q: Where are SMS records stored?
A: Both in Lead History and Message Center. Click < View Detail > to jump to the Message Center.